Hedgehog Fidget Clicker


Print Profile(2)


Description
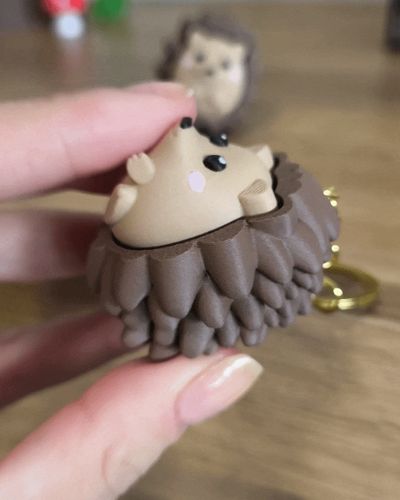
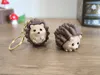
A cute hedgehog clicker to fidget with or carry as a keychain! This brings a cozy autumn vibe, perfect for enjoying the season while playing with your little spiky friend.🍂🦔
Boost Me (for free)
If you enjoyed this model, a Boost is always appreciated 💕 It really supports my work and helps me continue creating!
This model includes two versions of the spikes - pick your favorite style:
With hole: great for attaching to a keychain 🔑
Without hole: the standard clicker version ✨
Only the face/body part is designed for multicolor printing (AMS required), the spikes are printed in a single color.
Supports are needed for the spikes. I’ve set them up in the included file, for me they’re easy to remove after printing, but feel free to adjust them if you prefer a different style of supports.
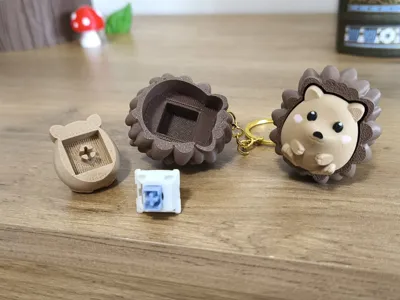
Model Parts:
Body: the part you press down.
Spikes: the outer shell with the textured spikes.
(Available in two versions: with hole for keychain and without hole).
-
Updated – March 15, 2026
Based on some helpful feedback, I updated the model with a stronger cross shaped connector on the head/body part, making the part that attaches to the Cherry MX style switch more durable during printing and assembly.
-
Assembly:
Print both parts – the body and your chosen spikes version.
Insert a cherry style keycap switch (cross stem) onto the cross shaped peg inside the body first.
Once the switch is securely attached to the body, press it into the square slot inside the spikes piece.
Optionally, add a small drop of glue to the peg and inside the base for a tighter fit (just avoid using too much to prevent glue overflow).
You will need a Cherry MX–style mechanical keyboard switch.
I used a square edged switch like in the photo, but I also tested with a smooth edged one and it worked fine. Make sure to check your switch model before printing and assembling!
⌨️ ✨ For those who aren’t sure which switch to get:
I use a Cherry MX–style mechanical keyboard switch. It has a small cross-shaped stem on top where my models attach. You can find these switches in mechanical keyboard stores, electronics shops, or DIY keyboard sites. I can’t include a link here, but I’ve added a photo for reference.

Enjoy your cute little clicker! 💖🍂🦔
🌸 License Notice!!
Any commercial use including selling physical products, giveaways, freebies, subscriber rewards, or promotional use requires a Commercial License. A Commercial License is available here: https://bluveriestudio.gumroad.com/
-------------------------------------
Check out my new models! ⭐


License
You shall not share, sub-license, sell, rent, host, transfer, or distribute in any way the digital or 3D printed versions of this object, nor any other derivative work of this object in its digital or physical format (including - but not limited to - remixes of this object, and hosting on other digital platforms). The objects may not be used without permission in any way whatsoever in which you charge money, or collect fees.
Comment & Rating (461)