Fanttik T1 Max Adapter For Stealth Press 1S


Print Profile(1)

Description
Welcome!
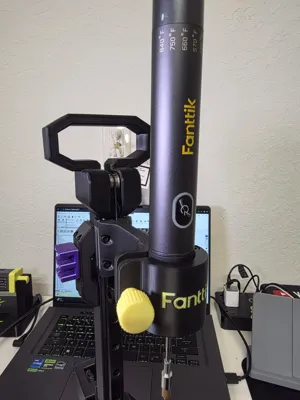
I got the Fanttik T1 Max soldering iron to make my stealth press portable!
The T1 Max is a rechargeable portable soldering iron, and it works great with the stealth press for heat-set insert pressing.
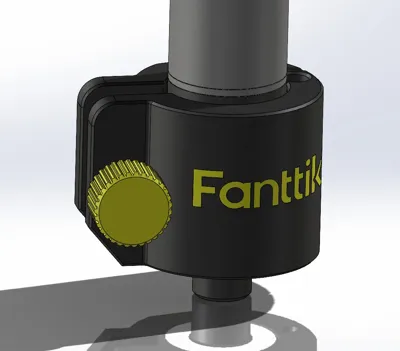
I've design the adapter to work like a “door” opening with a thumb screw to easly take the T1 max out of the stealth press incase of charging or other uses.
The design prints as one, the parts support each other, thus no need of support. after the parts are printed the will sapprate easly with a bit of force.
Why choose my design?
- Print-in-place design - No need for support, the parts support each other.
- Easy to print - 3MF files ready to print.
- No Support - No support is needed for this print.
- Door Design - Thumb screw and a hinge making it really easy to take the T1 Max off the Stealth Press.
What Do You Need? (affiliate links)
- Fanttik T1 Max Soldering Iron Link
- C210 Heat Insert Tip Link
- 2X - M3X8 Screws Link
- 2X - M3X20 Screws Link
- 2X - M3X4X5 Thread Insert Link
Printed Parts
- Body - 2 body parts.
- Thumb Screw.
Print Settings
- Material: PLA for indoor use, PETG or above for outdoor/hot environments
- Nozzle Size: 0.4mm
- Layer Height: 0.2mm
- Vertical Walls: 2
- Infill: 10%
- Supports: None
Assembly Instructions
- First, separate the two printed parts


2. Looking at the base ( the part with the 2 screw holes), press the thread insets in

3. With the M3x20mm, connect the base and front parts together.

4. Press the other screw into the thumb scerw print. If you think it's loose, add a drop of CA glue.

5. And you're done! Enjoy your new portable Stealth Press :)

Hope you enjoy this project! If you make one, please share it with us :D


Comment & Rating (25)