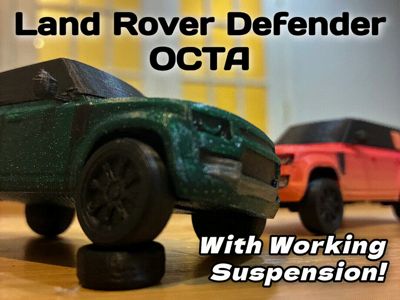
Land Rover Defender OCTA with Working suspension!


Print Profile(1)

Description
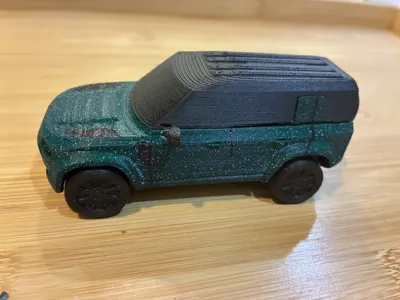
LAND ROVER DEFENDER OCTA
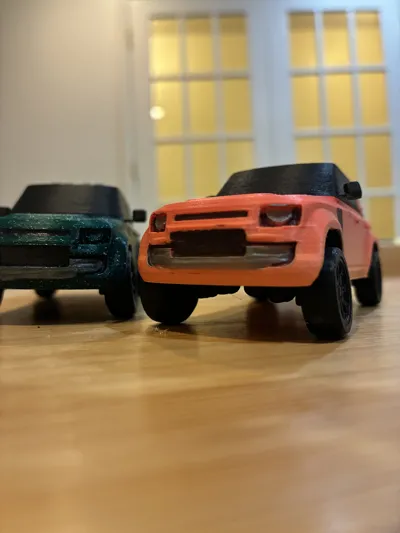
This model is a 1:43 scale version of the Land Rover Defender OCTA. It's about 4 inches long, but if you want a 1:64 scale car, just scale it by ~66%. If you do plan on scaling the model, be warned that the suspension might not work as well. This model does not require AMS and can be sharpie'd for extra detail. If you have any questions or suggestions, feel free to drop a comment. Note: The raw model files are the 1:64 scale, meaning if you want the 1:43 tested version, scale everything up by 150%.
FEATURES:
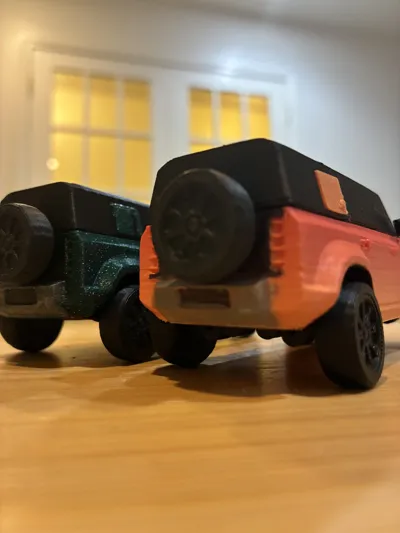
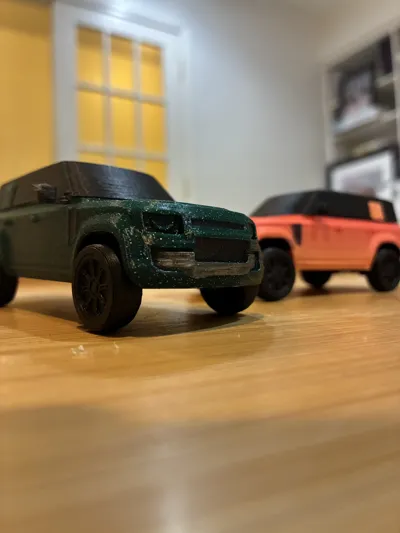
- All the wheels can spin, including the spare tire attached to the back
- Working independent suspension for each of the four wheels
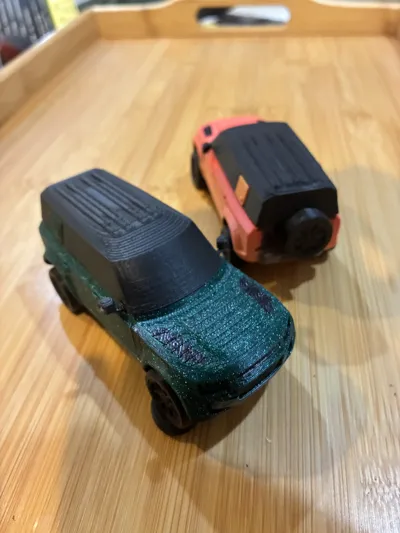
- Multicolored parts for more detail
- All parts can be snapped on or off for replacement, though glue is recommended.
- NO AMS NEEDED!!!
HELP WITH PRINTING:
- IGNORE THE NON-MANIFOLD GEOMETRY WARNING IN THE SLICER (for the bottom of the car)

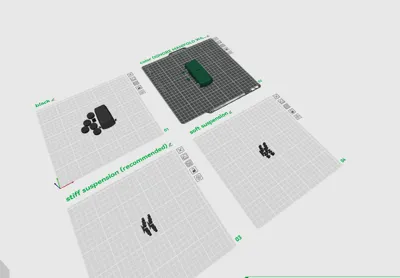
- Support is only needed for the 2 main parts (Top and bottom of car)
- Tree supports, on build plate only
- Included in the 3mf are 2 build plates for suspension. There is a soft and stiff suspension, either of which you can use depending on your liking. The stiff suspension is recommended.
- If the decoration square on both sides don't fit, try rotating them.
- MAKE SURE TO INSTALL THE SUSPENSION THE CORRECT DIRECTION. (The hole in the car is shifted slightly back, and the position of the wheel when attached to the suspension is shifted slightly forward, meaning when put in correctly the tire will be perfectly centered in the wheel well.
ASSEMBLY INSTRUCTIONS:
First, attach the top to the bottom of the car. Next, attach the wheels to the suspension, before clipping it to the car. Finally, you can add the side decorations and the rear wheel.
Boost Me (for free)
This took a long time to design, so please consider boosting to help out :D
License
You shall not share, sub-license, sell, rent, host, transfer, or distribute in any way the digital or 3D printed versions of this object, nor any other derivative work of this object in its digital or physical format (including - but not limited to - remixes of this object, and hosting on other digital platforms). The objects may not be used without permission in any way whatsoever in which you charge money, or collect fees.
Comment & Rating (29)