IS-3 (1945) WW2 Tank, Scale 1:35


Print Profile(3)


Description
Description
Description:
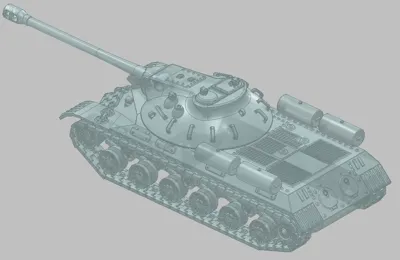
I present you the iconic IS-3 (1945) (Joseph Stalin-3) remodeled from shetches you also can find on the world wide web. This is a 1:35 scaled model of the most iconic soviet heavy tank of the second world war. The goal was simple, achiveing as many details as possible and presenting all the important moveable mechanics. The model features: 22 rotating whees, compleatly moving tracks, rotating turret and a tiltable main gun.
PLEASE READ CAREFULLY, BECAUSE YOU MAY FIND SOME IMPORTANT INFORMATION !
Ptinting:
- I used the "0,12 mm layer height high quality" print profile mostly.
- The setting in the original print profile are worked for me, and could work on almost any printer.
- Recomemnded settings:
- 0,8-0,12 mm layer height (on tracks i do not recommend layerheight more than 0,12 mm for smooth operating)
- 2 walls
- 7-15% infill
- 50-100 mm/s outter walls
- 120-200 mm/s inner walls
- 1st layer 30-50 mm/s
- Smaller parts such as: the main gun, gun joint, gun armor, the 7 pins must have 2x0,1 mm raft layers for better addhesion to plate.
- 1st plate: requires support on both hulls due to overhangs.
Note: it is important to clear your plate before printing, or use gloves to prevent contamination
Assembly:
- The assembly can be done WITHOUT GLUE (!).
- I recommend you to assemble in the following order:
- Phus the wheels on the sides carefully (they can break easily) (If not sure, see wheels order on pictures!).
- Put the two sides of the tank body useing 2 pins.
- Phus the two sides with the wheels to the body useing pins (2-2 on each side).
- Put together the turret and the cone with the remaining 1 pin.
- Phus the main gun armor to the main gun's shaft from the back side, you can not assemble it the other way around. Take attention on the orientation of the armor, it should be the same seen on pictures.
- Phus the rotating joint to the end of the main gun, so you can phus the whole gun assembly to the turret.
- And the least fun part for last: join 60-60 tracks together for each side (this requires some force).
Final touch: join 2-2 track that you can add to the front of the tank body.
Congratulations, you have a pretty cool IS-3 model!
- I will add a detailed guide later on if I deem it necessary based on the feedback.
Recommended color options:
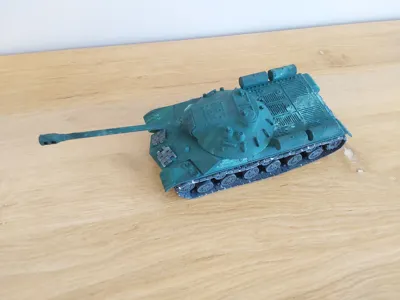
- Deep green for most of the parts.
- Grey for the tracks and wheels.
- Feel free to use any other color you like.
- Or you can paint it like I did (seen on pictures.)
- Smaller adjustements and adding details may be comeing in the future.
Enjoy your printing. :)
License
You shall not share, sub-license, sell, rent, host, transfer, or distribute in any way the digital or 3D printed versions of this object, nor any other derivative work of this object in its digital or physical format (including - but not limited to - remixes of this object, and hosting on other digital platforms). The objects may not be used without permission in any way whatsoever in which you charge money, or collect fees.
Comment & Rating (23)