Viking Inspired Kattegat Shield


Print Profile(3)


Bill of Materials


Description
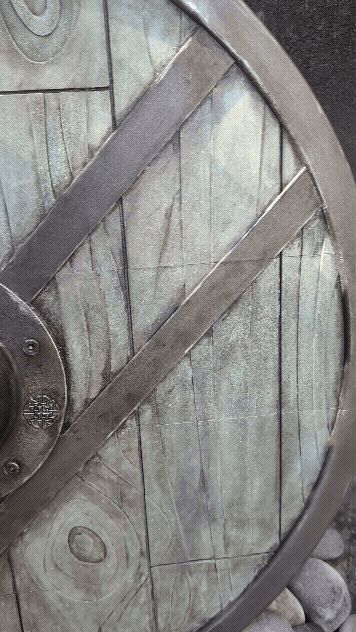
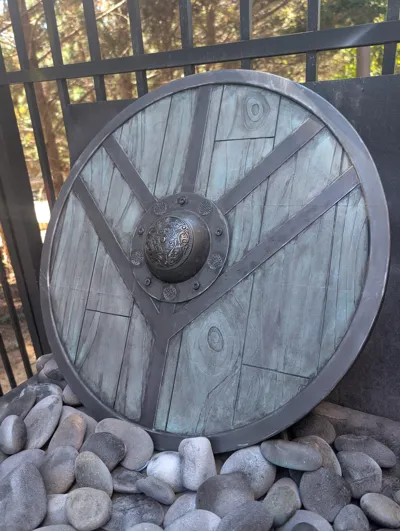
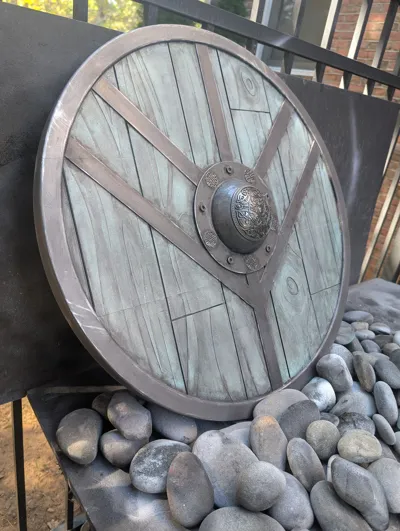
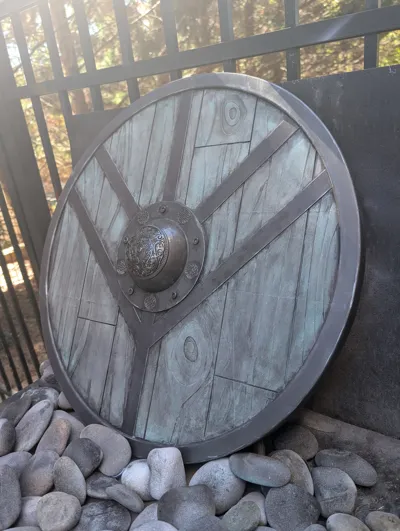
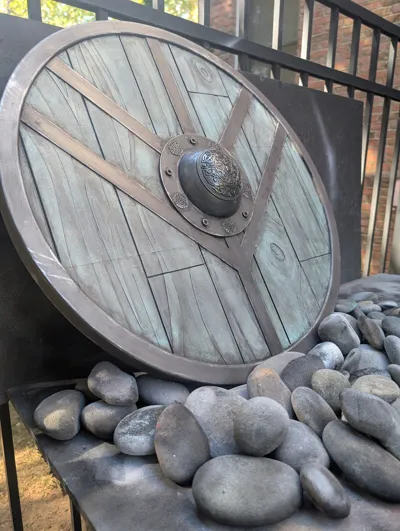
This is a full scale Shield inspired and based off of the shields used by Lagertha and other Shield Maidens in Kattegat (Vikings series). This was designed with finishing techniques in mind. It has surface layers that can be used to add a wood grain effect as seen in the photos.
Boost Me (for free)
If you enjoy this design or any of my others toss me a Boost for free. This type of support helps to keep designers pushing out new models.
I have included a very simple printable Umbo for this project (The shield cap); however it is not the one I used for my shield as I really liked the aesthetic of Rais1.3D ‘s model Umbo Viking. This shield lines up perfectly with his large profile for the Umbo. Feel free to print is and skip the profile for my simple version. I’ve reached out to him and made him aware that my design can work well with his.
Bill Of Materials (BOM)
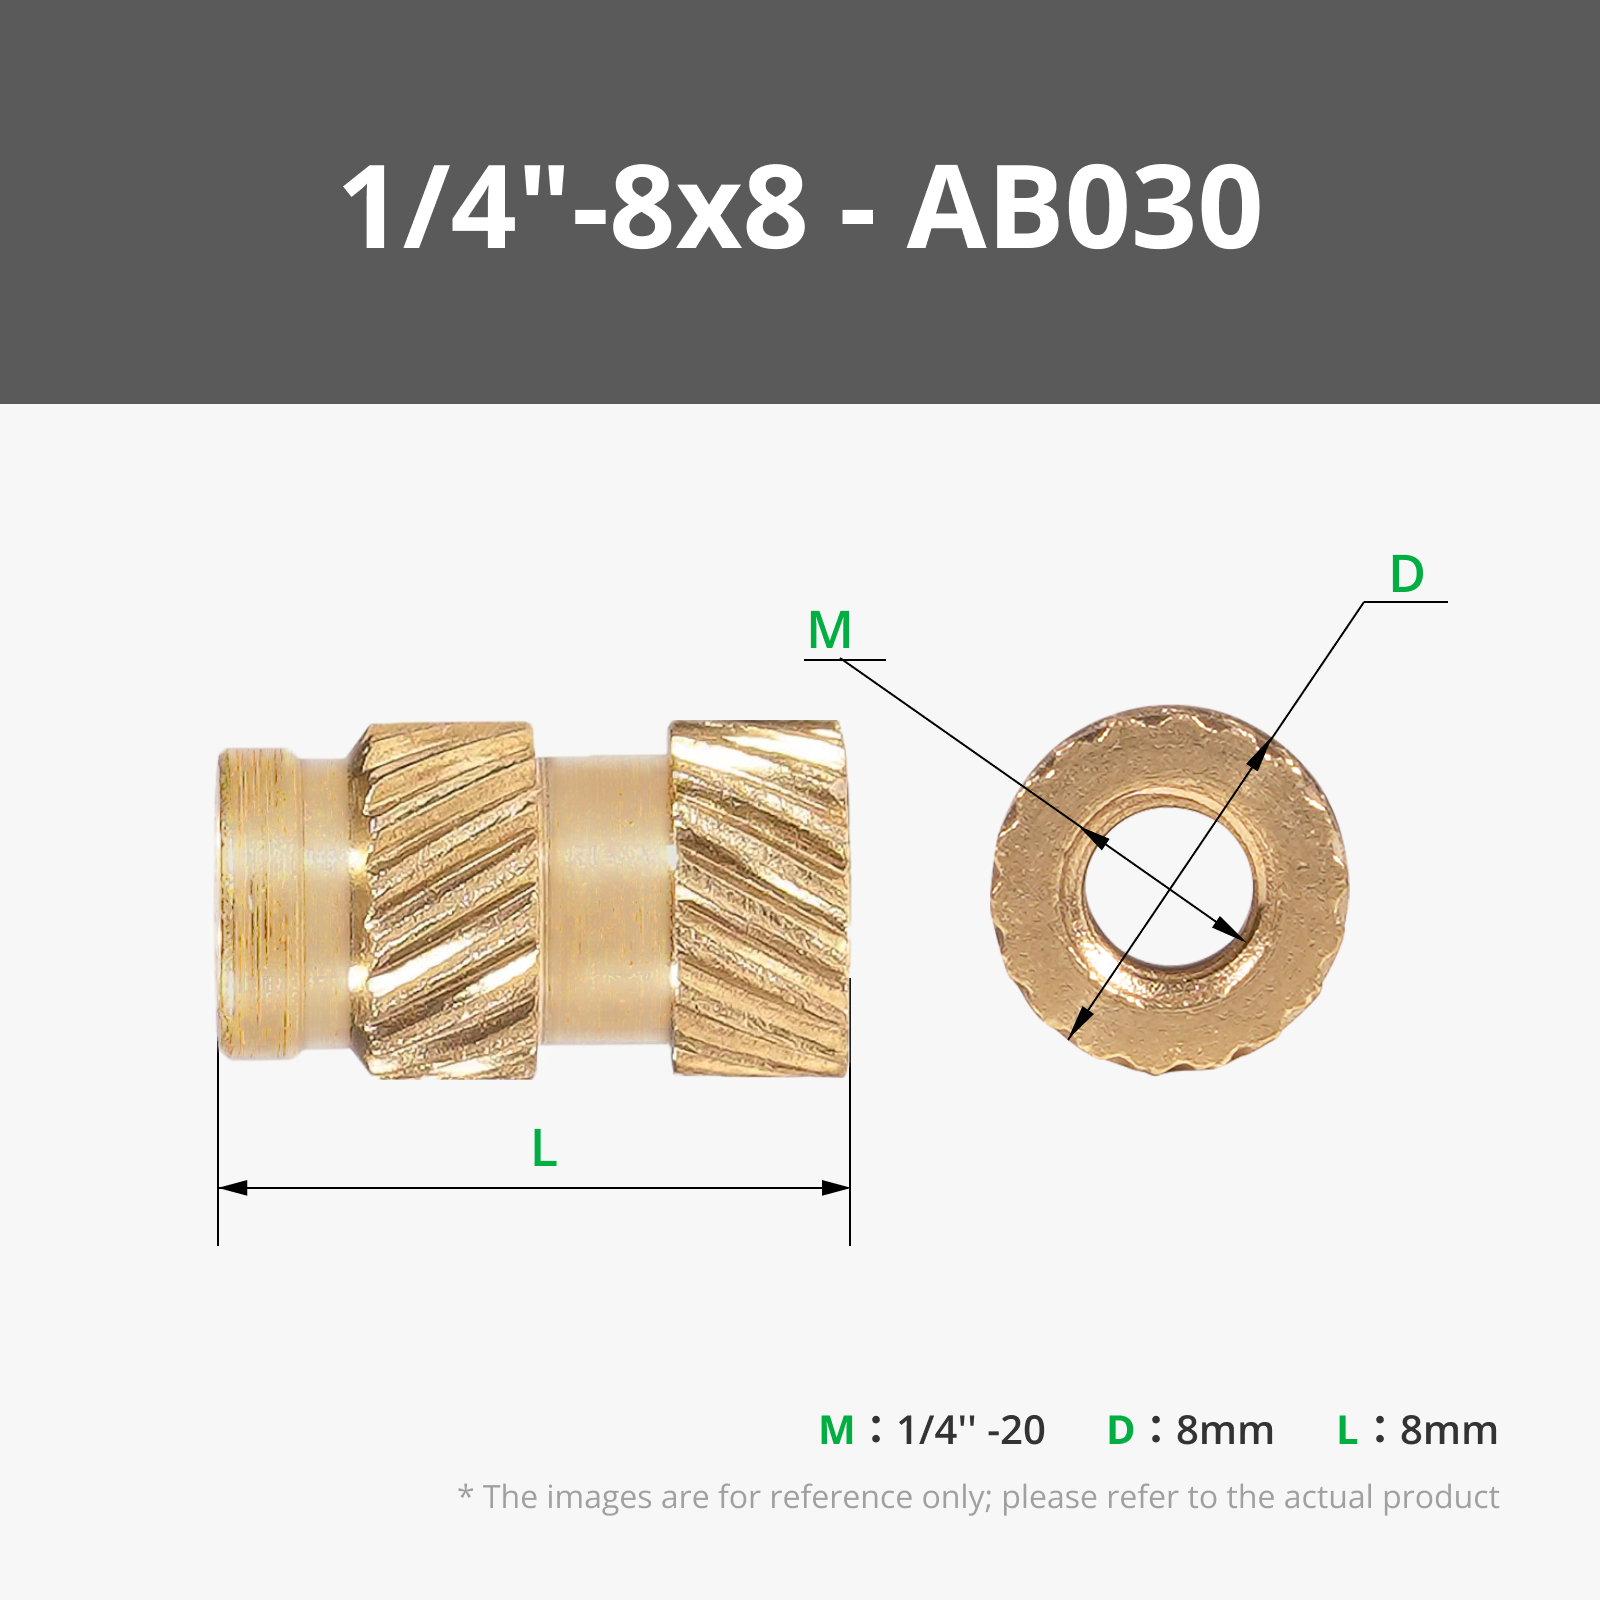
6mm Hardware is required for the handle. I tried using printed parts for the handle but was not comfortable with them holding based on the size and weight of the shield
- 4x M6 or ¼" Heat Inserts (length can very from 5mm to 10mm depending on how deep you want them.)
- 4x M6x12mm or ¼" Machine Screws
- (optional) ¼" or M6 Nuts and Bolts to hold the Umbo
- Printed parts are included as a print profile. It is not need to be real hardware, this is solely an aesthetic decision.
Assembly Steps
This shield is designed such that each piece of the base shield can only be put together with its adjacent pieces. However, there is an optimal way to put it together so that all of the parts fit easily and snug. I would also suggest using a chemical bond type of adhesive (like Acrylic Weld, or gloop for PLA to make it strongest) however it should work with CA (Super/Gorilla) Glue if that is all you have available.
When gluing it is advised to clamp the parts together to allow for a tight fit while the glue dries.
- First glue the vertical sections together
- Left Section
- Part_01 (plate 1) to Part_2 (plate 2)
- Part_03 (plate 3) to the previous parts assembled in the previous step
- Middle Section
- Part_04 (plate 4) to Part_6 (plate 6)
- Part_07 (plate 7) to Part_10 (plate 10)
- The glue the two sections from the previous 2 steps
- Right Section
- Part_05 (plate 5) to Part_8 (plate 8)
- Part_09 (plate 9) to Part_11 (plate 11)
- The glue the two sections from the previous 2 steps
- Left Section
- Glue the Left Section to the Center Section of the Shield
- Glue the Right Section to the Center Section of the Shield
- Next glue the left and right sides of the handle to the center
- AT THIS POINT I DID THE POST PROCESSING AND PAINTING STEPS TO MAKE IT EASIER TO PAINT
- (optional) Wrap the handle in a thin leather strip and secure it. I used CA Glue at the beginning and end of the wrap to hold it in place.
- Heat insert the ¼" or 6mm heat inserts to the 4 holes that align with the Handle. These are the holes in the back that do not form the star pattern or go the whole way through.
- Align the Umbo and either secure with glue and the printed Umbo fasteners, or use the thick nuts and bolts. The Umbo can also be glued down as well, however I did not do this as I may want to change it in the future.
- (optional) Align and glue the handle tabs down
- Screw in the ¼" or 6mm handle screws
Post Processing Technique
These are the steps I used to make my version of the Shield.
(Sanding steps are not required but can help blend the the wood grain effect to be less dramatic)
Sanding:
- Use an orbital sander with a 200-400 grit sanding pad and sand the edges of the wood like surface layers to be reduced.
- If you have any seams shown on the edges or back, you can sand and fill as well.
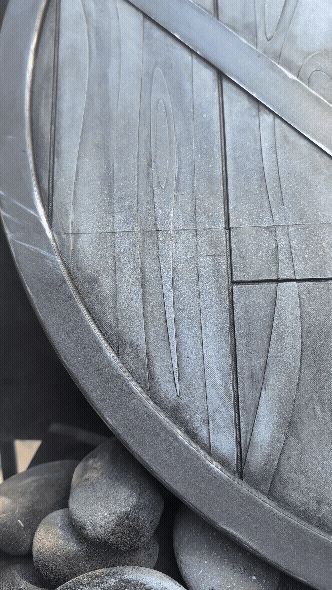
Priming:
- Apply a very light coat of sandable filler primer
- After it is dry, sand lightly with 400 grit sand paper to help prepare for paint and smooth out some of the transitions
- Apply a thicker coat of sandable filler primer
- After it is dry, sand lightly with 400 grit sand paper to help prepare for paint and smooth out some of the transitions
- Apply a thick coat of filler primer and let it harden and cure
Painting:
- Paint parts that should look like metal with a metallic spray paint. I painted the back, edges, umbo, and cross sections.
- After that cures, mask the edges and top surface areas that arent wood. (It is unnecessary to mask the back if you are leaving it in the metallic color)
- (Optional) Repaint the edges of the masking tape with the same metallic paint. This helps when removing the tape from peeling as well as keeping the top colors from bleeding under the tape.
- Spray paint the wood like areas with a light blue.
- Before that dries to the touch dust areas with a teal spray paint.
- Before that dries apply a very light white dusting of spray paint form a significant distant.
- You can remove the tape at this point.
- (Optional) Weathering steps
- After the paint dries completely, completely wash the shield with a mixture of Black/brown paint in a 50/50 mix with water.
- Remove the wash with paper towels by blotting.
- Apply another wash of Brown/Off White paint in a 40/40 mix with water
- Remove the wash with paper towels by blotting,
- Apply dry brushing in edging and deep crevices of a dark black/brown paint mix
- Apply silver leaf rub and buff on edges of metallic areas and on Umbo to make some areas shine
This will not support A1 Mini due to size of parts. If you are interested in this and need to print on an A1 mini, please reach out to me, and I can recut the shield into parts for an A1 mini.
License
You shall not share, sub-license, sell, rent, host, transfer, or distribute in any way the digital or 3D printed versions of this object, nor any other derivative work of this object in its digital or physical format (including - but not limited to - remixes of this object, and hosting on other digital platforms). The objects may not be used without permission in any way whatsoever in which you charge money, or collect fees.
Comment & Rating (25)