CableBuddy – Customizable Cable Tags


Print Profile(1)

Description
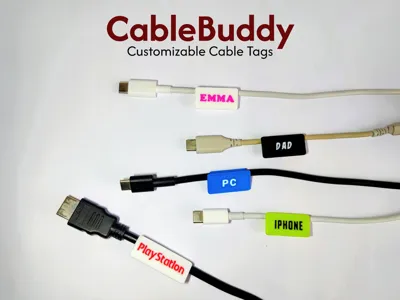
CableBuddy – Customizable Cable Tags for All Your Cables
Keep your cables organized and easy to identify with CableBuddy!


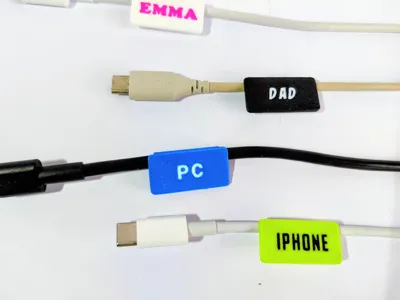
These 3D-printable cable tags are fully customizable and come in different models designed to fit various cable types — from iPhone and Android chargers to PC, USB, and HDMI cables.
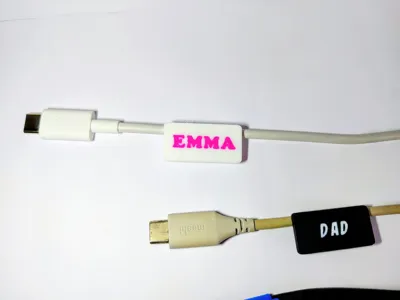
Each tag is parametric, so you can easily adjust the length and label text to suit your needs.
Whether you want to mark your family’s phone chargers, tidy up your workspace, or label your entertainment setup, CableBuddy makes it quick, clean, and fun.
✅ Fits multiple cable types (iPhone, USB-C, HDMI, PC, etc.)
✅ Parametric design — customize length and text
✅ Easy to print, no support required
✅ Perfect for home, office, or travel
Print, snap, and never mix up your cables again!
If you enjoy this print, your support (like and Boost) makes a huge difference and keeps these free designs coming.
Boost Me (for free)
Love it? Give it a Boost! 🚀 Your support helps me bring more designs to life 😊
Customizing Your CableBuddy in Bambu Studio
Switch to Bottom View:
Click on the View cube and select Bottom to see the underside of your model.
Open the Objects Menu:
Go to the Objects tab to see all parts of the tag.
Assign Colors:
Here, you’ll see the different components of the tag. You can assign colors to each part as you like.
Adjust the Tag Length:
Select the tag body (for example, 345_120) and click on the Scale icon.
Change the Scale Settings:
A: First, untick the Uniform Scale option.
B: Then, adjust the length either by entering a new value in the X field or by dragging the arrow in the workspace.

That’s it for the dimensions!
Edit the Text:
Double-click the text in the Objects menu, or right-click on it and choose Modify Text.
Customize the Text:
In the dialog box, you can edit the text content, font, size, and other options.

Check Your Modifications:
Go to the Preview mode and switch to Bottom View again to verify your changes.

✅ Done! You can now print your customized CableBuddy.
Tip: Recenter the Text (if needed)
If your text isn’t centered, right-click it in the Objects menu and choose Center.

Membership
License
You shall not share, sub-license, sell, rent, host, transfer, or distribute in any way the digital or 3D printed versions of this object, nor any other derivative work of this object in its digital or physical format (including - but not limited to - remixes of this object, and hosting on other digital platforms). The objects may not be used without permission in any way whatsoever in which you charge money, or collect fees.
Comment & Rating (2)