
[GT8 Pro] One-click unfold! Lens Hood Deco! 3-card storage!
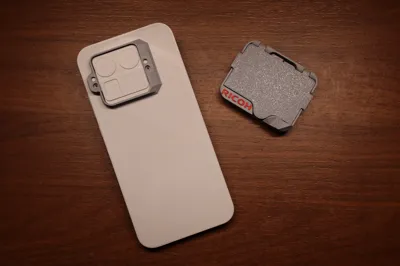
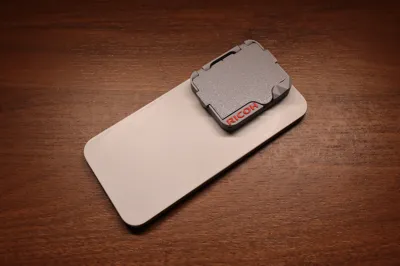
Print Profile(1)
![[Obsidian Lens Hood Deco] Print all on one plate](https://makerworld.bblmw.com/makerworld/model/USbdb8e183ebe5bc/461274402/instance/2025-11-02_e85b035220b438.jpg?x-oss-process=image%2Fresize%2Cw_100%2Fformat%2Cwebp)
Bill of Materials


Description
[Introduction]
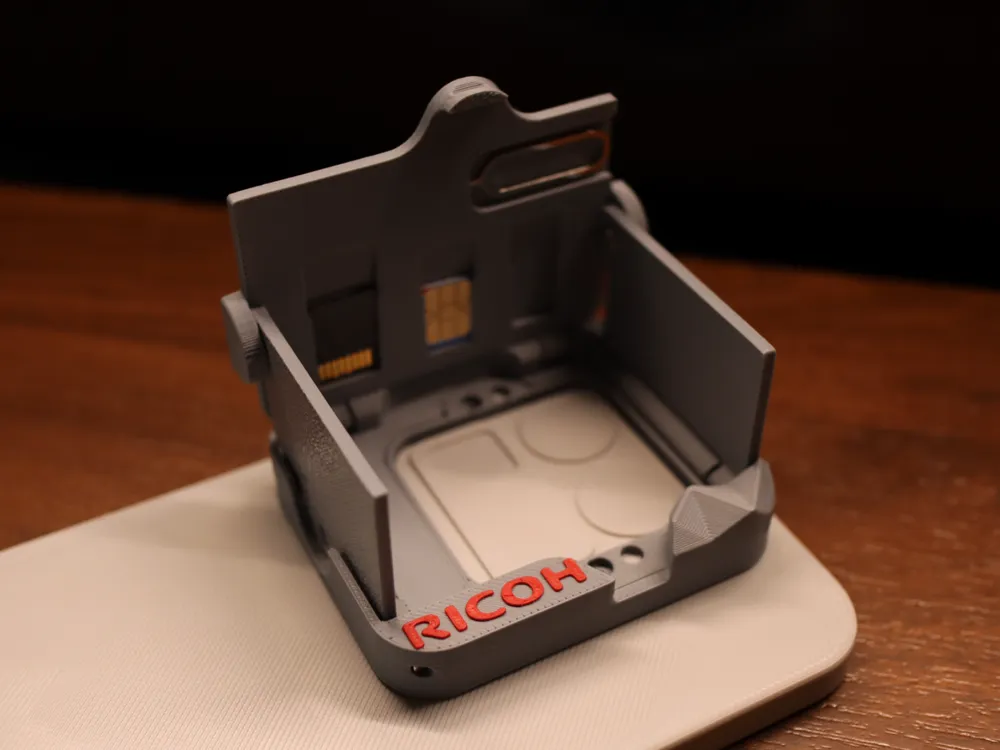

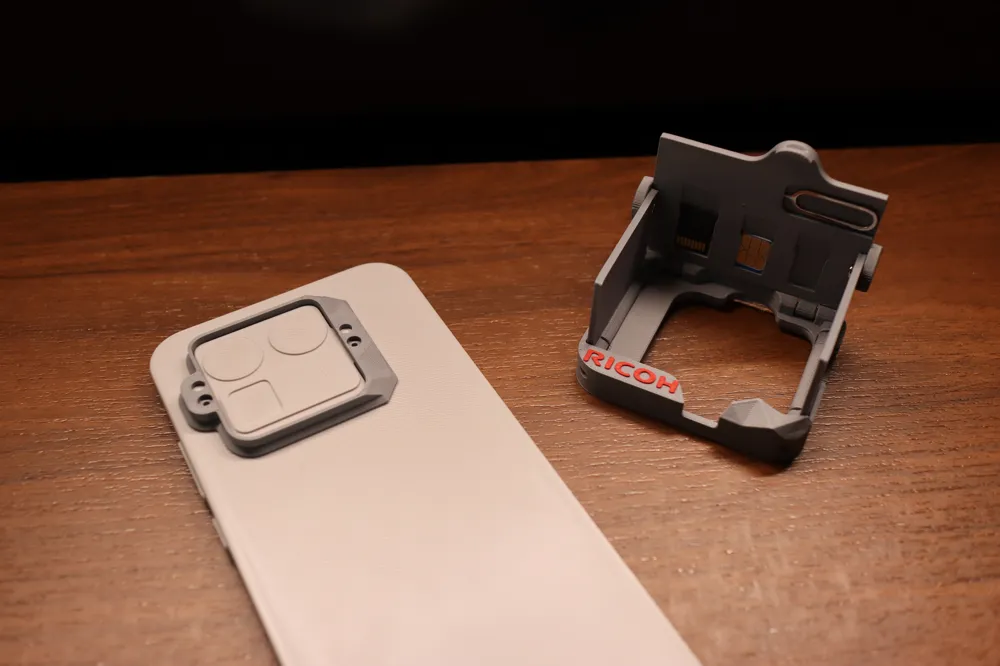
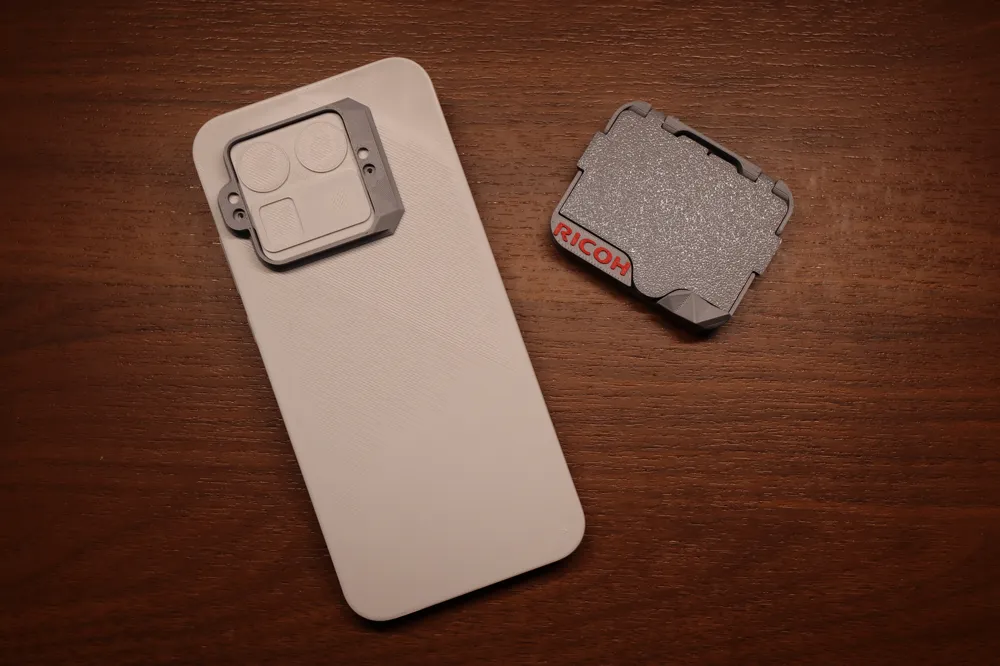
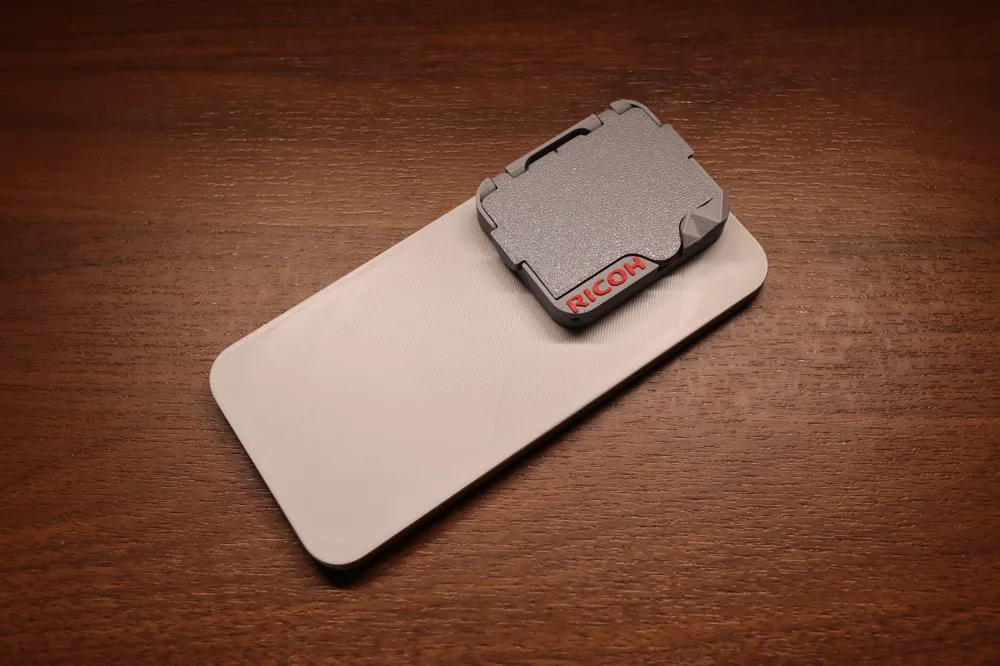
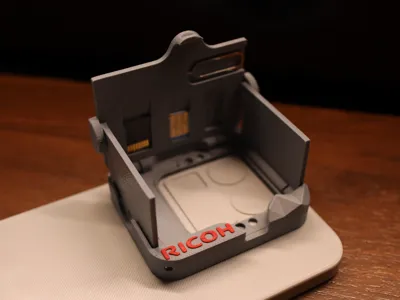
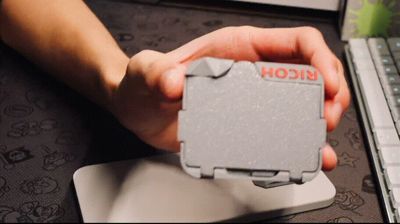
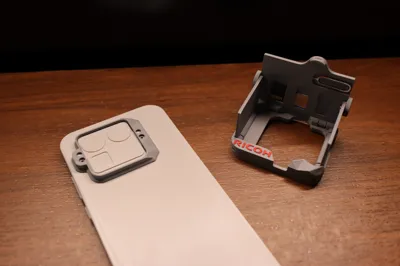
This is a replaceable Deco model with a **rock style**, specifically designed for the **Realme GT8 Pro phone**. It consists of a **[Common Deco]** and a **[Telephoto Lens Hood Doce]**. The **[Telephoto Lens Hood Doce]** can store one microSD card, two SIM cards, and a SIM ejector tool
When using the **telephoto** lens, the **[Telephoto Lens Hood Doce]** can be magnetically attached to the **[Common Deco]** already installed on the phone. The main functions of a lens hood are
blocking stray light,
preventing glare and ghosting,
improving image contrast and color saturation,
protecting the lens from bumps, raindrops, or dust,
reducing image haziness when shooting against the light.
Note: This [Telephoto Extension Doce] accessory can only be installed and used when the phone is shooting with the telephoto lens. If installed while using the main camera, it may cause unwanted intrusions into the frame.
Boost Me (for free)
I will create other more interesting and refined models. Boost me to speed up production!
[Installation Instructions]
This model requires accessories from the official Bambu Lab Maker's Supply. The accessories are as follows
2×14mm stainless steel straight pin shafts [6 pieces]
2 (thickness) ×4 (diameter) mm round magnets [6 pieces]
Step One
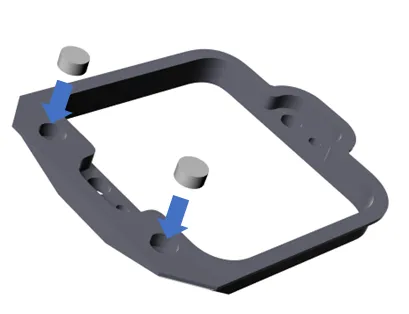
Install two magnets into the holes of the [Common Deco], ensuring that the magnets do not protrude from the surface after installation
If the magnets tend to fall out easily, you can use adhesive to secure them
Step Two
Install two magnets into the holes of the [Common Deco]. After installation, the magnets will slightly protrude from the surface
Step Three
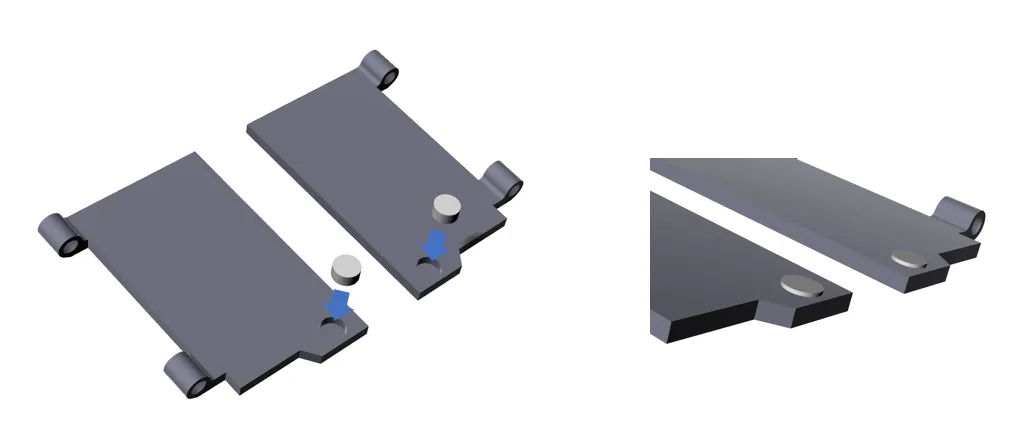
Test one side of a magnet to ensure it repels the position shown in the diagram. Face that side towards the hole on the bottom of the extension base and press the magnet in vertically. The other hole in the base for the magnet is installed in the same way
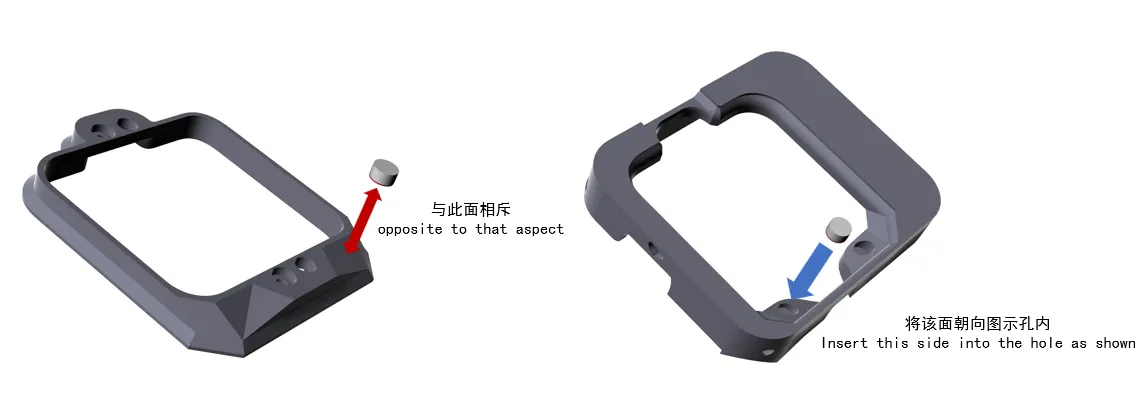
Step Four
After installation, test if the [Extension Base] can be magnetically attached to the [Common Deco]. After testing, please separate the two parts to continue with the subsequent installation
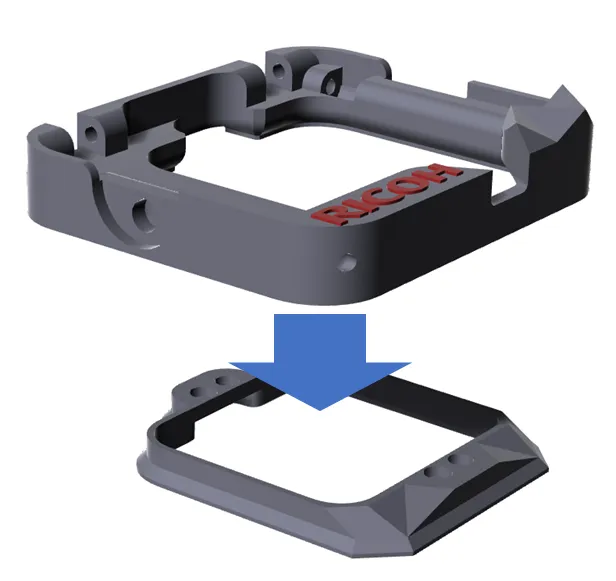
Step Five
Insert the inner blade from above into the corresponding slot in the base
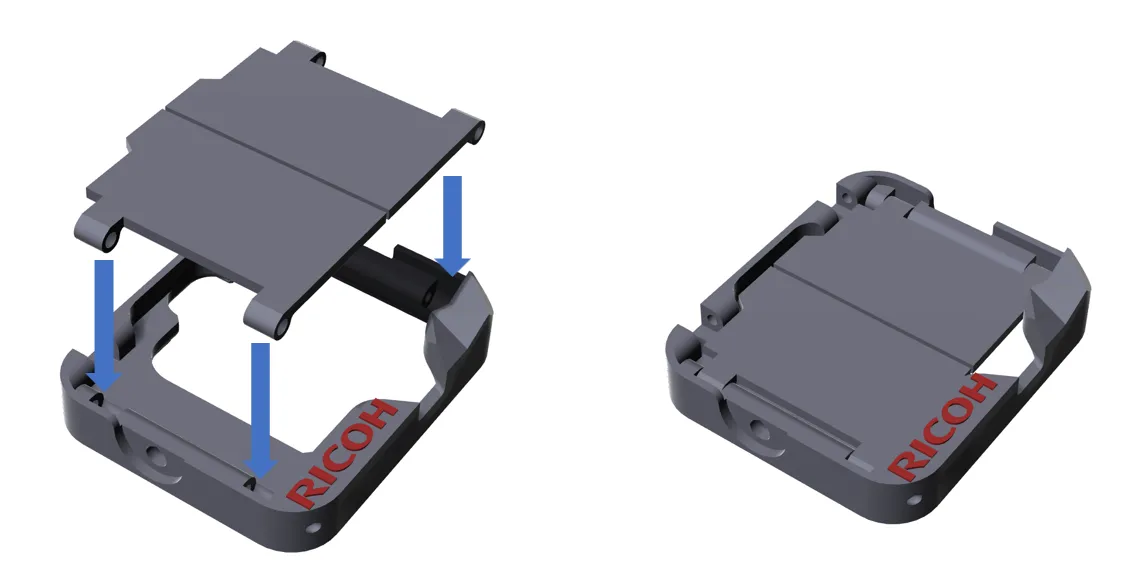
Step Six
Insert four 2×14mm stainless steel straight pin shafts as shown in the diagram. After insertion, the pin shafts should not protrude from the surface
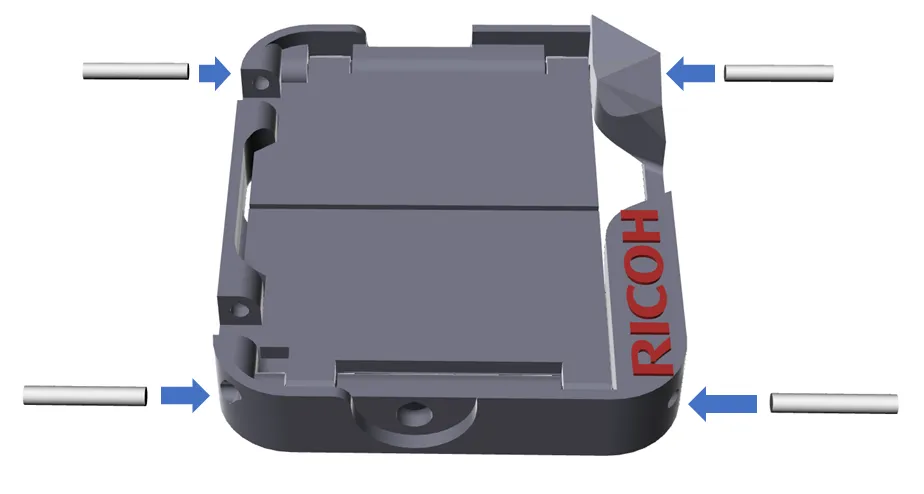
Step Seven
Insert the outer cover from above into the corresponding slot in the base
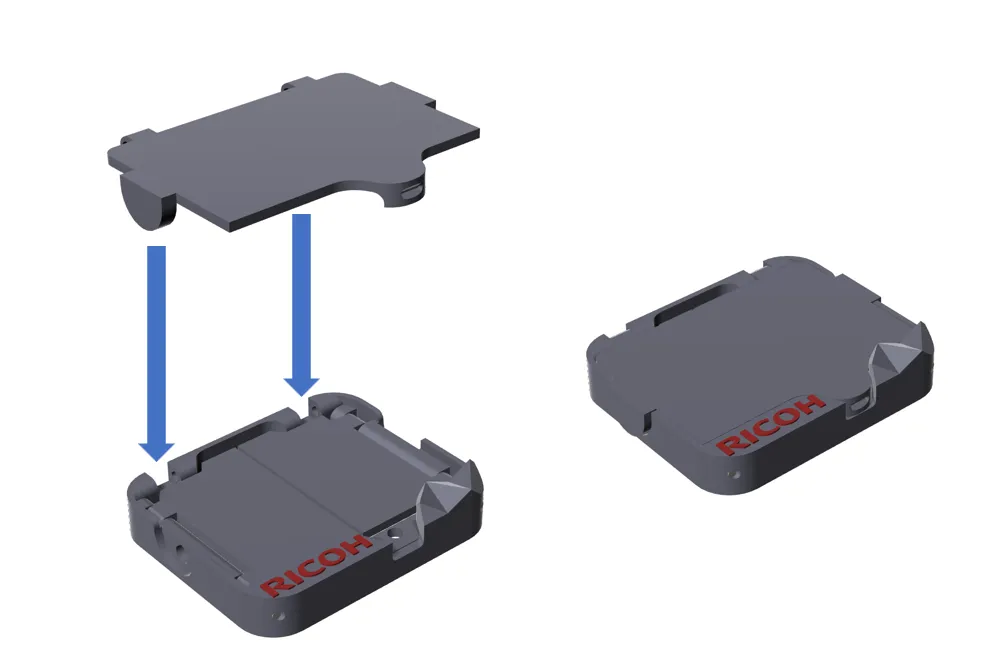
Step Eight
Insert two 2×14mm stainless steel straight pin shafts as shown in the diagram. After insertion, the pin shafts should not protrude from the surface
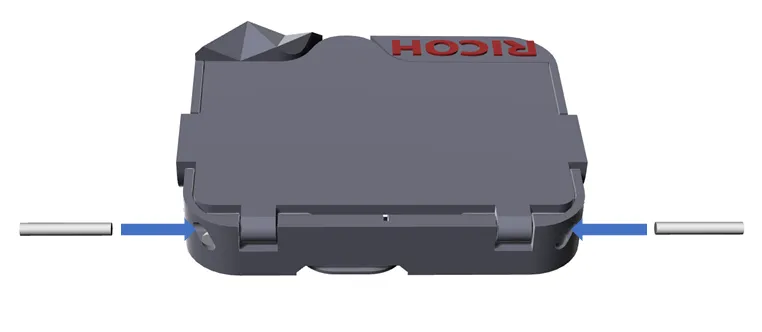
Step Nine
Test one side of a magnet to ensure it repels the position shown in the diagram. Face that side towards the hole on the inner side of the top cover and press the magnet in vertically. The other hole on the inner side of the top cover for the magnet is installed in the same way. After installation, the magnets should not protrude from the surface
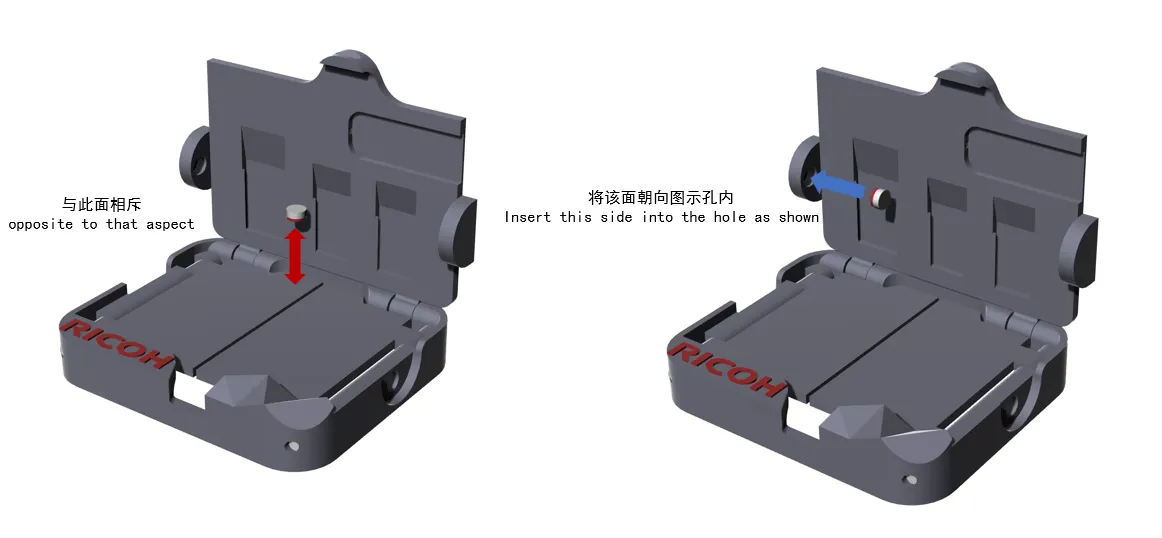
Step Ten
Open the inner page and observe if it can be magnetically attached to the top cover
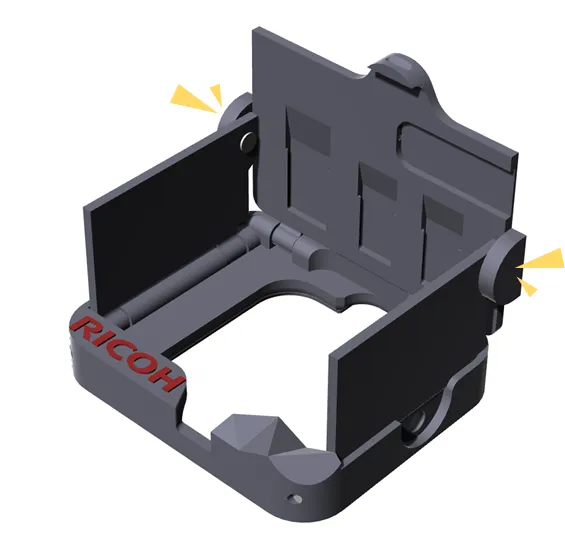
Step Eleven
Test one side of a magnet to ensure it attracts the position shown in the diagram. Face that side towards the hole on the side of the base and press the magnet in vertically. The other hole on the side of the base for the magnet is installed in the same way. After installation, the magnets should not protrude from the surface
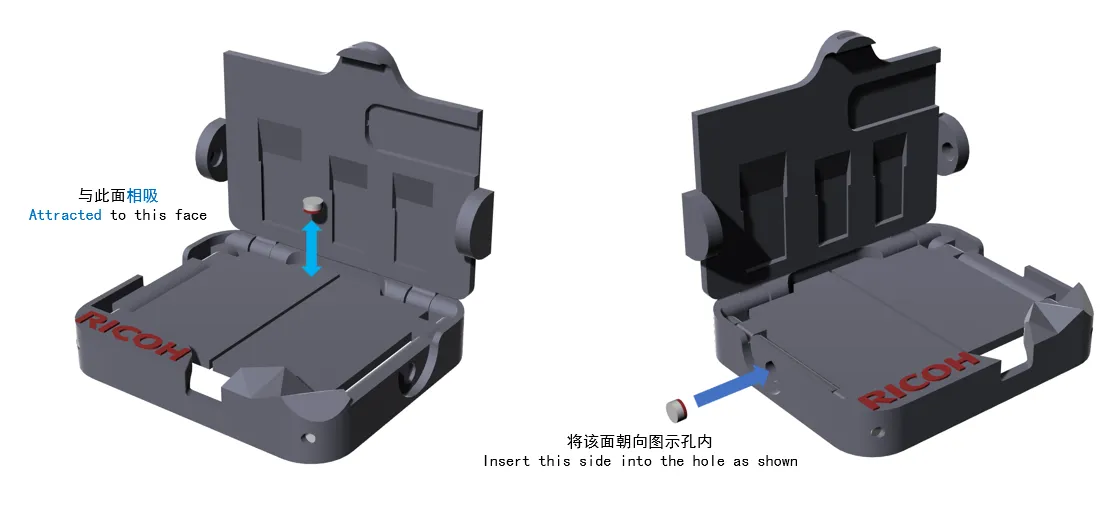
Step Twelve
Close the cover and observe if the top cover can be magnetically attached to the base correctly
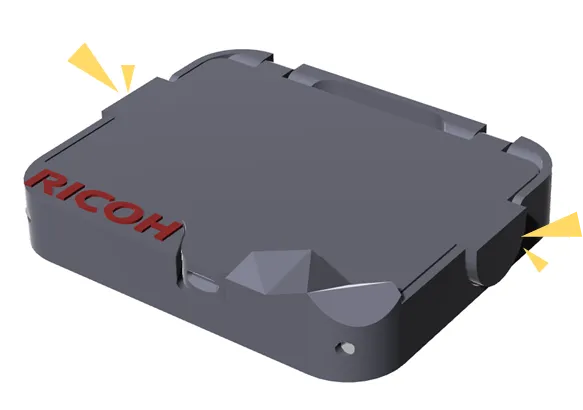
Installation complete!
License

You shall not share, sub-license, sell, rent, host, transfer, or distribute in any way the digital or 3D printed versions of this object, nor any other derivative work of this object in its digital or physical format (including - but not limited to - remixes of this object, and hosting on other digital platforms). The objects may not be used without permission in any way whatsoever in which you charge money, or collect fees.


Comment & Rating (0)