ModBrick|The Platform to Build Your Own Controller


Print Profile(4)


Bill of Materials


.png)

.png)


Description


Boost Me (for free)
Your appreciation fuels my creative endeavors! Your support is deeply appreciated! '◡'
Update - 2025-12-16
I am thrilled that ModBrick won an award in the competition! Thank you all for your support and for liking the design. I have continued to refine the model based on the original concept.
- Unified the internal design language of the remote controller for a more aesthetic interior.
- Modified part of the magnetic structure so that one side uses magnets and the other is fastened with screws. This reduces the number of magnets needed, minimizes glue usage, and avoids failure due to incorrect polarity. Adjusting the magnets under the panel also clears the removal path for the joysticks, making assembly easier.
- To address the difficulty in removing the front panel, I added an inclined surface at the bottom of the panel. It can now be pried up by pressing at the base and will not easily detach during normal use.
- Expanded the battery compartment and added battery positioning guides to prevent installation issues caused by slight variations in battery dimensions.
- Increased wiring clearance on both sides of the core board, making cable disconnection much simpler.
- For the Linear-Trigger Module, a PCB positioning feature has been added for more secure mounting, preventing displacement-related jams.
- Adjusted the appearance of the 2B module.
- The overall dimensions have increased slightly compared to the original version. If you prefer a more compact remote, the original model remains suitable.
- The assembly process remains largely the same as the original version. You may refer to the current assembly guide for installation. The updated guide will be uploaded once the modifications are complete.
————————————————
Correction Notice - 2025-11-17
I sincerely apologize for two oversights I made in the original BOM:
- Magnets: I forgot to list them as a separate line item. Although the CyberBrick kit does include some magnets, the quantity is insufficient if you plan to build all modules (including the NA modules). You will need approximately 26 D4x2 mm round magnets (CA001) in total.
- Screws: I initially specified stainless steel screws (AA013), but I've since found they are not magnetic. These should be replaced with carbon steel screws (AA050). For friends who have already purchased parts according to the original BOM, you can temporarily use the 6 screws from the CyberBrick kit for the Shoulder Frame. Other positions are not affected as they don't rely on magnetic attachment.
I apologize for any inconvenience this may have caused. The BOM has now been updated with the correct information.
Special thanks to @Bill Lab and @wolph for identifying these issues!
————————————————
ModBrick|The Platform to Build Your Own Controller
- The ModBrick modular controller is now live on the MakerWorld. It's a great pleasure to share the story and design thinking behind this project with the Makers.
From Need to Creation: The Birth of ModBrick
- While developing the CyberBrick remote-controlled car project, I wanted to achieve precise throttle control with my index finger via a linear trigger—an experience familiar to modern racing games. During this process, I tried development boards designed by several respected creators in MakerWorld, which were immensely helpful, and I sincerely thank them for their contributions. However, during testing, I found that existing solutions couldn't perfectly accommodate my desired layout.
- This led to an idea: could I create a highly free, freely configurable remote controller development platform? It shouldn't just meet the need for flexible testing but should also boast an elegant appearance, making the development process itself a enjoyable experience. Of course, if you love the design, you can also use it directly as the remote terminal for your project, perfectly adapting it to your vision through customization.
- That’s how ModBrick came to be.
Design Philosophy: Freedom, Practicality, Elegance
ModBrick is built upon the following core principles:
Free Configuration: Users can freely define the control interface according to their project's needs.
Quick Assembly/Disassembly: A magnetic connection system allows for instant module swapping.
Compact Layout: Pursues a small, refined form factor without compromising functionality.
Comfortable Feel: Ergonomic curves that fit the palm and provide satisfying tactile feedback.
Linear Trigger: Enables precise, analog control for throttle or similar functions. (the original purpose)
System Composition: Foundation Frame & Customizable Modules
ModBrick consists of a Foundation Frame and multiple interchangeable modules:
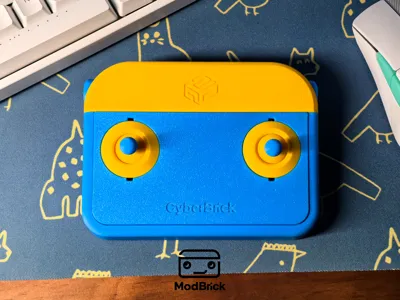
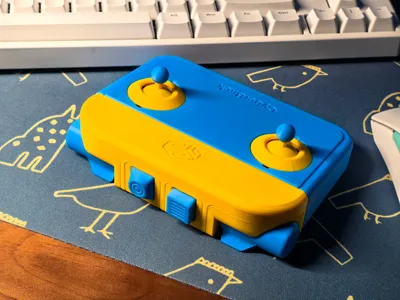
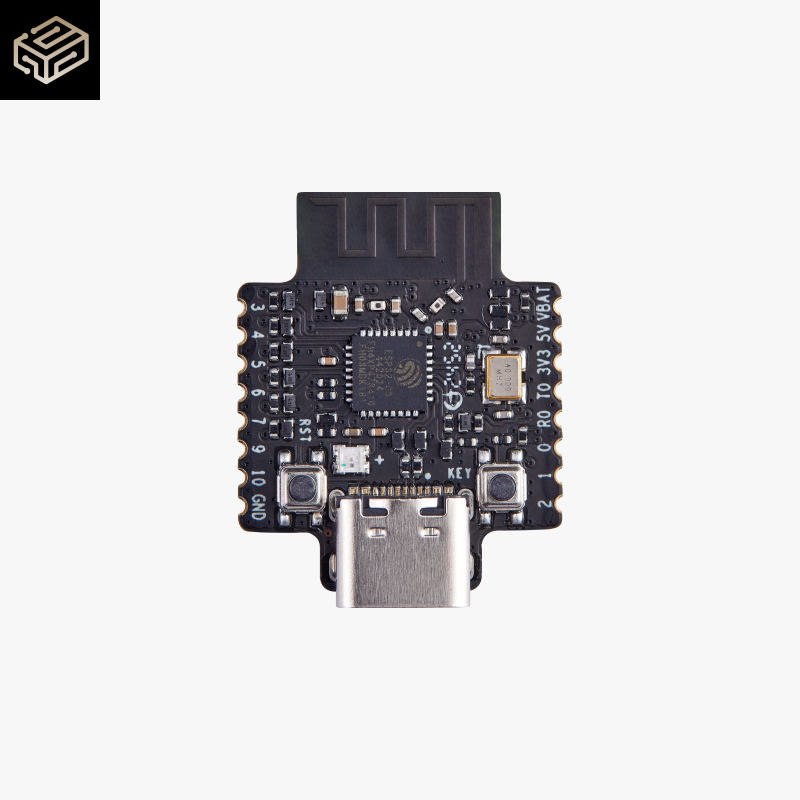
Foundation Frame: Integrates the base, front plate, core control board, power switch, and lithium battery. It's the command center of the entire system.
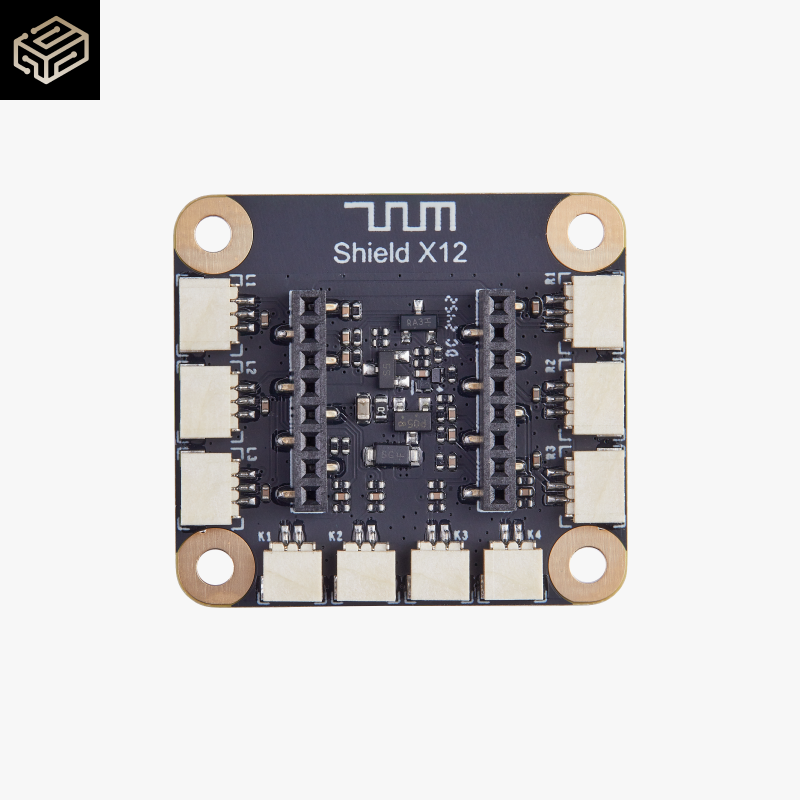
Customizable Modules: All modules and the front plate attach securely to the frame via magnets, making connection and disassembly effortless.
- The remote features 6 customizable module slots. Each slot supports various functional modules. If you don't need many buttons, you can use blank modules to fill the spaces—this embodies the ModBrick philosophy: Keep only what you need, remove all redundancy.
Using this system, you can easily assemble controllers for different operational preferences, for example:
Official Recommended Layout: Perfectly adapted for official models.
Racing Game Layout: Right linear trigger for throttle, left joystick for steering.
Configuration & Encoding System:
- Given the modular nature of this controller, everyone can build a different remote, making it difficult to provide a single standard json configuration. The attached json file serves only as an example, preconfigured for the official truck model. Beyond this, users still need a basic understanding of CyberBrick and must configure the controller themselves.
- To help developers using this controller for their projects accurately describe its assembly and wiring on MakerWorld, I have designed an encoding system, which has been uploaded to the Assembly Guide section.
Finally, I hope you enjoy using this remote controller. Happy Building!
(Should you encounter any issues during use, please leave me a message. I will continue improving it based on your feedback. Thank you very much!)
The STP model files have been uploaded to the original model page. You are welcome to modify the existing designs or create new modules to expand its capabilities.


Documentation (3)


License
You shall not share, sub-license, sell, rent, host, transfer, or distribute in any way the digital or 3D printed versions of this object, nor any other derivative work of this object in its digital or physical format (including - but not limited to - remixes of this object, and hosting on other digital platforms). The objects may not be used without permission in any way whatsoever in which you charge money, or collect fees.
Comment & Rating (133)