Kamen Rider Nega Den-O sic


Print Profile(0)
Description
3D Printed Kamen Rider Nega Den-O SIC Head Bust Full Workflow Guide
I. Project Overview
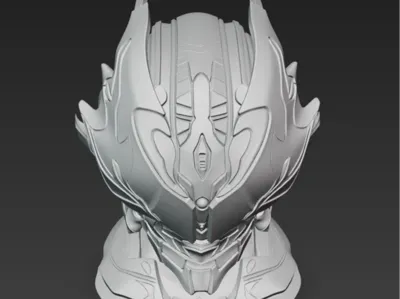
Kamen Rider Nega Den-O in the SIC series features sharper angles, metallic cracks, and purple electro-etched patterns, making it highly suitable for 3D printing to "solidify" the official art. As there are currently no readily available free STLs on public platforms, one can adopt the "AI image generation → ZBrush high-poly model → resin printing" approach
II. Model Source and Production
1. Modeling from Scratch
- Enter positive prompts in Stable Diffusion:
"kamen rider nega den-o, SIC style, bust, high-detail, front/side 2-view, 8K, sharp edge, metallic crack, purple neon"
- After generating 512×768 pixel front and side views, import into Blender for "image-based modeling" to quickly establish the rough shape
2. High-Poly Sculpting
- Import the rough model into ZBrush, activate "Dynamesh 256" to establish the main form first
- Use "TrimDynamic" and "Dam_Standard" to sculpt the SIC's iconic sharp, chiseled edges
- Use "Insert Cylinder" to create hard-surface parts like horns and compound eyes, then use "Polish" to make the bevels clean and crisp
- Finally, "ZRemesher → Project → subdivide to level 4" to preserve details, exporting an OBJ with approximately 2-3 million polygons
3. Part Separation and Polygon Reduction
- Separate into 4 parts: "head top - mask - horn - back of neck" for easier assembly and hiding layer lines later
- Use QuadRemesh or Decimate Master to reduce each part to 500,000-800,000 polygons, then use NetFabb to repair holes and thicken to 1.5mm to ensure printing strength
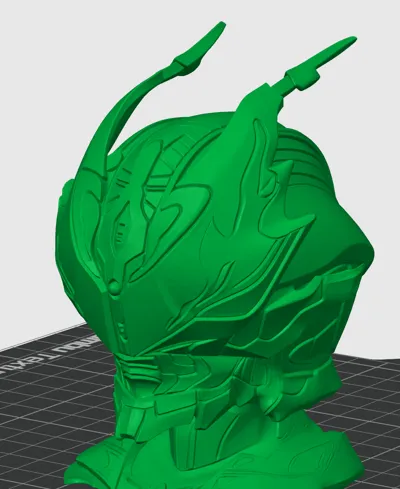
4. Slicing Parameters (taking a 0.4mm nozzle as an example)
- 0.12mm layer height, 15% infill, 1.2mm wall thickness, support type "tree-touchplate"
- It is recommended to rotate horn parts by 45° for printing to avoid warping at the tips
- For the resin version, 0.05mm layer height, 8× anti-aliasing, 40s bottom exposure, 2.5s normal exposure
5. Post-Processing
- Remove supports → 400-800-1500 grit wet sanding → filler primer → matte black base coat → dry brush gunmetal → local hand-painted metallic purple → acrylic + fluorescent purple dry brush electro-etched patterns → matte protective varnish
- Bury 5×2mm magnets into the interfaces for quick disassembly and replacement of horns or masks, facilitating future "berserk eye" effect parts
III. Recommended Materials and Equipment
- FDM: PLA-CF (easy to sand, no warping) or ABS (can be polished to a smooth shine)
- Resin printing: 8K rigid resin + 10% flexible resin blend, drop-resistant and not brittle
- Equipment: Elegoo Saturn 3 Ultra / Anycubic M3 Premium, molding volume sufficient for a 1:1 helmet
- Key tools: ultrasonic cleaner, UV curing box, 0.2mm photo-etched parts (for crack liners to enhance realism)
IV. Common Pitfalls and Solutions
1. Horn tip printing failure → Rotate the horn part by 45° individually and add a 1mm raft
2. Visible mask layer lines → First spray high-fill primer, then 1500 grit + polishing paste → mirror effect
3. Dull purple electro-etched patterns → First apply a matte black base coat, then "dot-dab" dry brush with fluorescent purple for high contrast without looking dirty
4. Back of neck too thin and prone to cracking → Use "Panel Loop" in ZBrush to add 2mm thickness to the edges, then export for printing
V. Time & Cost Reference
- Modeling + part separation 12h (experienced user)
- Printing 8-10h (FDM) / 6h (resin printing)
- Post-processing 6h
- Total material cost ≈ 30 RMB (PLA) / 60 RMB (resin)
VI. Conclusion
Although there are no ready-made "Nega Den-O SIC head bust" files in public libraries yet, with the help of AI image generation and ZBrush hard-surface workflows, it only takes one weekend to go from scratch to a finished product. After printing, you can not only make the official art three-dimensional but also freely scale, separate parts, change colors, and even mix and match with other Rider horn decorations — this is the ultimate freedom that 3D printing offers to Tokusatsu fans. May you soon display your "purple lightning" on your showcase shelf
License
You shall not share, sub-license, sell, rent, host, transfer, or distribute in any way the digital or 3D printed versions of this object, nor any other derivative work of this object in its digital or physical format (including - but not limited to - remixes of this object, and hosting on other digital platforms). The objects may not be used without permission in any way whatsoever in which you charge money, or collect fees.
Comment & Rating (0)