P1S/X1 exhaust duct solution with integrated check valve and universal vent


Print Profile(5)


Description
Introduction:
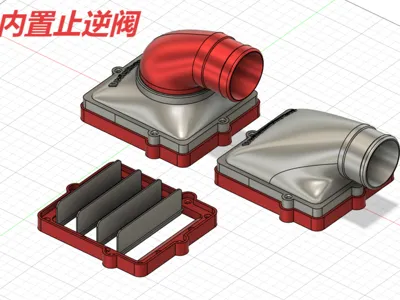
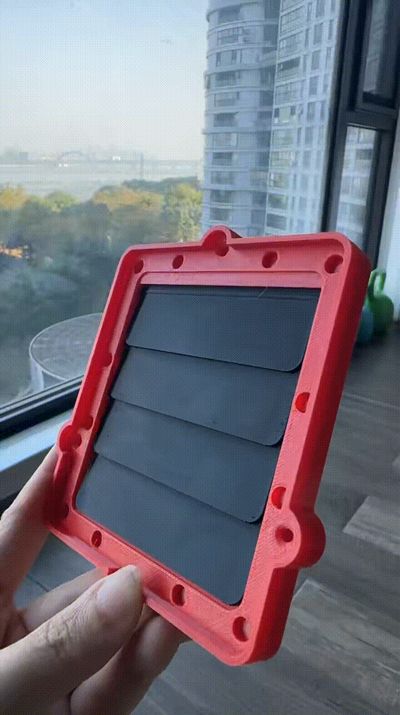
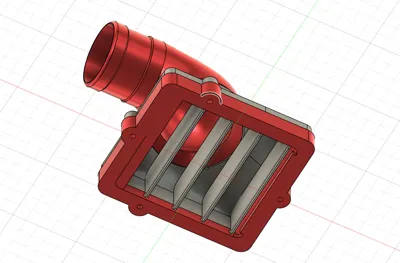
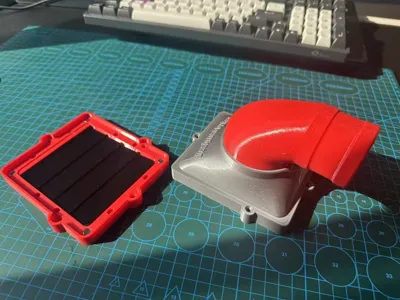
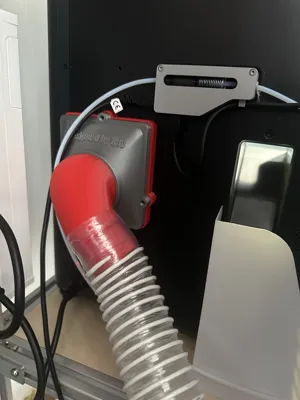
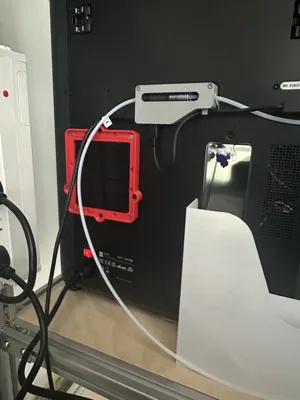
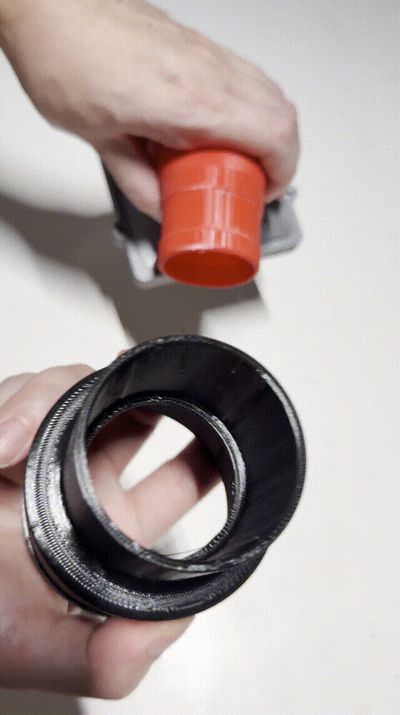
P1S Exhaust Vent with Damper (Check Valve)
Why choose my model
- Need for multiple machines to share a single exhaust vent—for example, I have only one hole in the wall but two machines
- When vents are paralleled, a check valve is crucial Traditional PVC fittings would be very bulky, and my space is limited Exhaust vent models on Makerworld do not have a built-in check valve version, so I made one myself
- Compared to other universal joints, my version offers excellent smoothness and a pleasing appearance
- Strong magnetic adhesion, accurate hole positions, also suitable for users without magnets
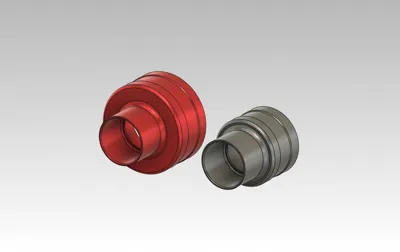
- Besides the standard 50mm (2-inch) diameter, in the second print profile, I also included 75mm (3-inch) and 100mm (4-inch) adapters for larger diameter ducts
Installation Tips:
Don't forget to remove your activated carbon filter it blocks 50% of the airflow and with external exhaust, we no longer need it

- There are two ways to fix the vent:
If frequent disassembly is required, consider using 6mm*3mm magnets for magnetic attachment, the quantity depends on the actual magnetic force of your magnets (I used N52 magnets, placing them only in the four corners was sufficient for fixation), up to 24 pieces can be installed meanwhile, the check valve is fixed with 4 M3*12 screws (the backplate hole sizes vary, for smaller holes, consider using self-tapping screws to tap them, or simply omitting two screws won't have much impact; I personally installed three screws on the top, bottom, and right side)
- If disassembly is not required, consider directly installing with 4 M3*30 screws
Boost Me (for free)
If you find this model useful, please give me a free boost with a click of your finger
Change Log:
2026-01-28 Update: Added print profile, provided an exhaust vent T-joint for two machines in parallel, default diameter is 50mm+50mm to 75mm, also applicable with the multi-diameter adapter in print profile 2 (If you have other diameter requirements, you can also contact me)

2026-01-28 Update: Added print profile, provided TPU gaskets, if you have TPU, you can choose to print them to further increase airtightness

2025-11-16 Update: Significantly reduced blade thickness (1.25mm→0.6mm), this makes airflow smoother

2025-11-15 Update: Strengthened the inner edges of the duct, this provides better support

2025-12-13 Update: Added print profile, provided 75mm and 100mm duct adapters


License
You shall not share, sub-license, sell, rent, host, transfer, or distribute in any way the digital or 3D printed versions of this object, nor any other derivative work of this object in its digital or physical format (including - but not limited to - remixes of this object, and hosting on other digital platforms). The objects may not be used without permission in any way whatsoever in which you charge money, or collect fees.
Comment & Rating (21)