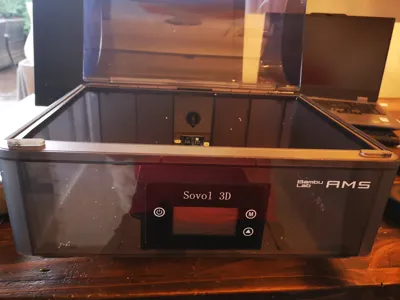
Bambu Lab AMS heater


Print Profile(4)


Description
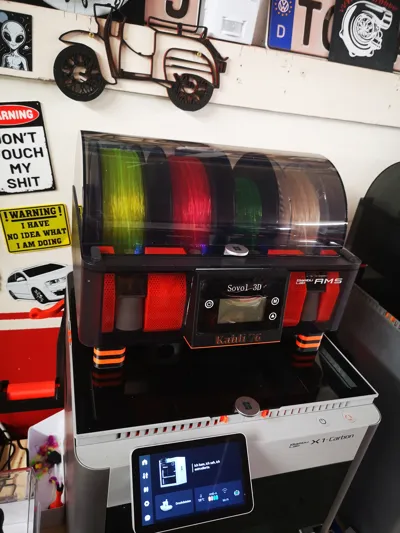
Hey, I built my own AMS heater / dryer I am still very satisfied with the SOVOL OFFICIAL dryer
But since I sold my good Ender 3 V2 Neo I no longer need the separate dryer and I thought, why not just combine both, and it worked out relatively well If you have any questions, feel free to contact me
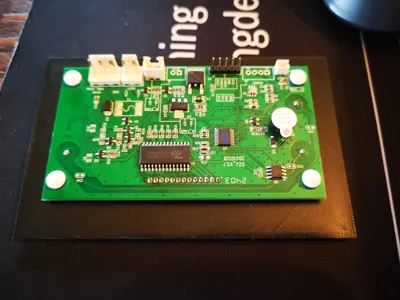
I completely disassembled the heating system the (black) display was carefully heated and the adhesive came off very well
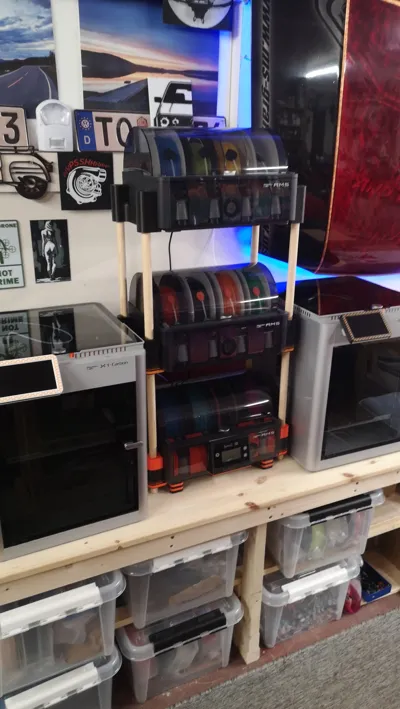
This AMS has been in use for quite some time now and works very well no problems with temperature or electronics
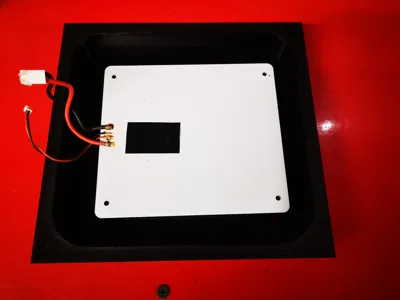
Under the heating plate, I also glued a gold foil to somewhat stop the heat However, it should also work well without it
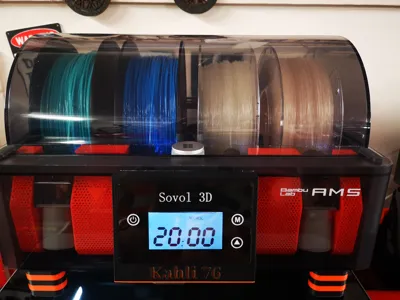
With this, I naturally print TPU permanently from all possible brands, without problems You can also contact me about this
My nickname was removed from the provided prints :-)
From this device (pictured below) comes all the electronics and these good drying devices can be ordered on AliExpress

The power cable and its plug were also taken from the original and with the appropriate drill bit, I routed it out the back (as marked in the picture) and reattached it with the original plug

The template (the single PLA file) is for better cutting out the heating element and finding the screw holes personally, I only attached everything with Tesa double-sided tape and it works great

The white clips of the electronics board in the picture fit perfectly and you can reattach them with the original clips and the white clips can simply be carefully pried off

IMPORTANT: PLEASE TAKE PICTURES OF EVERYTHING WHEN DISASSEMBLING, THIS WILL HELP YOU DURING REASSEMBLY…!
License
You shall not share, sub-license, sell, rent, host, transfer, or distribute in any way the digital or 3D printed versions of this object, nor any other derivative work of this object in its digital or physical format (including - but not limited to - remixes of this object, and hosting on other digital platforms). The objects may not be used without permission in any way whatsoever in which you charge money, or collect fees.
Comment & Rating (1)