
Pencil Electrical maker
Print Profile(0)
Description
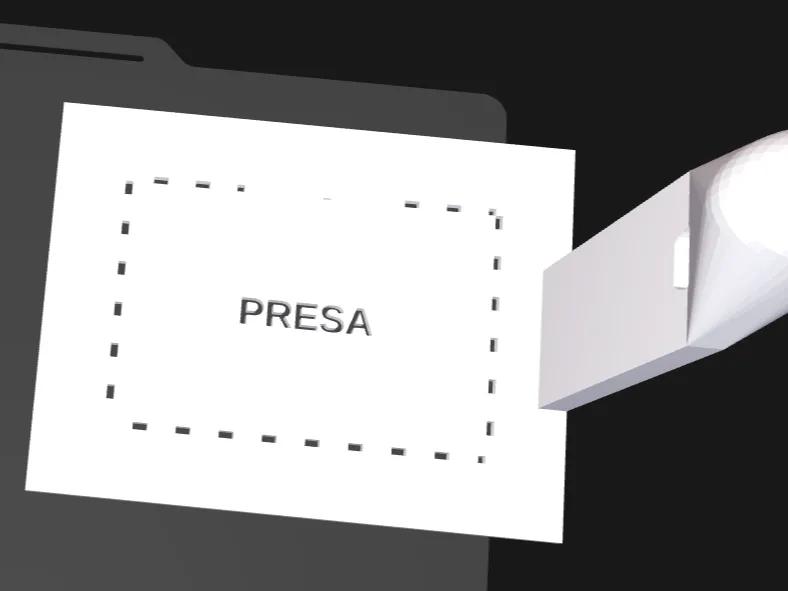
Professional and fully customizable template for marking electrical boxes on the wall before installation!
📐 What does it do
This template allows you to mark the position of electrical boxes directly on the wall with millimeter precision using spray paint. The dashed outline marks the exact perimeter of the box, while the central text indicates the function (SOCKET, TV, RJ45, INTERCOM, etc)
✨ Main Features
✅ Pre-configured Standard Boxes
- 503: 108 x 74 mm (3 modules)
- 504: 135 x 74 mm (4 modules)
- 507: 183.5 x 90 mm (7 modules)
- Customizable custom sizes
✅ Predefined Texts TV • SOCKET • RJ45 • INTERCOM • THERMOSTAT • RJ11 • LIGHT • CUSTOM
✅ Smart Dashed Outline
- Marks the exact perimeter of the box
- Solid outer frame (20mm) for structure and grip
✅ Ergonomic L-shaped Handle (Optional)
- Can be positioned on the right or left
- L-shaped design: first horizontal (60mm), then vertical (35mm)
- Allows you to hold the template without getting dirty with spray paint
- Completely removable if you prefer
✅ Quick Identification
- Box number printed at the top (empty, spray through)
- Immediately recognize which template you are using
🎯 How to Use
- Customize in OpenSCAD: modify box type, text, handle position
- 3D Print: use 2-3mm thickness for rigidity
- Position on the wall: align the template where you want to install the box
- Grip the handle: hold the template steady without touching the surface
- Spray: apply light spray over the template
- Remove: the perfect outline and text remain on the wall!
🔧 Customizable Parameters
openscad
box_type = "503"; // 503, 504, 507 or custom text = "SOCKET"; // TV, SOCKET, RJ45, etc. with_handle = true; // true/false handle_position = "right"; // right, left, none dashed_outline = true; // true/false outer_frame_width = 20; // frame thickness (mm) text_size = 8; // text size
🖨️ Recommended Print Settings
- Layer Height: 0.2-0.3mm
- Infill: 20-30%
- Perimeters: 3-4
- Supports: no supports
- Material: PLA, PETG or ABS
- Recommended thickness: 2-3mm for optimal rigidity
💡 Pro Tips
- Use low-pressure spray to avoid smudges
- The L-shaped handle allows you to hold the template firmly without getting dirty
- Print multiple templates with different texts to save time on large jobs
- The 20mm outer frame provides enough structure for easy handling
🛠️ Utility for Electricians and Installers
Perfect for:
- Renovation works
- New electrical installations
- Professional and precise markings
- Saving time during the marking phase
- Ensuring perfect alignments
Fully parametric and customizable OpenSCAD file!
License: Creative Commons - Attribution
Author: [Your name]
License

You shall not share, sub-license, sell, rent, host, transfer, or distribute in any way the digital or 3D printed versions of this object, nor any other derivative work of this object in its digital or physical format (including - but not limited to - remixes of this object, and hosting on other digital platforms). The objects may not be used without permission in any way whatsoever in which you charge money, or collect fees.


Comment & Rating (0)