Crafting Stars (also for children)


Print Profile(4)


Description
Enchanting Christmas Stars
With this star winder, beautiful Christmas stars can be crafted from raffia or felt wire in just a few minutes – perfect for children, but equally for anyone who wants to create unique Christmas gifts or decorations themselves.
Perfectly suited for:
- joint crafting sessions during Advent
- children who want to make small handmade gifts for family, friends, or grandparents
- homemade tree or window decorations
- simple crafting activities in daycare, school, or at Christmas parties
- anyone who wants to quickly make beautiful stars without complicated instructions

Crafting Instructions
Materials
- The printed star winders
- Felt wire or raffia:
- 85 cm for small stars
- 115 cm for large stars
- Optional:
- Scissors, pliers, beads, or small decorations for embellishment
- the printed threading aid
The small stars can also be made well with raffia. They are then slightly less durable but can be fixed with a drop of glue.
Preparation:
- Choose the desired star size (small/large).
- Cut the felt wire/raffia to the appropriate length.
- Tip: Sometimes it helps to wrap the end with a piece of tape.
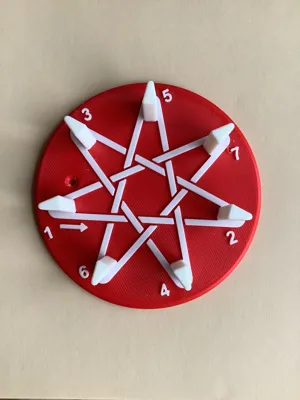
- Start at number 1. Leave about 5 cm of felt wire protruding at the back and secure it by wrapping it once around the pin marked 1. Then you can hold the end with one hand or thread it through the hole.
Winding:
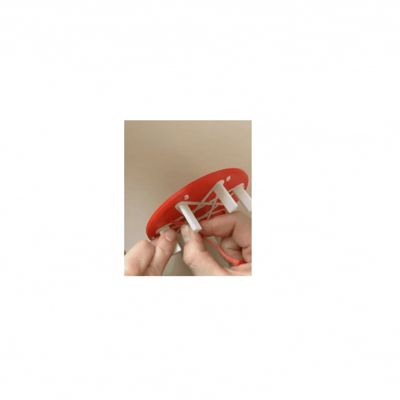
- Follow the numbered sequence on the pins. Guide the wire tightly around each pin one after another until you reach the starting point again.
- Pay attention to the drawing and always check whether you need to guide the wire over or under the other felt wires. If you wish, you can use the threading aid.
Finishing
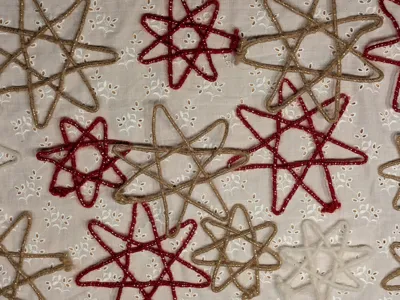
- Align everything nicely again and straighten the star.
- Knot or twist the two ends together and cut off any excess wire.
- Optional: Decorate the star with beads, ribbons, or other embellishments.
Tips for Children:
- Children usually manage very well without the threading aid.
- However, it's best to first look together at when the wire needs to be threaded over and when under.
- Adults can also help keep the wire taut.
- Young children should first practice with soft ribbons, cords, or raffia.
Printing Notes:
A color change is necessary to print the text.
- I don't have an AMS myself, so there are two print profiles with a pause where you can change the filament. The pause was set at Layer 26 (5.20).
- There are two extra print profiles for AMS owners.
Boost Me (for free)
Do you like the model? Then feel free to give it a Boost! It costs you nothing – but it makes me happy. 😊
License
You shall not share, sub-license, sell, rent, host, transfer, or distribute in any way the digital or 3D printed versions of this object, nor any other derivative work of this object in its digital or physical format (including - but not limited to - remixes of this object, and hosting on other digital platforms). The objects may not be used without permission in any way whatsoever in which you charge money, or collect fees.
Comment & Rating (0)