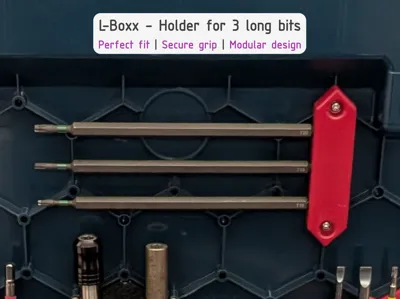
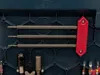
L-Boxx - Holder for 3 long bits


Print Profile(2)

Bill of Materials


Description
L-Boxx - Holder for 3 long bits
No more chaos in the toolbox! Previously, my long bits always flew around loosely in the L-Boxx, which was not only annoying but also cost time searching.
This holder for three long bits was one of my first projects after purchasing my 3D printer. It perfectly utilizes the honeycomb structure in the lid of the L-Boxx. This way, the bits are always within reach and securely stored. An invaluable advantage in everyday work: When I pack up at the end of the day, I can see at a glance whether all three bits are in their place or if something has been left behind on the construction site.
✨ Features
- Specialized: Design optimized for 3 long bits.
- Organized: Immediate control over tool completeness.
- Space-saving: Utilizes the unused space in the lid of the L-Boxx.
- Secure Hold: Extremely stable due to screwing with threaded inserts.
🖨️ Print Settings (Recommendation)
- Material: PLA or PETG
- Walls: 2
- Infill: 15% (Gyroid)
- Support: Yes (required)
🔧 Assembly
- Prepare L-Boxx Lid: Thermally insert three M3 threaded inserts (heat-set inserts) (e.g., with a soldering iron) into the existing receptacles in the lid. Ensure they are flush with the surface.
- Install Holder: Position the holder in the desired field of the honeycomb structure.
- Screw In: Pass three M3x8 hex socket head screws through the mounting holes into the prepared threaded inserts.
- Secure: Tighten the screws evenly until the holder is securely seated.
- Load: Sort in your long bits and done!
ℹ️ Information
I have designed other bit holders for the L-Boxx.
You can find them at the following link: Bosch tools and accessories.
____________________________________
📸 Show us your results! 😀
I look forward to your 💬feedback, a ⭐star rating, a ❤️like and 📷pictures of your 🖨️prints!
🔍 Discover more
Interested in my other models?
Feel free to look around my profile!
There you will find more useful accessories, decoration ideas and practical everyday helpers.
Link: https://makerworld.com/de/@exo2dus
_____________________________________
Boost Me (for free)
It costs you nothing and you support my work with it. 😀
Thank you and happy printing!
License
You shall not share, sub-license, sell, rent, host, transfer, or distribute in any way the digital or 3D printed versions of this object, nor any other derivative work of this object in its digital or physical format (including - but not limited to - remixes of this object, and hosting on other digital platforms). The objects may not be used without permission in any way whatsoever in which you charge money, or collect fees.
Comment & Rating (0)