Radiator fan / Radiator booster (Type 33)


Print Profile(2)

Bill of Materials

Description
Boost Me (for free)
A small boost for you, a big one for my project!
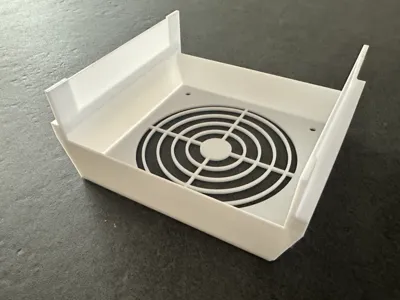
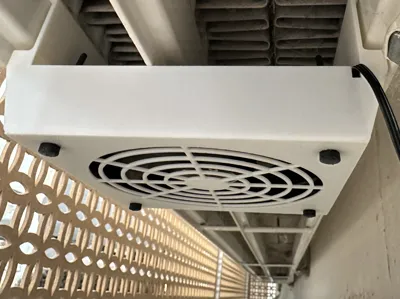
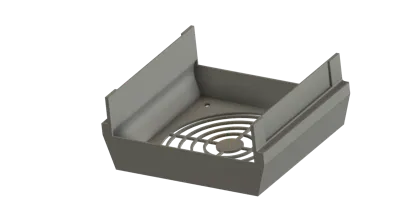
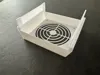
Increase heating performance and save energy! This modular radiator booster for radiator type 33 solves the problem of heat accumulation – especially behind radiator covers or under windowsills. Active air circulation heats the room faster and the heating works more efficiently (perfect for heat pumps or low flow temperatures)
Highlights:
- Modular: Print as many elements as your radiator is wide.
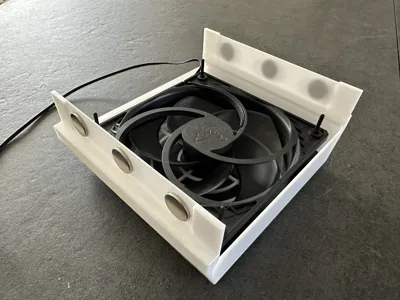
- Quiet: Optimized for Arctic P12 Silent (120mm) fans.
- Low Vibration: Designed for use with rubber fan mounts.
- Flexible: Magnets allow the fan to be mounted and removed anywhere.

The mount is designed so that any magnets up to 20mm in diameter can be installed. The recess is designed for 2mm magnets, and the protruding lips on the side allow the mount to be easily pushed under the heater without getting caught on the magnets

For my setup, I used 6 pieces of 15mm x 2mm magnets for each mount. As a power supply, I recommend an adjustable 3–12 V model to conveniently adjust the fan speed (and thus the volume) via the voltage. The fans can be directly connected to the power supply via Wago terminals and extended. The pinout of the fan connector can be viewed on the manufacturer's website
Note: Make sure the fans are not PWM fans, but rather have their power fixed at 12V. The correct fans are linked below
Control is smart via a Shelly Plug in conjunction with Home Assistant
Model Variants
Radiators are not standardized. The internal dimensions and the thickness of the fins vary depending on the manufacturer

To determine the correct model, the internal dimension between the two outer fins (A) and the internal dimension between the central webs of the two outer fins (B) should be measured

Model A
e.g. Kermi

Model B
e.g. Buderus

Is your model not listed? No problem! If you send me the relevant data via private message, I can gladly make an adjustment. The specifications for (A) and (B) are important.
Installation
- Place the fan into the booster. Depending on the model, you may need to insert the fan at an angle.
- Insert the fan mounts from below and let them snap into place. Attention: There is a snap point for the fan and one for the booster!
When using the fan mounts, make sure they are long enough! Mounts with the correct length are linked below
Material
PETG, ABS or ASA. Please DO NOT use PLA! Radiators get warm, PLA becomes soft and deforms. I chose Bambulab ASA
Material List & Sources
- ARCTIC P12 (5 pieces) 120 mm case fan, 12V
https://amzn.to/4pExD9m
- WAGO connection terminals (consider how the connections will be built beforehand. Wago terminals are available in different sizes)
https://amzn.to/4jRImvV
- 20 pieces rubber fan mounts (sufficient for 5 fans)
https://amzn.to/45VvCOZ
- Neodymium Magnets 15mm x 2mm
https://amzn.to/49CyLo9
- Power Supply 12V, 3-12 Volt adjustable
https://amzn.to/4sQKIzh
- Shelly Plug for smart control
https://amzn.to/3YGfY6o
- Superglue for attaching the magnets
https://amzn.to/4qJd50J
Transparency notice: The links above are affiliate links. As an Amazon partner, I earn from qualified sales, without any extra cost to you! If you support me through this, I can continue to invest time in new projects and publish my models on Makerworld. Thank you very much for that
License
You shall not share, sub-license, sell, rent, host, transfer, or distribute in any way the digital or 3D printed versions of this object, nor any other derivative work of this object in its digital or physical format (including - but not limited to - remixes of this object, and hosting on other digital platforms). The objects may not be used without permission in any way whatsoever in which you charge money, or collect fees.
Comment & Rating (7)