CHERY TIGGO 7 PHEV Charging Cable Holder


Print Profile(2)


Description
ENGLISH BELOW ⬇️
CHERY TIGGO 7 Plug-In Hybrid – מתקן תלייה לכבל טעינה
?מה זה
מתקן שמתאים במיוחד ל־צ'רי טיגו 7 היברדית ומאפשר לאחסן את כבל הטעינה בצורה מסודרת, נקייה ונגישה בתוך תא המטען בלי בלגן, בלי תזוזות, ובלי שהוא יתפוס שטח סתם
🔩 התקנה ללא קידוח – שימוש בחריצים המקוריים של הרכב
המתקן מתחבר לחריצים הצרים שקיימים לאורך דופן תא המטען
החיבור נעשה בצורה נקייה ובטוחה באמצעות בורג טי מודפס שנתפס בחורים, מהדק ואום הכול בלי קידוחים ובלי כלים
📸 כל התמונות בתצוגה הן מהתקנה אמיתית ברכב
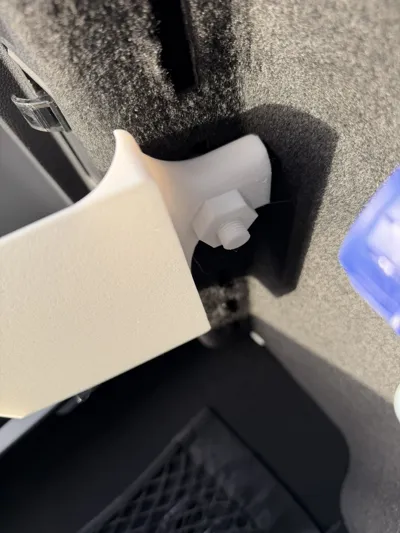
📌 שלב 1 – הכנסת הבורג לחריץ
הבורג המעוצב בצורת טי מיועד במיוחד לחריצים הצרים שבתא המטען
יש להחזיק אותו כך שה"כנפיים" שלו מקבילות לכיוון החריץ כדי לאפשר החדרה חלקה
לאחר הכנסת הבורג פנימה, מסובבים אותו חצי סיבוב (90°) — עכשיו הכנפיים שלו פונות לרוחב והוא ננעל מאחורי הפלסטיק
זה המנגנון שמעניק את חוזק האחיזה
📌 שלב 2 – חיבור המחזיק לבורג
לוקחים את מחזיק הכבל ומשחילים אותו על הבורג דרך החור האחורי
החלק נכנס למקומו בצורה מדויקת והבורג כבר מחכה בפנים
📌 שלב 3 – הידוק עם האום
מבריגים את האום עד שהמתקן צמוד בצורה מלאה לדופן הרכב
הכול נעשה ביד — בלי כלי עבודה ובלי שום מאמץ
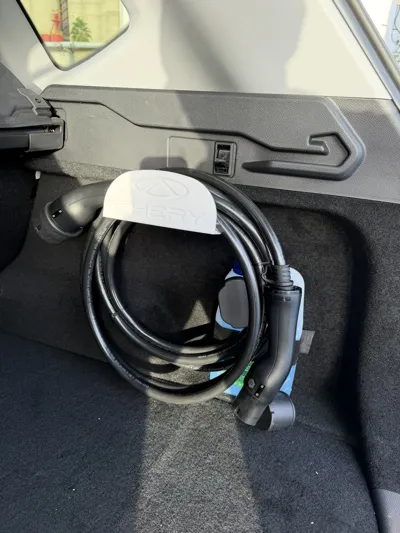
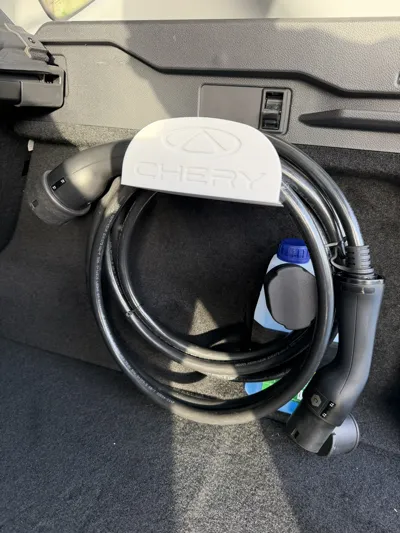
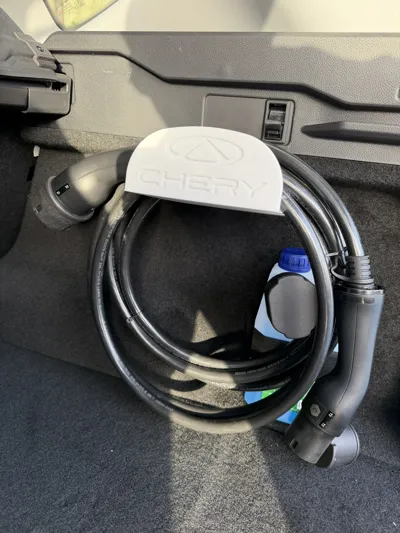
⚙️ זהו! המתקן מותקן ומוכן לשימוש
הכבל יושב יפה, מסודר, לא זז בנסיעה, והכול נראה כמו מקורי
מומלץ להדפיס ב־
ASA/PETG
בגלל עמידות טובה יותר לחום
📂 מצורפים לפרויקט פרופילי הדפסה מוכנים לשני החומרים
------------------
Cable Holder for CHERY TIGGO 7 Plug-In Hybrid – Charging Cable Mount
🧩 What is it?
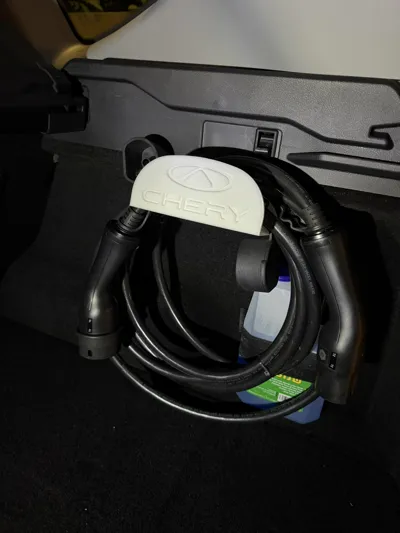
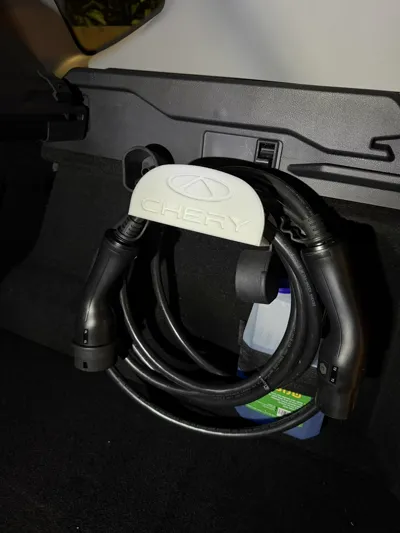
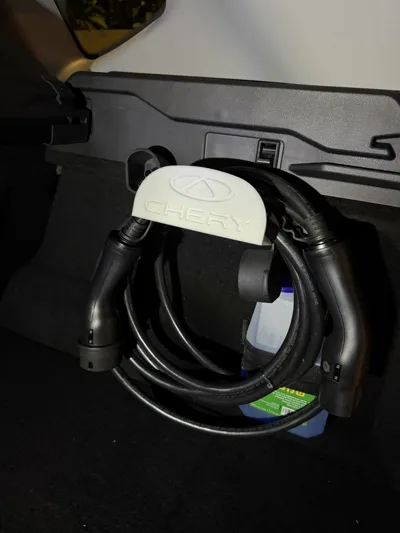
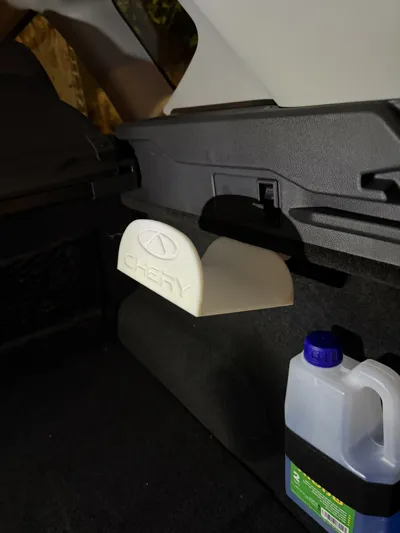
A custom 3D-printed mount designed specifically for the CHERY TIGGO 7 Plug-In Hybrid. It keeps the charging cable organized, clean, and easily accessible in the trunk — without moving around or taking up unnecessary space.
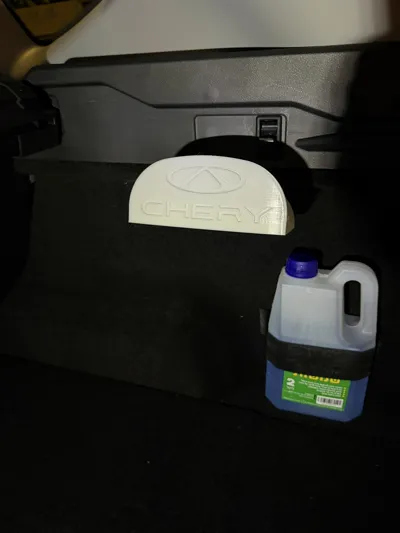
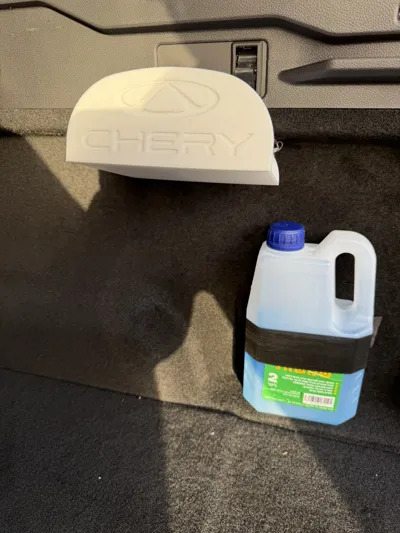
The holder is shaped to match the trunk wall perfectly and includes an embossed “CHERY” logo for a clean, OEM-like appearance.
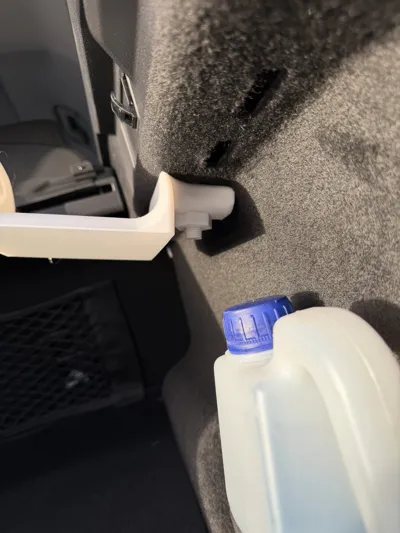
🔩 Tool-free installation – attaches using the factory trunk slots
The mount connects to the narrow factory slots that run along the inner trunk wall using a custom T-bolt, a backing piece, and a nut — with no drilling and no tools required.
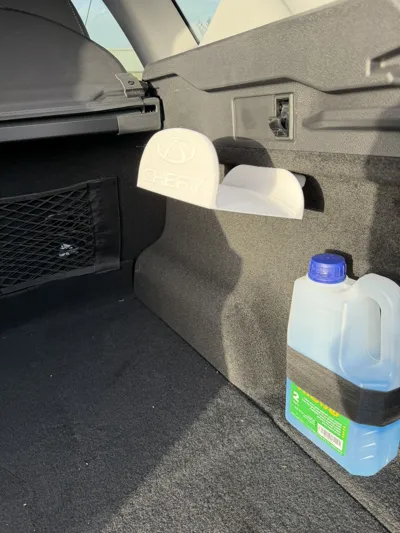
📸 All photos are from a real installation
So you can be confident the fit is accurate.
📌 Step 1 – Insert the T-bolt
Align the bolt’s wings with the direction of the slot so it can slide in smoothly.
Once inside, rotate the bolt half a turn (90°) so the wings turn sideways and lock behind the panel.
This locking action is what gives the mount its strong and stable grip.
📌 Step 2 – Attach the holder
Slide the holder onto the bolt through the rear hole until it sits flush against the panel.
📌 Step 3 – Tighten the nut
Screw on the nut by hand until the mount is firmly secured with zero movement.
No tools are needed.
⚙️ Done! The holder is ready to use
Your charging cable will stay neatly stored and won’t move while driving.
Recommended printing
Use ASA or PETG for high heat resistance.
Print profiles for both materials are included in the project.
License
You may create derivative works based on this object, provided that all such derivative works are published exclusively on the MakerWorld platform and include proper attribution to the original creator. You may not share, upload, host, distribute, or publish this object—or any derivative work of this object—on any other digital platform, marketplace, or distribution channel. Commercial use of this object and any derivative works is strictly prohibited. This includes, but is not limited to, selling, renting, sublicensing, or using the object in any context in which you receive monetary compensation or other financial benefits.
Comment & Rating (2)