Parametric Tag – 10 Christmas Motifs (Fusion 360)


Print Profile(1)

Description
DON'T USE THE CUSTOMIZE BUTTON (IT WILL NOT WORK), DOWNLOAD .F3D FILE AND MAKE YOUR CHANGES IN FUSION360.
You need Damion font installed in your PC. You can find it here: https://fonts.google.com/specimen/Damion
This is a fully parametric Christmas gift tag created in Fusion 360.
You can fully customize the model by choosing from 10 different motifs, adjusting the motif scale, editing the name or text, changing text size, and fine-tuning multiple layout parameters.
🎄 Motifs Available
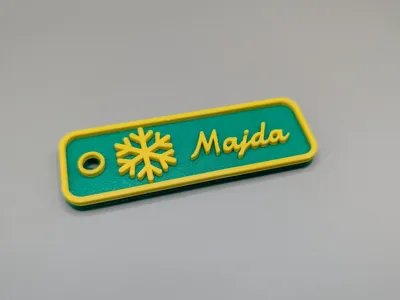
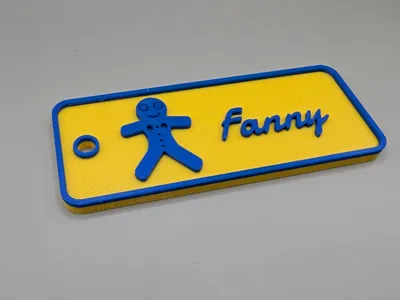
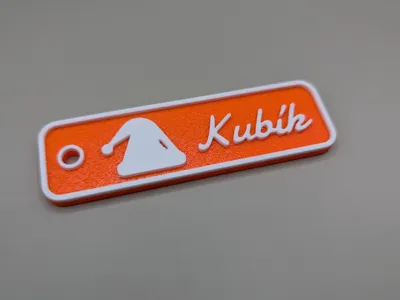
This parametric tag includes 10 Christmas motifs you can switch between:
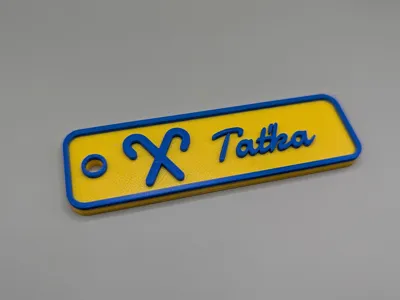
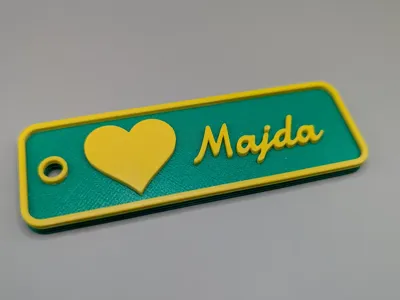
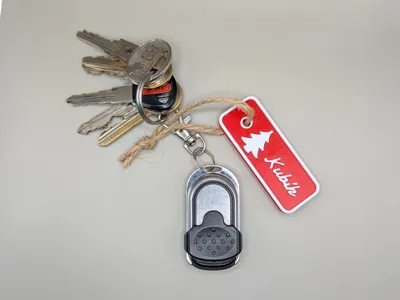
- Reindeer
- Christmas Tree
- Snowflake
- Gingerbread Man
- Present
- Snowman
- Shooting Star
- Santa Hat
- Candy Canes
- Heart
✨ How to Customize the Tag
1. Download the .f3d file
This model is fully parametric, so editing is done directly in Fusion 360.
2. Open the file in Fusion 360.
3. Choose your preferred motif.
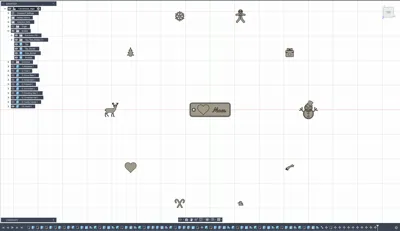
Each motif is a separate body. Hide the Preview folder (10 bodies) using the eye icon to keep the workspace clean.
4. Go to:
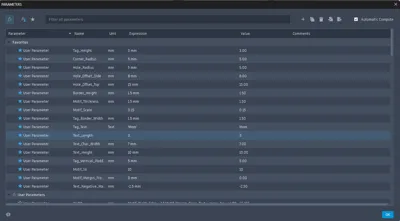
Modify → Change Parameters
5. Set the main parameters:
- Motif_Id (1–10) → selects the motif
- Motif_Scale → changes the overall size of the tag
- Tag_Text → the name or word you want on the tag
- Text_Length → number of characters in the text
- Text_Height → adjusts the text size
6. Show the motif you selected:
- Hide the default motif body (component) „10) Heart“
- Enable visibility for the motif that matches your Motif_Id (e.g., 3) Snowflake)
This lets you preview the final look and check spacing.
7. Fine-tune layout and spacing:
- Text_Char_Width → adjusts left/right spacing around the text
- Motif_Margin_From_Text → distance between motif and text
- Text_Negative_Margin → move text toward or away from the motif
- negative = closer
- positive = further
8. Optional advanced parameters (for experienced users):
- Corner_Radius
- Hole_Radius
- Hole_Offset_Side / Hole_Offset_Top
- Border_Height
- Motif_Thickness
- Tag_Border_Width
- Tag_Vertical_Padding
9. Export for slicing.
Go to File → Export → 3MF and save the model.
This ensures correct import into Bambu Studio / PrusaSlicer / Orca.
(Alternatively, STL works too, but 3MF keeps orientation and units.)
For best multi-color printing results, keep Border_Height, Motif_Thickness, and Text_Height the same thickness — this allows printing the base plate first, then switching filament once to print all top details (motif, text, border, hole ring) in a second color.
💡 Quick Tips
Text in Fusion 360 is not fully parametric.
Fusion handles text differently from other sketch elements, so depending on the chosen font and characters, the layout may shift slightly.
If the text moves too close to the border or outside the tag, adjust Text_Char_Width to correct spacing.
• Text size can be tuned using:
- Text_Height (overall text scale)
- Text_Length (number of characters)
Every name behaves differently.
Short names, long names, or names with wide letters (M, W) may require small spacing adjustments to keep the layout balanced.
Fine details require attention.
The Gingerbread Man and Reindeer motifs include small details (holes, antlers).
For best results:
- use a 0.2 mm nozzle, or
- increase Motif_Scale so the details remain printable with a 0.4 mm nozzle.
🖨️ Recommended Slicer Settings
A sample print profile is included in the project files.
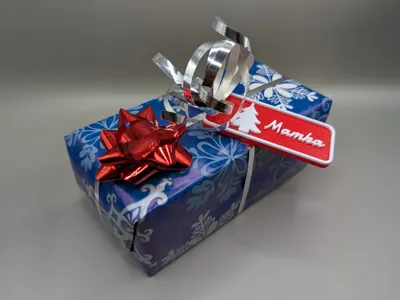
It uses the Tree motif and the sample text “Mom” to demonstrate recommended settings.
After exporting your 3MF from Fusion 360, import it into your slicer
(I personally use Bambu Studio, but any slicer that supports 3MF works).
In the Objects panel, each element of the tag appears separately:
- Body(x) → text characters (Fusion splits them individually)
- Hole_Border
- Motif (Reindeer / Tree / Snowflake …)
- Tag
- Tag_Border
You can assign different colors to these objects.
My recommended setup is a two-color print:
- the Tag in one color,
- everything else (text, border, hole ring, motif) in a second color.
Top surface pattern for the Tag:
In Strength → Top Surface Pattern, choose Hilbert Curve.
This creates a very clean decorative texture.
Quality settings for text and motif:
In Quality → Ironing → Top Layers:
- Speed: 30
- Flow: 30
(Adjust according to your filament; lower flow often gives cleaner characters.)
Ironing is optional, but it significantly enhances text and motif sharpness.
Color tools:
Printers with more extruders or an AMS can assign separate colors to each object.
Single-color printers can simply ignore color assignments and slice normally.
Material:
I printed all samples in PETG, but PLA will usually give even crisper results on small details.
All preview photos were printed on a Bambu Lab P1S printer using PETG with a simple two-color filament swap (using AMS 2 Pro).
License
You shall not share, sub-license, sell, rent, host, transfer, or distribute in any way the digital or 3D printed versions of this object, nor any other derivative work of this object in its digital or physical format (including - but not limited to - remixes of this object, and hosting on other digital platforms). The objects may not be used without permission in any way whatsoever in which you charge money, or collect fees.
Comment & Rating (13)