WAGO 221 Junction Box


Print Profile(2)


Description
UPDATED: VERSION 2
- WAGO connectors now snap in place without moving (thanks to @pulsar).
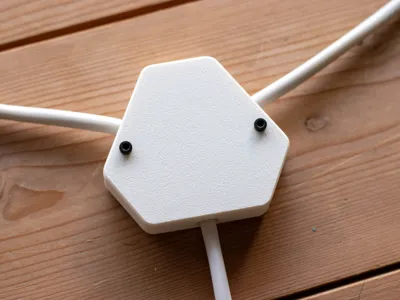
- Lid screws are now not exposed but hidden in the lid.
- Added support for WAGO 221-613
Design
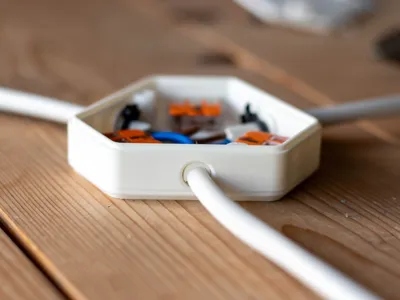
This Hexagonal design is meant to help with cable management and esthetics.
It's compact with enough space inside to work easily with cables.
Compatibility
- Compatible with WAGO 221-413, WAGO 221-412, WAGO 221-613.
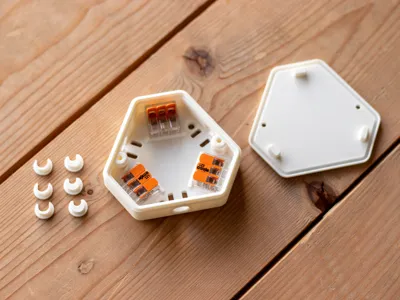
- Wires up to 8.5mm diameter. Smaller Wire Holder Caps are provided to fill the empty space and secure the wire firmly.
Hardware
- WAGO 221
- M3 screws for Enclosure Lid
- Up to M4 screws for wall mount
- Tire Up
Assembly
Assembly is very simple and easy. See pictures for reference.
- Clip the WAGO Connectors starting from the back and push the front to snap in place.
- Insert the wire through the side holes.
- Clip the Wire Holder Caps onto the wire and push them into the wire hole.
- Secure wire and the Wire Holder Caps with tire-up through the bottom holes.
- Close the Lid and secure with M3 screws.

⚠ SAFETY DISCLAIMER ⚠
This Junction Box is not Certified. Depending on the country you live in, this junction box might not fill the regulatory requirements to be permitted for usage. Use it at your own risk. It does not provide electrical insulation, fire resistance, or safety certification and it may result in personal injury, fire hazard, or property damage. Best suited for DIY low voltage projects.
Support me: https://ko-fi.com/geroulas
Build More:


Comment & Rating (54)