


Print Profile(1)

Description
Hey Makers! 👋
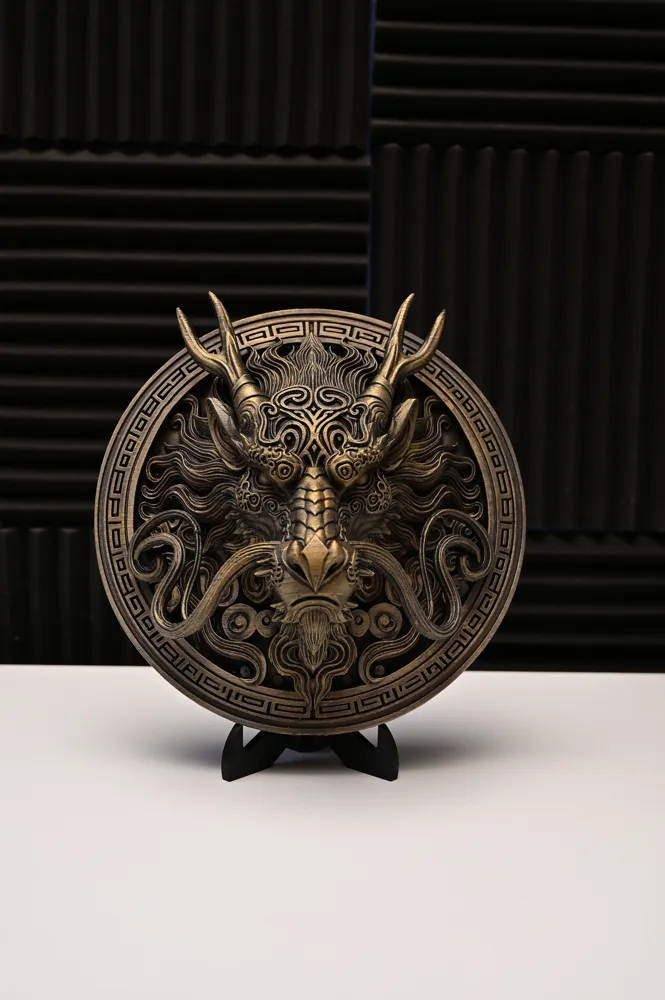
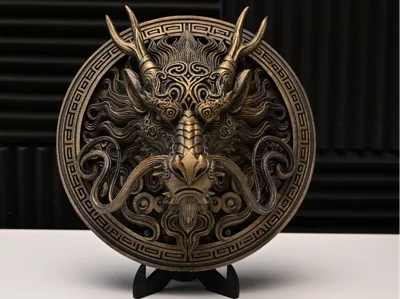
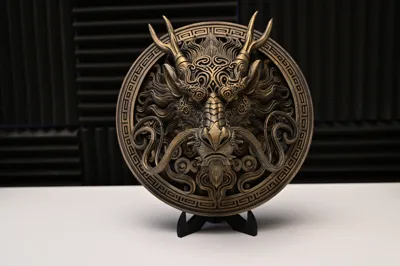
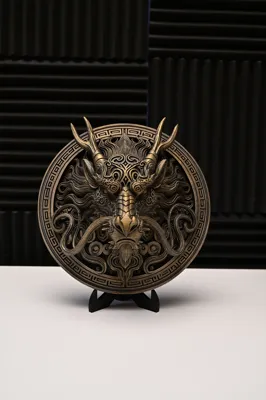
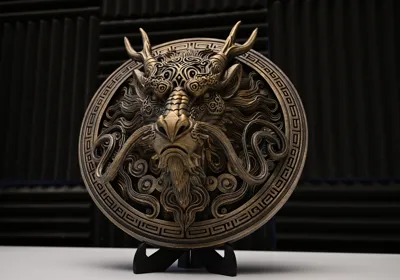
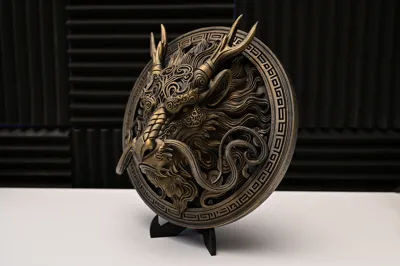
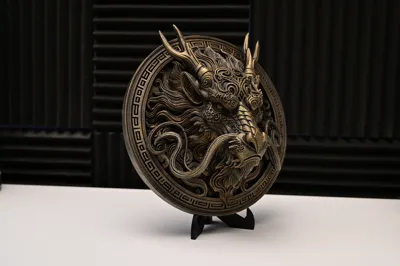
This Imperial Dragon Wall Relief looks like it has been guarding the gate to a forbidden treasure chamber for the last 1000 years — ready to greet anyone with fire who enters your "Man Cave" without permission 🐉🔥
The scales and details are so deep and sharp that it looks like it was cast directly from solid bronze.
🎨 My "Cheat Code" for the look in the photos: I printed it in Matte Black PLA. Then I applied the Drybrushing technique in two steps:
- First, lightly drybrush everything with Bronze.
- Then, very carefully, apply Gold only to the highest spots (tips). This creates the extreme depth effect and triggers the full "God Mode" look! ⚡
Perfect for anyone who prefers to decorate their walls with mythical energy instead of inspiring plant pictures.
⚠️ MY PRINTING EXPERIENCE (Tips for the best result) ⚠️
To ensure the dragon comes out as epic for you as it did in my photos, here is my process:
- Orientation: I printed it UPRIGHT (Vertical)! ⬆️ In my test print, this ensured extremely sharp details. My print profile is set up exactly this way. Note: I haven't tested if it prints just as well lying flat – so I recommend the upright position because I know it works perfectly.
- Supports & Whiskers (IMPORTANT): The profile already contains the necessary support structures. CAUTION: When removing supports, be extremely careful around the face! The long whiskers are fine and delicate. 👉 My Tip: Use small pliers to gently cut/pull out the supports. Don't just yank on them like a Berserker, or the whiskers might snap!
🛠️ Emergency Plan (If something breaks): If a whisker snaps while removing supports – don't panic!
- Option A: A drop of superglue.
- Option B (Pro Move): Briefly heat the break point and the broken piece with a lighter or soldering iron and "weld" the filament back together. After cooling, it looks like nothing ever happened.
Print Details (My Setup)
- Material: Matte Black PLA (best for the Stone/Metal look)
- Layer Height: 0.12 mm or 0.16 mm (High Quality)
- Orientation: Vertical / Upright (My recommendation)
- Infill: 10-15% Gyroid is plenty
More Asian & Mythical Designs from the Relief Forge:
- Chinese Foo Dog Lion Relief → https://makerworld.com/de/models/2638235-chinese-foo-dog-lion-relief-wall-art-decor#profileId-2914461
- Asian Tiger Relief – Guardian of the East → https://makerworld.com/de/models/2107630-asia-tiger-relief-guardian-of-the-east#profileId-2279800
Boost Me (for free)
If you like the design and want to support my work, please leave a Boost 🚀! This helps me massively to create more projects like this for you. And of course: Show me your results (especially your painting skills)!
Happy Printing! 🚀
License
You shall not share, sub-license, sell, rent, host, transfer, or distribute in any way the digital or 3D printed versions of this object, nor any other derivative work of this object in its digital or physical format (including - but not limited to - remixes of this object, and hosting on other digital platforms). The objects may not be used without permission in any way whatsoever in which you charge money, or collect fees.
Comment & Rating (27)