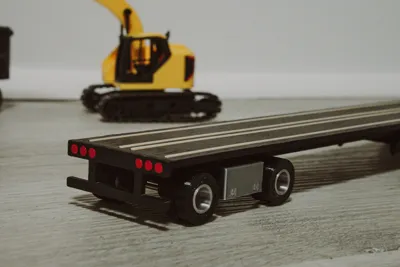
1/64 Flatbed Trailer


Print Profile(1)

Bill of Materials


Description
This is a 1/64 scale flatbed trailer designed to pair perfectly with my 1/64 semi truck.
Boost Me (for free)
Want to see more? Boost me for Free! Thanks,
The model features a low-profile, realistic flat deck, tandem axles, and clean proportions inspired by real-world flatbed trailers.
The deck includes plank-style details to simulate wood decking, making it ideal for hauling scale loads such as construction equipment, pallets, pipe, lumber, or machinery. Designed as a multi-part print, this model allows for clean printing and easy assembly.
Features
- True 1/64 scale
- Realistic flatbed proportions
- Movable Leg Stand
- Tandem axle design
- Deck plank detail for added realism
- Easy to print and assemble
- No AMS required
- Perfect for dioramas and display
🔧 Parts Needed
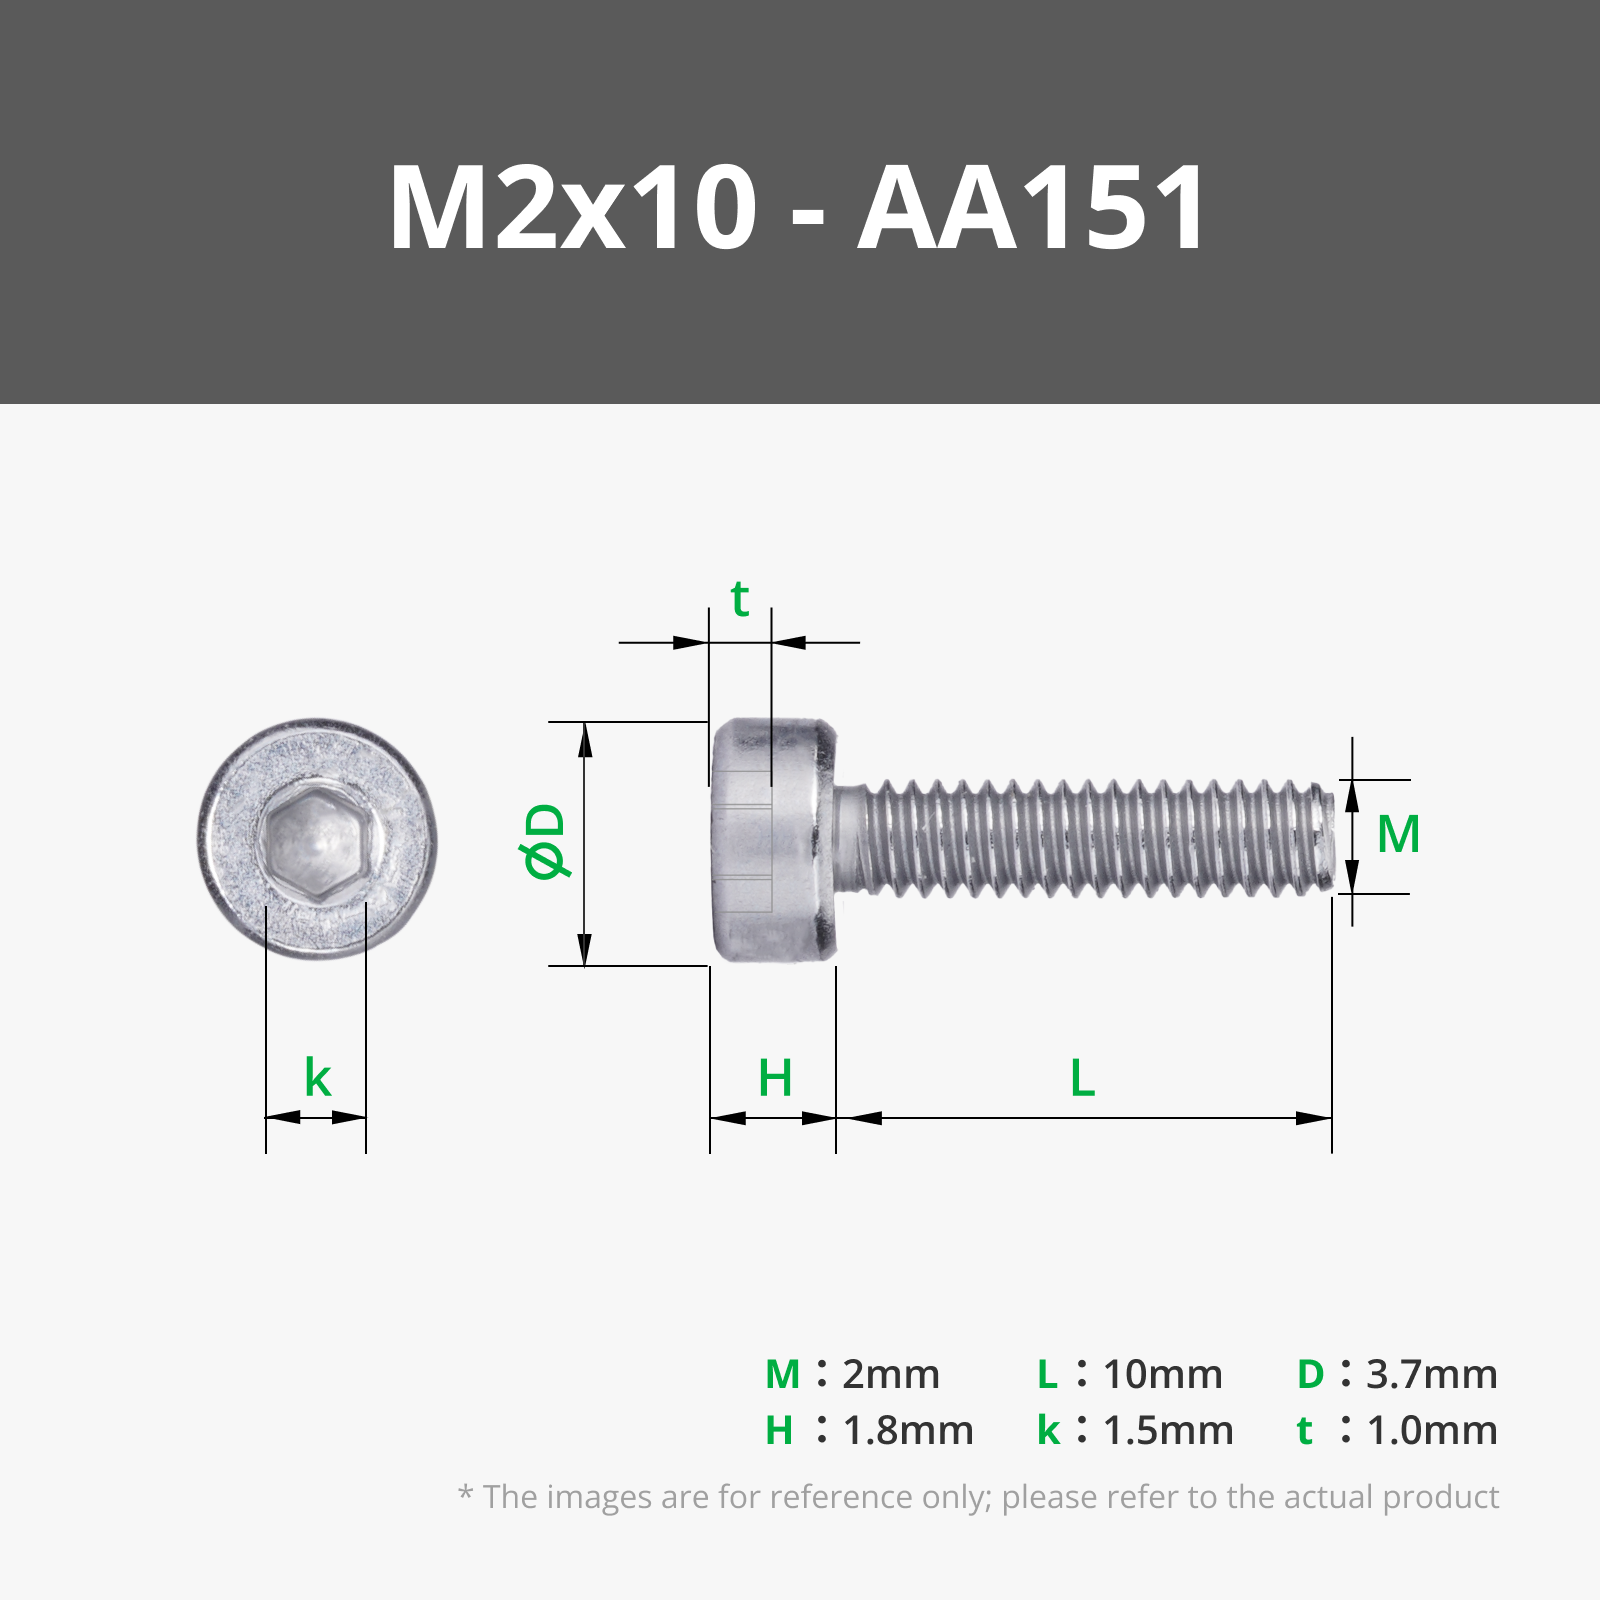
- x4 M2 × 12 mm bolts
- x2 M2 × 8 mm bolts (or shorter if preferred)
- x1 M2 × 6 mm bolt
- x5 M2 nuts
Optional
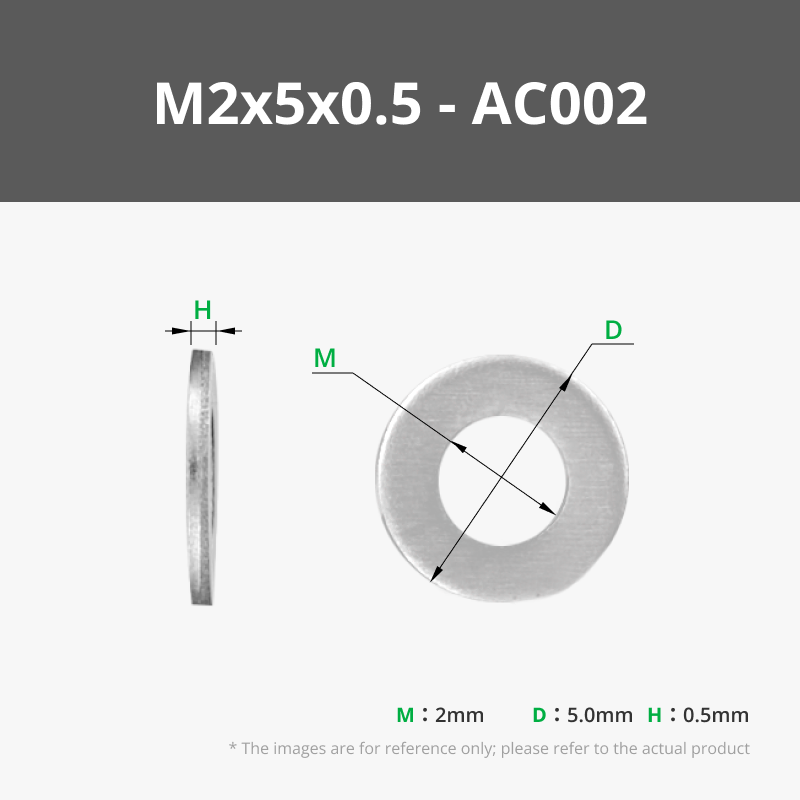
- x4 M2 washers (recommended for smoother wheel rotation)
🛠️ Assembly Instructions
1️⃣ Prep
- Remove all brims and clean up printed parts.
- Test fit parts before gluing.
2️⃣ Deck
- Glue the wood/plank inserts into the deck.
- Allow glue to fully cure before handling.
3️⃣ Stand / Landing Legs
- Insert 2 bolts into the stand legs.
- Tighten to your desired tension so the legs move but hold position.
4️⃣ Wheels & Axles
- Insert an M2 × 12 mm bolt through the wheel rim and axle.
- (Optional) Add an M2 washer between the wheel and axle.
- Secure with an M2 nut and tighten to desired rolling resistance.
- Add a small dab of super glue to the nut to prevent loosening.
- Repeat for all wheels.
5️⃣ Rear Bumper & Lights
- Glue the rear bumper into its mounting holes.
- Glue each light into place, or snap-fit if tolerances allow.
6️⃣ Tool Box
- Glue the tool box between the wheels.
- Ensure it is centered and level before the glue sets.
7️⃣ Hitch
- Thread an M2 × 6 mm bolt into an M2 nut.
- Apply a small amount of super glue to the nut.
- Press the nut and bolt assembly into the hitch hole.
- Ensure it is straight and centered before the glue sets.

Follow me on Patreon https://bit.ly/3MN1Rcx

Boost Me (for free)
Your Support is Appreciated
Thanks.
License
You shall not share, sub-license, sell, rent, host, transfer, or distribute in any way the digital or 3D printed versions of this object, nor any other derivative work of this object in its digital or physical format (including - but not limited to - remixes of this object, and hosting on other digital platforms). The objects may not be used without permission in any way whatsoever in which you charge money, or collect fees.
Comment & Rating (59)