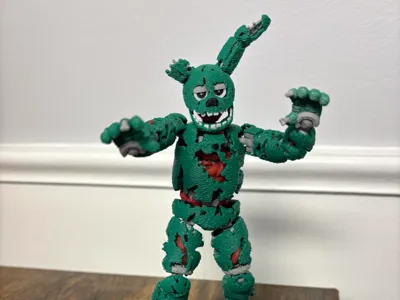
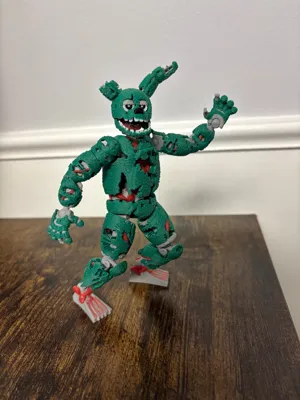
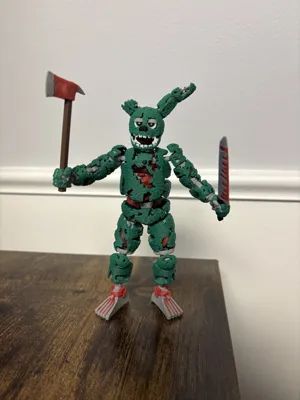
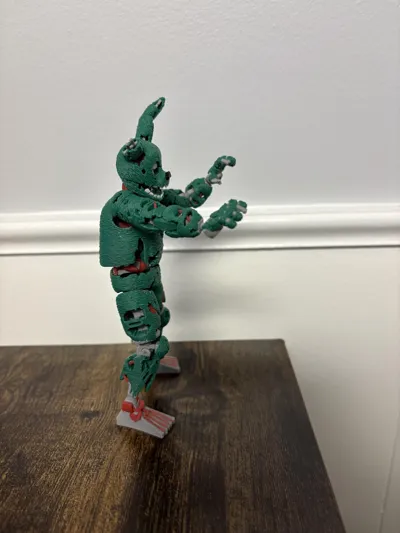
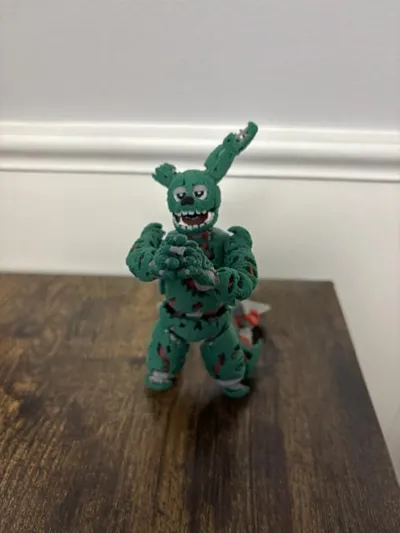
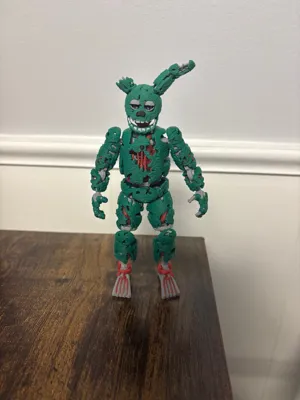
Springtrap Dummy 13


Print Profile(2)


Description
Introducing my newest creation, Springtrap Dummy 13. This was a difficult model to create due to Springtrap being extremely withered and full of holes. My goal for this model was to stay as true to the design as possible while also reinforcing and strengthening the model so that it could be functional and reliable in heavy play. All the models I found online of Springtrap were not durable at all and felt brittle and cheap. Please be mindful of the following parts when removing supports:
Head v2 and v3 - before you fit Springtrap's head onto William Afton's head, make sure to remove all support debris and remnants from within the helmet around the eyes. If any support material is left behind here, the helmet will get stuck and you'll have to pry it off, risking damaging the model. Try to scrape it off so that everything appears flush.

- Torso - due to the nature of Springtrap's design, some supports may be difficult to reach. I highly recommend getting a cheap set of precision screw driver's to assist with support removal as well as flush cut pliers.
- Arms - be careful when handling the upper and lower arm pieces without the frame pieces inside. I tried to beef these areas up as much as possible to prevent breakage while removing supports. Try not to put too mush pressure on either side of the arms where the joint gaps are. I've snapped a few doing this.
I highly recommend printing the above pieces as drafts first so you can get an understanding of where the supports are and how to remove them carefully.
Please take your time when removing the supports. This is a very high quality model, so it will take some time to print completely and I'd hate for you to have to sit and wait hours for replacement parts to print.
I couldn't figure out how to create assembly instructions in CAD, so I just recorded a video of me assembling this model.
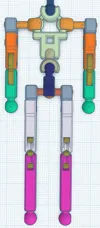
In the above video, I break the upper leg frame piece twice while trying to hammer it in. I've reworked this part of the model so it shouldn't be nearly as difficult to seat the frame inside the armor. You should be able to set both the upper and lower leg frames by hand and without any tools. To do this, I cushion my palms with my shirt and just squeeze like a crazy person. You'll hear a click when they seat fully.
I've upgraded the shoulders since making the above video, so they will look different. They are more durable now and look much better in my opinion.
I've included three different heads, two sets of hands (one articulates and the other is lore accurate), two torso's (take extra care if using version 2 of the torso due to supports appearing behind the veins/organs) and two sets of pizza knives.
I recommend printing the frame parts in PETG to avoid any wear and tear and loose joints.
I felt like I had a lot more to write, so hopefully I'm not missing anything. Please reach out with any questions, comments or concerns. I love all the feedback I've gotten on my previous models. It's really helped to fine tune them and make them even greater.
Documentation (1)
License
You shall not share, sub-license, sell, rent, host, transfer, or distribute in any way the digital or 3D printed versions of this object, nor any other derivative work of this object in its digital or physical format (including - but not limited to - remixes of this object, and hosting on other digital platforms). The objects may not be used without permission in any way whatsoever in which you charge money, or collect fees.
Comment & Rating (769)