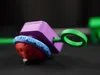
Spinblade – Battle Spinner V2 Bayblade Style Toy


Print Profile(10)

Bill of Materials

Description
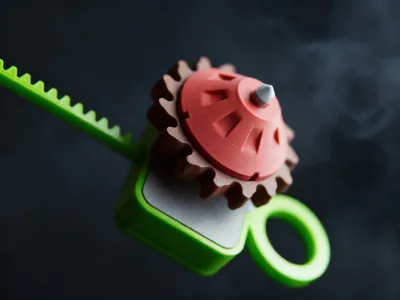
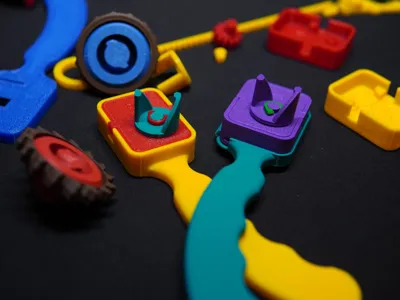
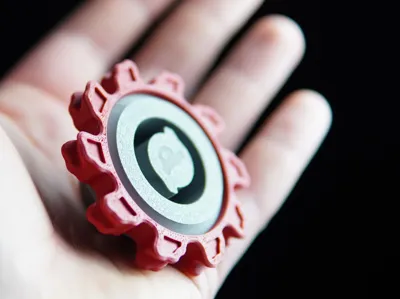
🌀 Spinblade – Modular BattleSpiner
A mechanical fidget designed around the realities of 3D printing
Spinblade is my take on a Beyblade-style spinning toy — but designed specifically with FDM 3D printing in mind.
From the beginning, the goal was to create a fully printable mechanical system that works reliably despite the limitations of layer adhesion, surface finish, and dimensional tolerances. Every part was shaped to respect how FDM actually behaves — not how it should behave in theory.
It’s both a mechanical project and a fidget-style battle spinner.
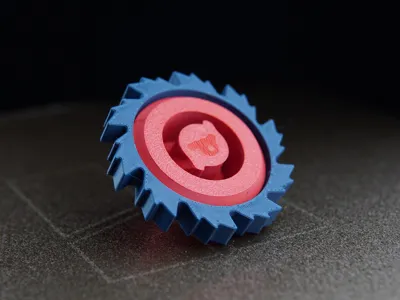
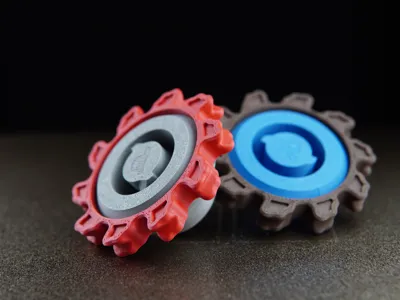
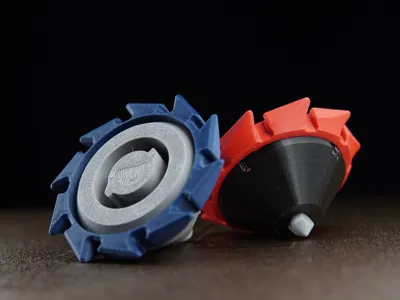
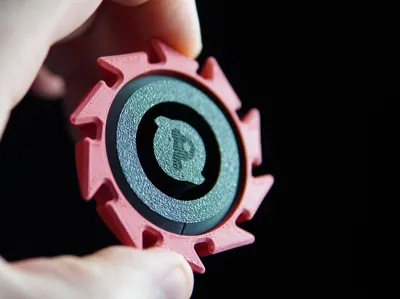
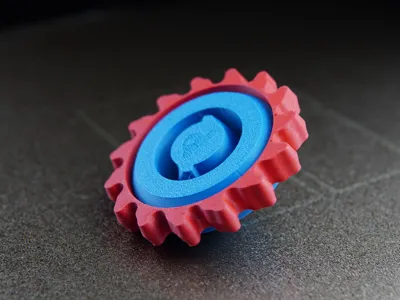
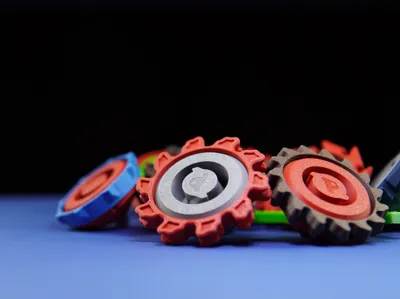
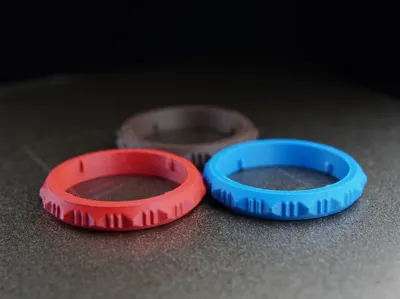
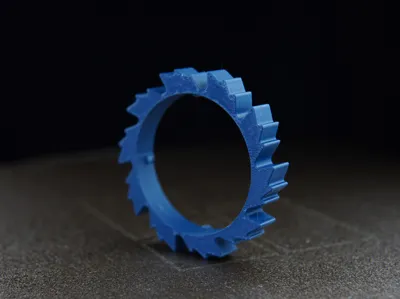
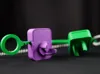
🔩 Modular Disk Architecture
The disk is built from three main components:
a central base
interchangeable outer rings
central pin
The rings mainly differ visually, featuring different tooth patterns, but they also subtly influence contact and spin behavior.
The locking system uses a flexible snap-over protrusion.
It can be assembled and disassembled repeatedly without damage. Both PLA and PETG work well, although PETG handles repeated stress more comfortably.

Tolerances are intentional and relatively tight.
A poorly calibrated printer may result in either a loose snap or a ring that feels too tight. With a properly tuned machine, the engagement feels clean and controlled.

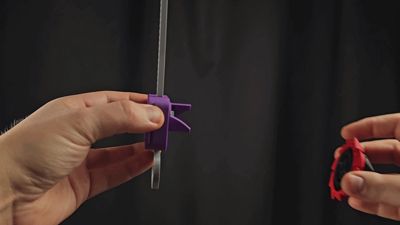
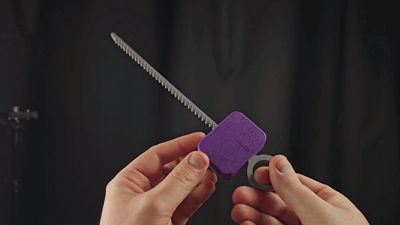
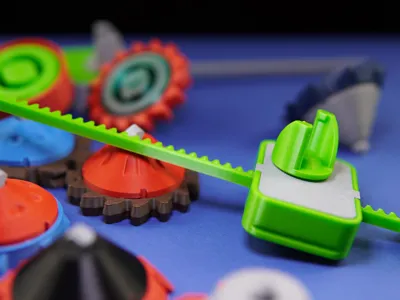
⚙️ Launcher Mechanics
The launcher is based on a 1:1 rack-and-pinion system using a 12-tooth printed drive gear.
A toothed rod converts linear motion into rotational force.

The drive gear is fully printed. The goal was to keep the system accessible and fully printable without additional hardware.

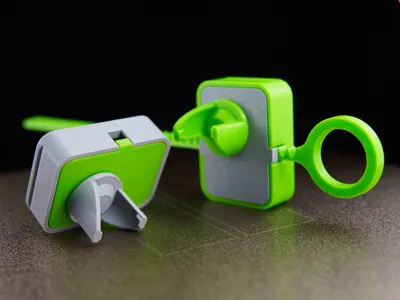
Retention & Release System
The disk holder includes symmetrical retaining protrusions that hold the disk during acceleration. As the launcher spins up, centrifugal force helps keep the disk engaged.

When the toothed rod is fully pulled out, a flexible locking pawl springs into place and stops the drive gear abruptly.
The sudden stop, combined with the disk’s inertia, causes it to disengage cleanly from the holder.

Tests showed that inertia alone can sometimes release the disk, but without the locking pawl the gear may continue rotating, causing inconsistent release. The pawl ensures a predictable launch cycle and avoids frustration.
🖨 Designed for Printing
Print orientation matters.
Each part was intentionally oriented in the print profile to:
- strengthen load-bearing directions
-eliminate supports using controlled overhang geometry
-improve press-fit alignment
For example, the central pin on the disk is printed on its side with a flattened profile.
This improves concentricity, ensures better press-fit engagement with the base, and reduces wobble during rotation.

All parts are pre-oriented correctly in the provided print profile and should be printed as placed.
The project has been tested on:
-Bambu A1 mini
-Bambu P1S
-Prusa MK3S
-Ender 3 V2
-Custom-built printer
🖨️ PRINT PROFILES
To keep things simple and flexible, the project includes several ready-to-use print profiles:
| All-in-One Plate – BattleSpiner |
Quick start. Print and battle. The full setup on a single build plate. |
| Rings & Base |
Build it your way. Interchangeable rings for the BattleSpiner base. The core disk without any ring attached.
|
| Launcher |
Launcher only. Complete your setup. The launcher only. |
| SPARE |
| Reprint what you need. Nothing more. All parts separated into individual components. Best for reprints, tweaks, or replacing a single element without printing the full setup again. |
🧾 Printing and assembly
- Assembly guide in PDF
- No supports required 🙌
- Tight tolerances in some areas — a well-calibrated printer is recommended
🧾Part list
| Drive Gear (12T) |  |
| Disk Holder |  |
| Locking Pawl |  |
| Retaining Ring |  |
| Top Shell |  |
| Bottom Shell |  |
| Launch Rod |  |
| 1. Install the drive gear and holder Insert the drive gear through the opening in the bottom shell. Position the disk holder on the opposite side. The hexagonal interface ensures correct alignment. | 2. Secure with retaining ring Lock the disk holder in place using the printed Seeger-style retaining ring. |
 | 
|
| 3. Install the locking pawl Place the locking pawl into the dedicated recess in the top shell. | 4. Close the housing Join the top and bottom shells together. The locking pawl will engage the gear during assembly — align the parts carefully and close them at a slight angle if needed.Both shells should click into place when fully seated. |
 |  |
| 1. Insert the central pin Press the central pin into the disk base. It is designed as a press-fit and should require light force to seat properly. | 2. Attach the ring Insert the ring from the bottom side of the base. Rotate the base clockwise until you feel a distinct click, indicating the ring is locked in place. |
 |  |
*****
UPDATE INFO
*****
🔄UPDATE 15.02.26
New Screw-Free & Glue-Free Launcher
I’m happy to introduce a completely redesigned version of the launcher.
This new iteration is now fully mechanical — no screws and no glue required.
I know some of you mentioned difficulties with properly bonding one of the internal components in the previous version. I’ve been thinking about how to solve this without compromising strength or reliability.
At first, I experimented with snap-fit solutions, but repeated tests showed that they weren’t durable enough under stress.
The final solution uses a Seeger ring (retaining ring), which provides a secure and clean mechanical lock without adhesives.
A new assembly guide has been added to reflect these changes.
If you’re starting the project now, I strongly recommend downloading the updated version.
As always, I’m looking forward to your feedback — and of course, your battle photos 🌀
For more details, download the PDF file.
*****
🔄UPDATE 14.02.26
The launcher has been updated. The component previously reported as difficult during assembly — specifically the part responsible for holding the disk — has been redesigned. The bonding surface between this part and the drive gear has been extended to increase glue contact area. This modification improves alignment and provides a more stable joint during assembly. The goal of this revision is to simplify the gluing process and make the launcher easier to assemble reliably
*****
⚠️ WARNING – please read before printing
I always try to test my designs on different printers and filaments to make them as reliable as possible.
That said, print quality still depends heavily on bed leveling, extrusion accuracy, and overall printer calibration.
This project includes a few areas with tight tolerances, so for the best experience it’s important that your printer is properly set up. A well-calibrated machine will make the difference between a smooth assembly and unnecessary frustration.
If your printer is dialed in, everything should fit and work as intended.

---------------------------------------------------------------------------------------------------
I put a lot of personal time into each project I share here 🕒❤️. I do it knowing there's no real profit—apart from sharpening my skills 🛠️ and the joy of contributing something useful or fun to others 😊.
The points I earn on this platform help cover only a small part of the filament I use to create these models 🎯.
If you ever run into printing issues, please take a moment to check if the cause might be on your end 🔍🖨️.
Even with all the advancements in 3D printing, proper calibration, bed adhesion, filament choice, and profile settings still play a big role in the final result ⚙️🎛️.
Negative ratings affect a project’s visibility 📉 and reduce the number of downloads, even if the issue wasn't with the model itself.
If something's not working, please don’t hesitate to message me 💬—I'll do my best to help or clarify things 🙌.
This is just a small part of my life, but it’s a big part of my passion 💡. I’m constantly learning and improving 📚, and your thoughtful feedback makes a huge difference 💬🌱.
Boost Me (for free)
If you'd like to support me, consider clicking the free “Boost” button 🚀—it really helps. Thank you for being here! 🙏

Documentation (2)
License
You shall not share, sub-license, sell, rent, host, transfer, or distribute in any way the digital or 3D printed versions of this object, nor any other derivative work of this object in its digital or physical format (including - but not limited to - remixes of this object, and hosting on other digital platforms). The objects may not be used without permission in any way whatsoever in which you charge money, or collect fees.
Comment & Rating (304)