
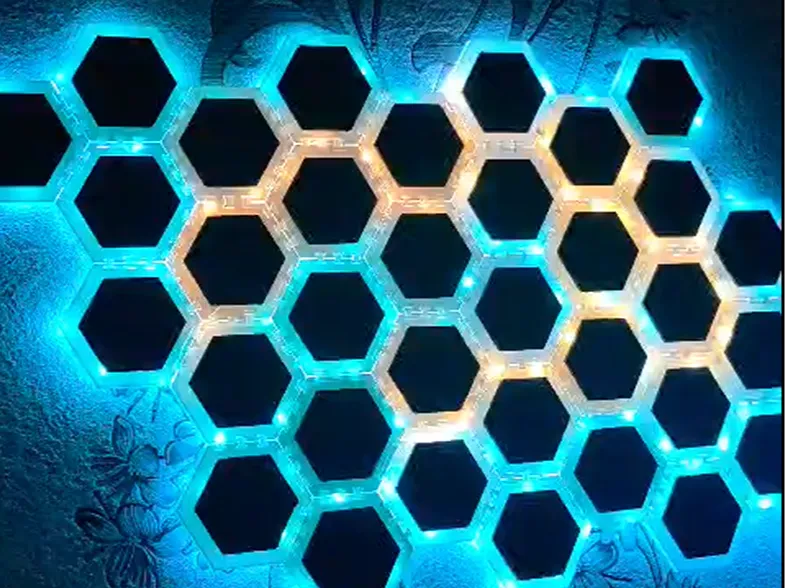
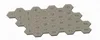
hexagon wall decoration
Print Profile(1)

Description
🔷 Hexagon LED Wall Panel – Fixed Layout Design
⚠️ Important Assembly Notes (READ FIRST 🙂)
- Black parts MUST be printed – this is mandatory
- Black parts are inserted directly into the numbered holes
- They fit only in one correct orientation
- It is not possible to insert them incorrectly
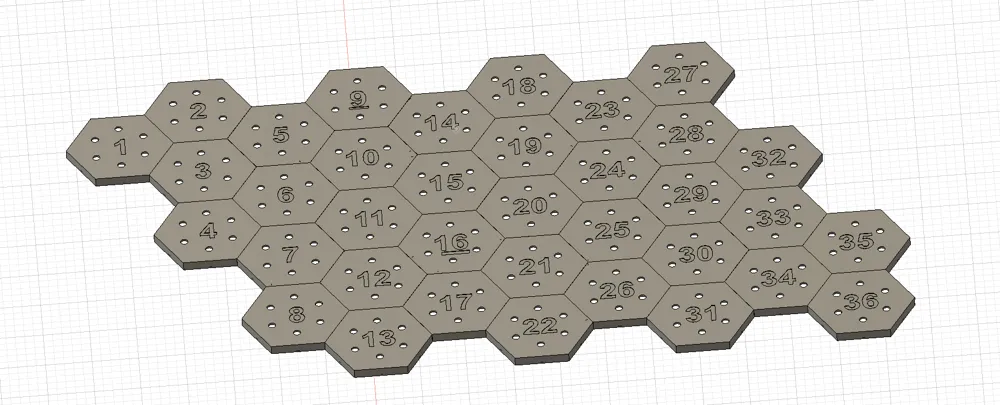
- Always follow the reference image and numbering
These parts are designed to self-align, making assembly easier and mistake-free 🙂
Description
This hexagon LED wall decoration features a fixed, non-modular layout.
All hexagons must be printed and assembled exactly according to the numbering shown in the reference image. Every numbered piece is required to achieve the correct final shape.
✅ Assembly is easy and beginner-friendly, as long as the numbering order is followed carefully.
⚠️ Important:
This design cannot be rearranged or modified. All parts must be assembled in the correct numeric order to ensure proper fit and appearance.
📌 In the future, new designs will be released, including fully modular and highly customizable versions.
🧩 STL / 3MF File Contents
The provided 3MF file includes:
- All 36 numbered hexagon panels
- Correct orientation and spacing for printing
- LED holes and internal wire routing channels
- A dedicated LED power entry point at Hexagon #36
- Preconfigured and tested print settings
🔌 Hexagon #36 is the starting point for LED wiring and power input.
💡 LED Specifications
- LED hole size: 6 × 6 mm
(Any type of LED can be used, as long as it fits through the 6×6 mm opening) - Placement:
- One LED in each corner of every hexagon
- LEDs pass through the holes, not surface-mounted
- Fixing method:
- Use a small amount of glue or tape in each corner to secure the LEDs
- Minimum LED length:
- At least 10 meters of LED strip is required for the full design
- Designed for smooth and continuous edge glow lighting
- PLA compatibility:
- PLA can be safely used with any LED type, provided the LEDs do not generate excessive heat
🖨️ Recommended Print Settings
For best results, use the settings included in the provided 3MF file.
The values below are tested and recommended.
Material
- PLA (recommended if LEDs stay cool)
- PETG (optional, for increased heat resistance)
Nozzle & Layer Height
- 0.6 mm nozzle → 0.18 mm layer height (recommended)
- 0.4 mm nozzle → 0.12 mm or 0.16 mm layer height
⚙️ Quality & Accuracy Settings (Bambu Lab A1 Combo)
These settings apply specifically to Bambu Lab A1 Combo printers.
- Auto Cycle Counter-Hole Compensation: Enabled
- Elephant Foot Compensation: 0.2 mm
- Additional elephant foot prevention: Enabled on bottom surfaces
- Precise Z height adjustment: Enabled
- Machine G-code Z-offset:
- Default (Bambu Lab): -0.02
- Used in this project: +0.15
⚠️ Important:
Z-offset depends on individual printer calibration, filament, and build plate condition.
📘 How to adjust Z-offset (Bambu Lab A1 Combo):
- Open Bambu Studio
- Go to Device → Printer Settings
- Find Machine G-code Z-offset
- Adjust in small steps (±0.02 mm)
- Re-test first layer before printing all parts
Always follow official Bambu Lab tutorials if adjustments are needed.
Walls & Infill
- Wall loops: 1
- Detect Thin Walls: Enabled
- Infill density & pattern: Default values are sufficient
Supports
- Supports are required only in specific areas
- Use default support settings
- Top Z distance: 0.21
- Bottom Z distance: 0.21
Bed Adhesion
- Brim: Use only if bed adhesion is weak
- Brim object gap: 0.25 mm
🔧 Assembly Instructions
- Print all 36 numbered hexagons
- Insert LEDs through the 6×6 mm holes in each corner
- Secure LEDs using a small amount of glue or tape
- Route wires through the internal channels
- Start LED wiring from Hexagon #36
- Insert the black parts into the numbered holes
- Assemble all hexagons strictly following the numbering
- Glue all parts together
- Mount the finished panel on the wall
🛠️ Assembly is simple, intuitive, and does not require special tools.
⚠️ Safety Notice
- Glue is required for assembly
- Safety glasses must be worn during assembly and LED installation
- Disconnect power while working with LEDs
- Decorative use only – not a toy
🆕 Future Updates – Modular & Custom Designs
Upcoming releases will include fully customizable systems, allowing you to:
- Place hexagons anywhere and in any layout
- Mix large and small hexagons
- Build designs with black parts, without black parts, or mixed
- Create highly modifiable structures
- Insert photos or images inside hexagon frames
- Reconfigure layouts at any time
These future designs will offer maximum creative freedom.
Documentation (1)
License

You shall not share, sub-license, sell, rent, host, transfer, or distribute in any way the digital or 3D printed versions of this object, nor any other derivative work of this object in its digital or physical format (including - but not limited to - remixes of this object, and hosting on other digital platforms). The objects may not be used without permission in any way whatsoever in which you charge money, or collect fees.


Comment & Rating (0)