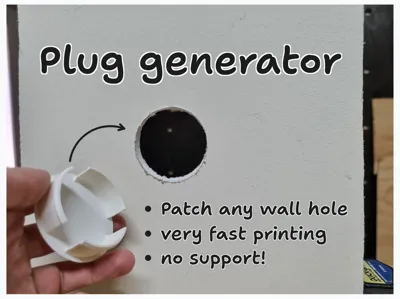
Wall Hole Plug Generator - Patch any size hole!


Print Profile(6)


Description
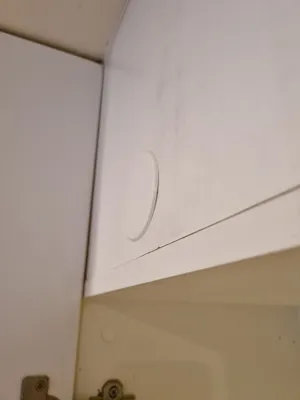
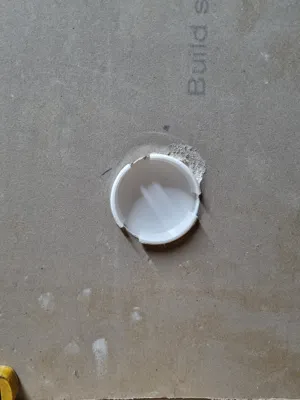
🔧 FILL ANY WALL HOLE - CUSTOM SIZE GENERATOR
Print a perfect-fit plug for any circular hole in your drywall or plasterboard.
Just measure, customize, print, and press fit!
━━━━━━━━━━━━━━━━━━━━━━
📝 GENERAL INSTRUCTIONS / HOW TO USE MODEL:
1. Measure your hole diameter
2. Measure the thickness of the wall / depth of hole you're looking to patch
3. Click to edit the right version for you - Metric or Imperial

4. Adjust parameters in customizer
5. Download and print!
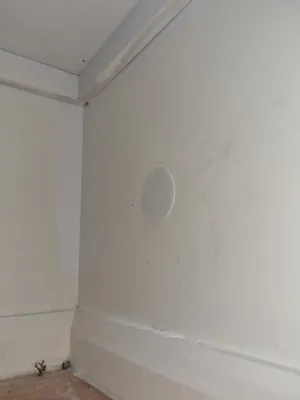
6. Press plug into hole until it clicks
7. Optional: fill/sand/paint face for invisible repair
━━━━━━━━━━━━━━━━
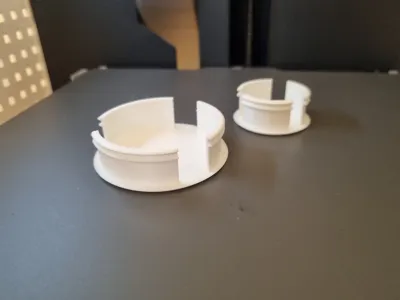
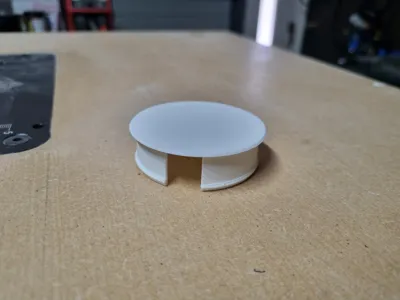
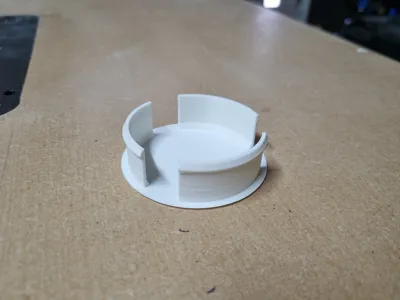
⚙️ CUSTOMIZABLE PARAMETERS
- Wall hole diameter
- Wall thickness (standard drywall: 10-13mm or 3/8 - 5/8" in freedom units)
- Number of flex legs (2-8). 3 works well by default.
- front face thickness (what covers the hole). Thinner front results in a more subtle cover.
TWO VERSIONS INCLUDED:
- Metric - dimensions in mm (15-200mm holes)
- Imperial - dimensions in inches with fractional sliders (1/2" to 8" holes)
━━━━━━━━━━
🖨️ RECOMMENDED PRINT SETTINGS:
- Material: Tested and works well with PLA and PETG - may need to adjust plug wall thickness for stiffer materials.
- Orientation: Face plate DOWN on build plate
- Supports: None needed
- Infill: 15-50%
- Layer height: 0.2mm works well.
- Build plate: I recommend the standard Textured PEI plate to match the surface finish of painted walls.
- Seam lines: can be set to random if you are operating with tight tolerances.
This took me ages to make but was a fun exercise trying to figure out how to make editable models. Please let me know if this was helpful for you!
License
You shall not share, sub-license, sell, rent, host, transfer, or distribute in any way the digital or 3D printed versions of this object, nor any other derivative work of this object in its digital or physical format (including - but not limited to - remixes of this object, and hosting on other digital platforms). The objects may not be used without permission in any way whatsoever in which you charge money, or collect fees.
Comment & Rating (6)