Search models, users, collections, and posts
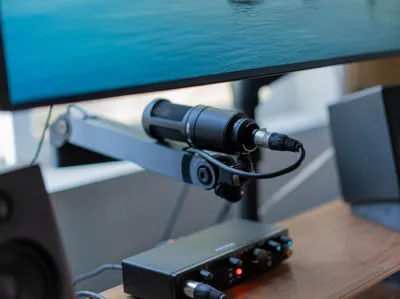
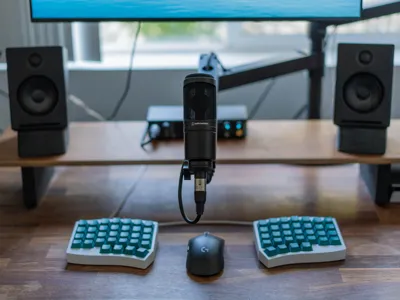
Low Profile Microphone Arm
IP Report


Print Profile(3)

Microphone arm
Designer
17.6 h
10 plates
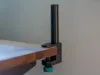
Desk clamp
Designer
12.5 h
9 plates

For 40mm diameter poles
Designer
4.8 h
2 plates
Open in Bambu Studio
Boost
2078
5774
135
135
2.5 k
731
Released
Description
This is a low-profile microphone arm that swivels underneath a monitor to save space. I've been using this for over 3 months, and it's been rock-solid.
Boost Me (for free)
- Fully 3D printed with no supports! All printed hardware can be swapped with M10 x 30mm bolts and M10 nuts.
- Clamps onto 35mm diameter poles (e.g. Ergotron or Amazon Basics monitor arms). If you don't have an existing pole, model files for a pole are provided.
- Included mounts for Audio Technica AT2020 microphones, ⅝"-27 threads, and ⅜"-16 threads.
- Magnetic cable management channel with 4mm x 2mm magnets (24 magnets required).
- STEP files available for purchase on Printables.
Instructions
- Material: PETG/ABS recommended. PLA is acceptable, but creeps/deforms under constant loads more than other materials.
- Wall loops: 5. The arm needs to be very rigid.
- Infill: 15% Gyroid. Fill Multiline: 2. Nuts and bolts should be printed solid with 100% infill.
- Layer height: 0.20mm.
- Line width: 0.60mm recommended. Thicker line widths improve layer adhesion and overhang angles. 0.40mm is acceptable.
- Print orientation: Arms printed face up. Joint printed upside-down against the flat angle. Bolts printed along the flat cutout.
- Supports: None for most pieces. The ⅜" and ⅝" mic adapters require supports for the threads.
- Print 2 of the M10 hex tools to help tighten bolts.
Assemble according to the below image. 2 nuts are required for the swivel piece to prevent rotational motion from loosening the joint--tighten the first nut to the desired tension then lock the tension with the second nut.

Troubleshooting
- If the second arm doesn't fit into the swivel joint and can't be forced in: decrease the X-Y contour compensation of the swivel joint piece and print again. This joint is made to be a very tight interference fit to prevent sagging, so decrease this value as little as you can.
- If the second arm sags downwards: tighten the bolt connecting the second arm to the joint as much as you can. You may need to use pliers/wrenches to get more torque.
- If the swivel joint is rotating on its own: the first nut is too loosely or the second “jam nut” isn't installed. This should be tensioned such that friction overcomes gravity.
- If the nuts/bolts cannot handle the torque: ensure that the bolts are printed horizontally and at 100% infill. Try anything to improve layer adhesion (e.g. slower printing, higher temperatures). If the threads don't last, try lowering the line width and/or layer height to improve the print resolution.
- If the arm permanently creeps/deforms: this is expected with any plastic experiencing a load over time, especially since this is a long lever arm. You should be able to tighten any joints to increase the friction so gravity doesn't affect the usability of the arm even if it's deformed.
License
This user content is licensed under a
Creative Commons Attribution-Noncommercial-Share Alike
Comment & Rating (135)