Parametric Junction Box – modular & scalable


Print Profile(7)

Bill of Materials


Description
Parametric Junction Box | Parametric Junction Box
Boost Me (for free)
🔧 This model is fully parametric. A boost helps to implement new modules & improvements
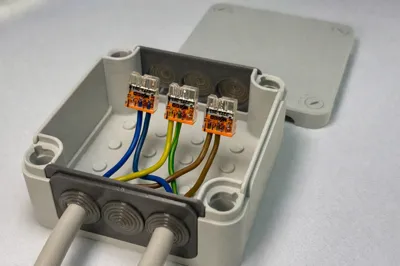
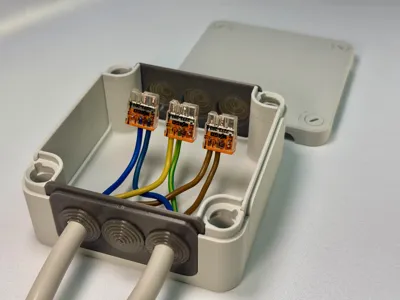
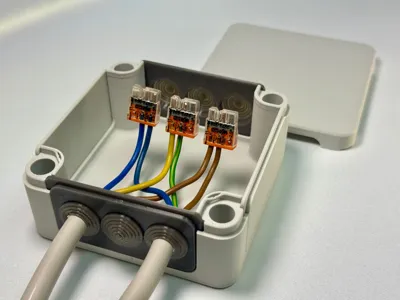
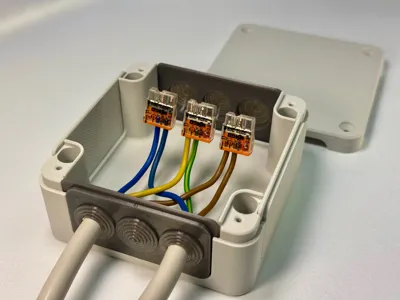
This parametric junction box is a modular, scalable enclosure system for 3D printing
The dimensions are fully controlled by parameters and are based on a 20mm grid, allowing the box to be easily adapted to different applications
The design remains visually and functionally identical regardless of size
Ideal for electronics projects, distributions, smart home applications, and DIY installations

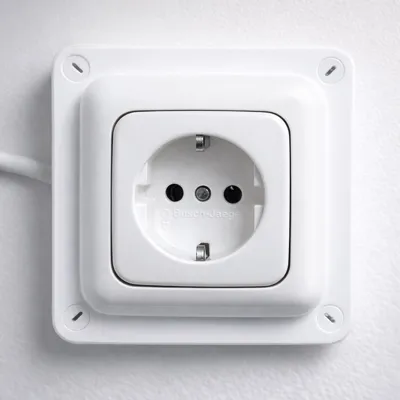
!!!!! NEW !!!!! For Schuko
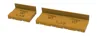
Junction Box Pro Plug with Grid

Junction Box Classic Plug with Grid

🔧 Parametric Control (20mm Grid)
Attention, the Schuko control is different. see in Red
The complete geometry of the junction box is based on a 20mm step system
The actual dimensions are defined by the number of grid units in X, Y, and Z directions
User Parameters
| Parameter | Description |
|---|---|
| X_20mm_Step | Number of 20mm grid steps in Width (X) |
| Y_20mm_Step | Number of 20mm grid steps in Depth (Y) |
| Z_20mm_Step | Number of 20mm grid steps in Height (Z) |
🔹 1 Step = 20 mm
Minimum Size
The smallest possible box size is:
- 3 × 3 × 2 Steps
- 60 × 60 × 40 mm
The Classic Box is always 10mm longer in X
- 3 × 3 × 2 Steps
- 70 × 60 × 40 mm
Smaller values are not supported by the design
User Parameters Schuko
| Parameter | Description |
|---|---|
| Y_20mm_Step | Number of 20mm grid steps in Width (Y) |
| Z_20mm_Step | Number of 20mm grid steps in Height (Z) |
| Plug_Holes | Number of socket holes |
| Plug_Step_X | Number of possible socket holes Plug_Step_X=(5 x X_20mm_Step) |
Minimum Size
The smallest possible box size is:
| Parameter | Description |
|---|---|
| Y_20mm_Step | 5 |
| Z_20mm_Step | 3 |
| Plug_Holes | 1 |
| Plug_Step_X | 1 (must be equal to or greater than "Plug_Holes") |
The Classic Box is always 10mm longer in X
Smaller values are not supported by the design
🧩 Inserts / Cable entries (important)
The inserts (cable inserts) are also parametrically designed
➡️ Important:
For the inserts, the same X, Y, and Z step values must be used as were set for the junction box
Workflow Recommendation
- Configure junction box with desired steps
- Configure insert with identical step values
- After downloading:
- simply delete unnecessary sides
- duplicate more needed sides
- for the Schuko version, the (“Plug_Step_X” * 5) then you have the “X_20mm_Step” for the cable entry
🧭 Note on Bambu Studio / Bambu Slicer
After importing the models into Bambu Studio, the objects must be split (separated) and realigned
Recommended procedure:
- Select model
Execute “Split to objects”

- Align box, lid, and inserts flat on the print bed
- Move parts as needed or print individually
🧱 Integrated 20 × 20 mm Grid System
An additional 20 × 20 mm grid is integrated inside the junction box
This grid allows your own small holders, adapters, or modules to be placed directly in the box
The grid structure is intentionally kept compatible with the box's 20mm step system and expands the junction box into a modular platform

🧩 Clips System
For the grid, I provide separate clips ("Nipsi") that allow self-created parts to be easily clipped in – without screws or glue. The .Step “Junction Box Clip Board” can be easily downloaded"
here:

➡️ This allows you to:
- design your own modules
- clip them in precisely
- and rebuild or expand the box at any time
- AND PLEASE ALSO UPLOAD THE PRINT PROFILE HERE ON THIS PAGE :)
The Clip-Step can be downloaded and reused as desired for individual applications
🔩 Features
- Fully parametric
- Modular & scalable
- Uniform wall thicknesses
- Parametric Inserts
- Optimized for FDM 3D printing
Thanks & happy printing 😊
License
You may create derivative works based on this object, provided that all such derivative works are published exclusively on the MakerWorld platform and include proper attribution to the original creator. You may not share, upload, host, distribute, or publish this object—or any derivative work of this object—on any other digital platform, marketplace, or distribution channel. Commercial use of this object and any derivative works is strictly prohibited. This includes, but is not limited to, selling, renting, sublicensing, or using the object in any context in which you receive monetary compensation or other financial benefits.
Comment & Rating (34)