OEC NAS Case | Enhanced Heat Dissipation, Compatible with 15mm Thick Drives


Print Profile(2)

Description
Boost Me (for free)
If you find this design useful, please boost me
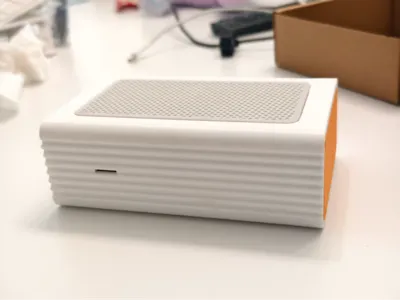
🚀 WXY OEC NAS Case | Enhanced Heat Dissipation, Compatible with 15mm Thick Drives
📖 Introduction
With FlyCow System (FnOS) adapting to OEC, this edge computing box has become an excellent low-power NAS choice. I still like the original pull-out hard drive design, but the original case has limited space, only supporting 7mm thin drives. However, high-capacity SSDs are expensive, and common 2.5-inch mechanical hard drives are typically 9, 12.5, or 15mm thick, so they cannot fit.
This design is specifically made to perfectly accommodate 15mm thick 2.5-inch high-capacity mechanical hard drives, completely resolving capacity concerns. While increasing space, it optimizes heat dissipation, preventing it from becoming a heat trap, and fully retains the original hard drive caddy.
✨ Model Features
- Perfectly compatible with 15mm thick 2.5-inch hard drives.
- Compatible with the original hard drive bracket, retaining the convenient pull-up drive removal structure and the original machine's colorful LED lighting effects.
- Added multiple heat dissipation vents.
- The case structure is compact, maintaining a small footprint, and the back panel IO cutouts are precise.
🛠️ Materials Required
Keep all original OEC mounting screws. In addition, the following items are needed:
- Screws: M2.5 * 8mm flat head self-tapping screws x 9 pieces.
- Filament recommendation:
- Main body: PETG or higher heat-resistant filament. Hard drive operating temperatures typically stay around 40 degrees Celsius, so PLA is not recommended.
- Light guide strip: Transparent PETG (for guiding LED light).
- Glue: A small amount of 402 glue (for securing the heat dissipation cover).
- Note: The ventilation holes are generated using the slicer software's built-in infill. Do not arbitrarily change the modifier settings in the print profile!

🔧 Assembly Steps
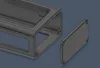
Lampshade preparation: Insert the light guide strip printed with transparent filament into the lampshade and flatten it to ensure uniform light transmission. When installing the light guide strip, if it's too tight or protruding, you can gently trim the edges with a small file or sandpaper for better light transmission.

Assemble the middle frame: Secure the OEC motherboard and hard drive bracket to the middle frame. The installation method is the same as the original factory: first install the motherboard, then place the lampshade, and finally install the hard drive caddy.

Install the lampshade: Place the prepared lampshade into the corresponding groove reserved in the middle frame. Correct installation should cover the LED beads precisely.

Back panel fastening: Align the IO port cutouts of the back panel, insert, then tighten 1 M2.5*8 screw on the back panel to lock it in place.

Assemble into case: Slide the assembled module into the outer case.

Side locking: On the corresponding positions on both sides of the case, screw in 4 (total 8) M2.5*8 screws for reinforcement.

Seal the exterior: Apply a small amount of glue to the edges of the upper and lower heat dissipation covers, align them, and attach them to the case. Installation complete!

Comparison with original case dimensions:

License
You shall not share, sub-license, sell, rent, host, transfer, or distribute in any way the digital or 3D printed versions of this object, nor any other derivative work of this object in its digital or physical format (including - but not limited to - remixes of this object, and hosting on other digital platforms). The objects may not be used without permission in any way whatsoever in which you charge money, or collect fees.
Comment & Rating (0)