
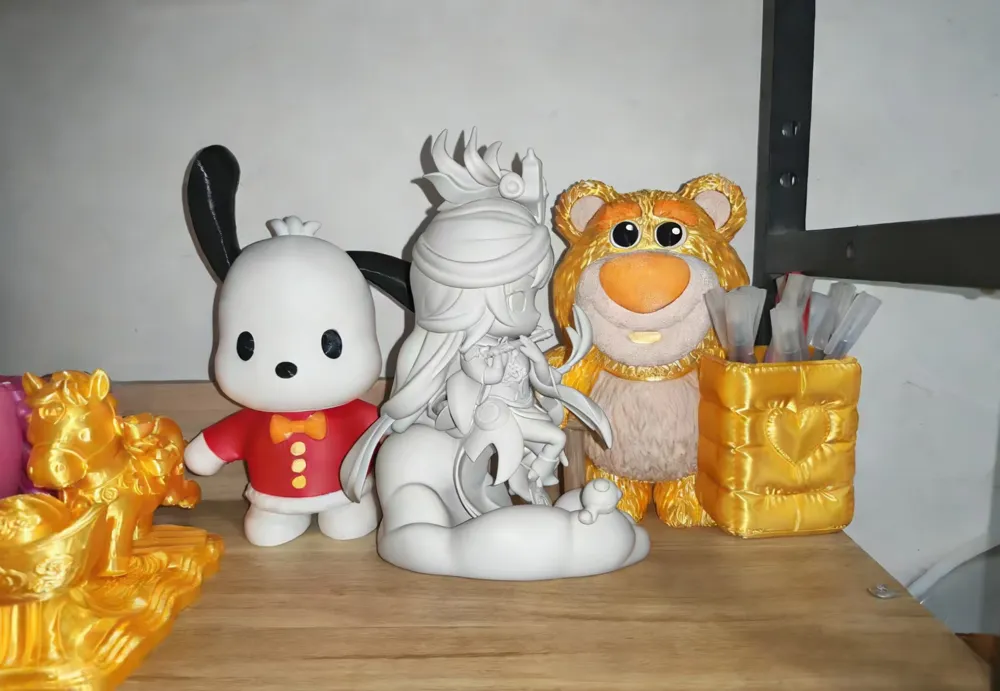
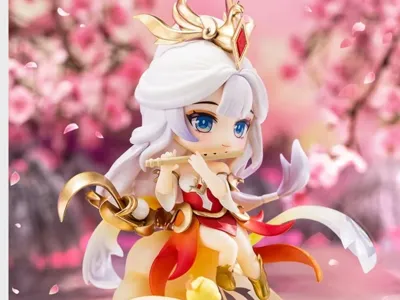
Honor of Kings: Wang Zhaojun Phoenix Ming Chibi Figurine
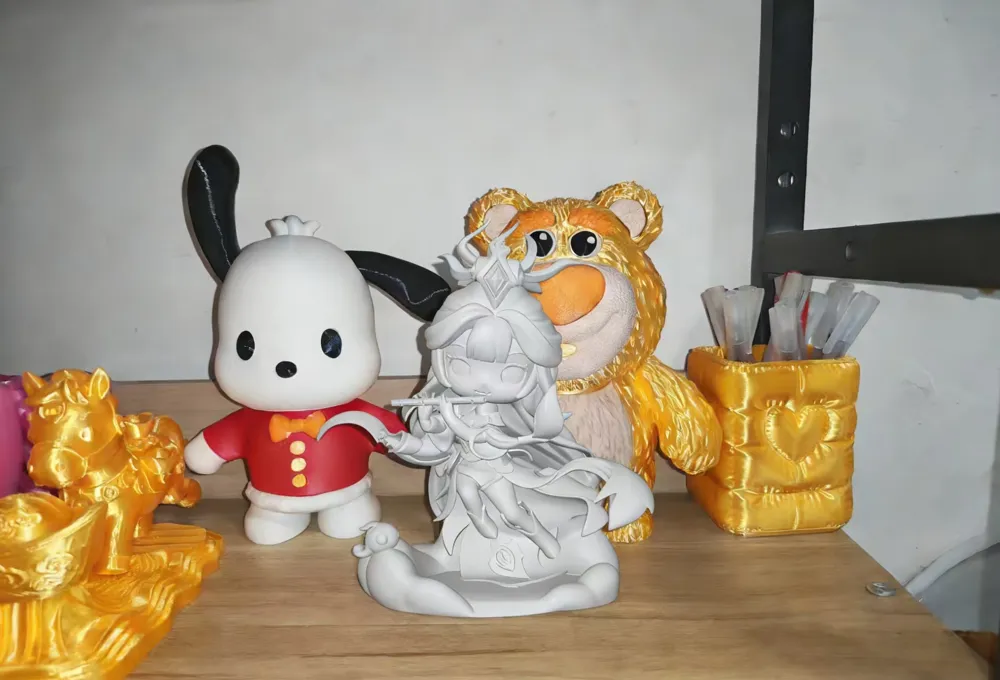
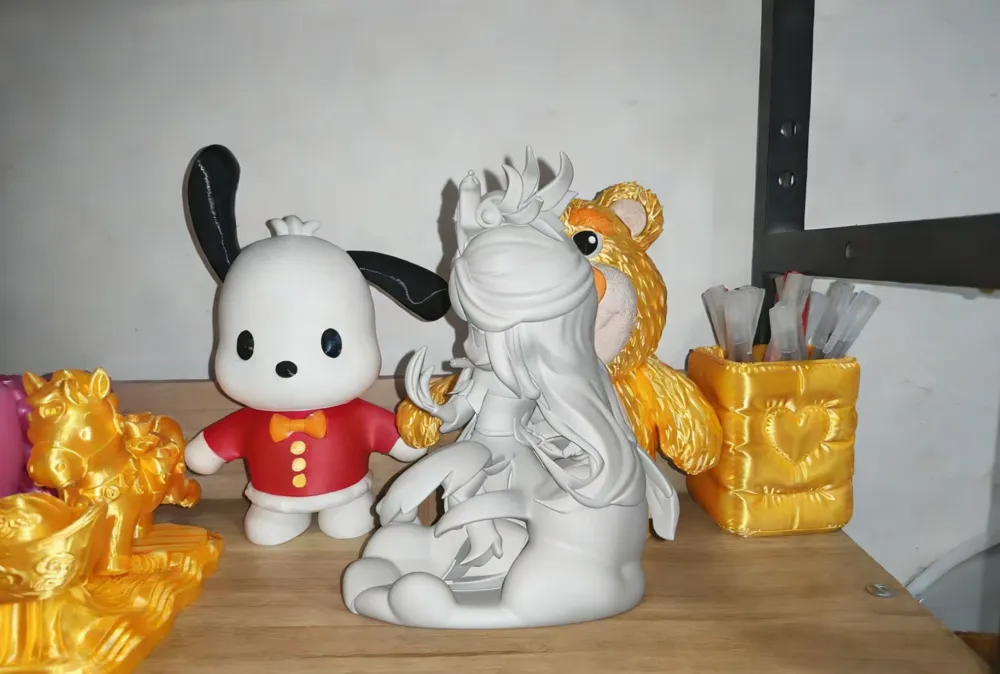
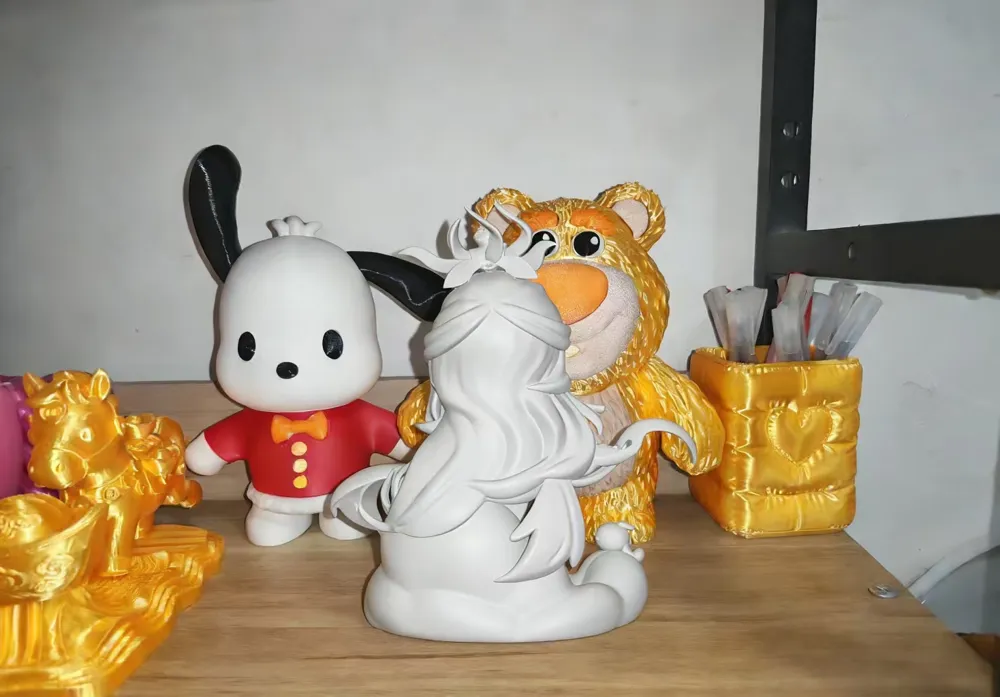
Print Profile(1)

Description
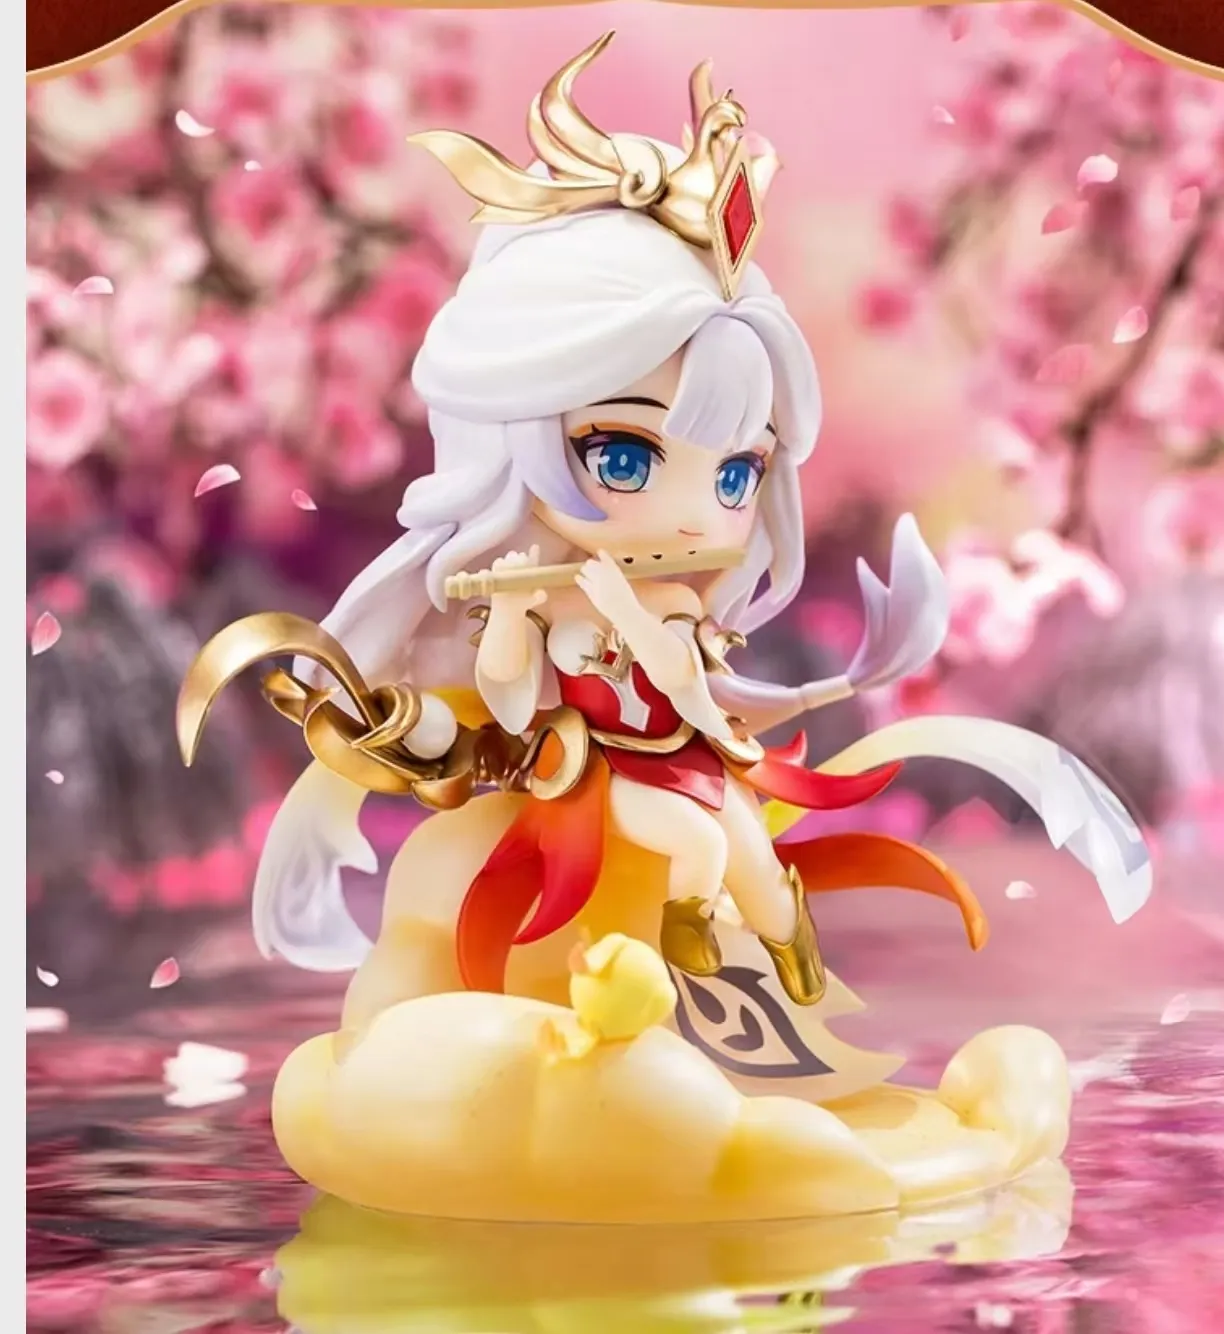
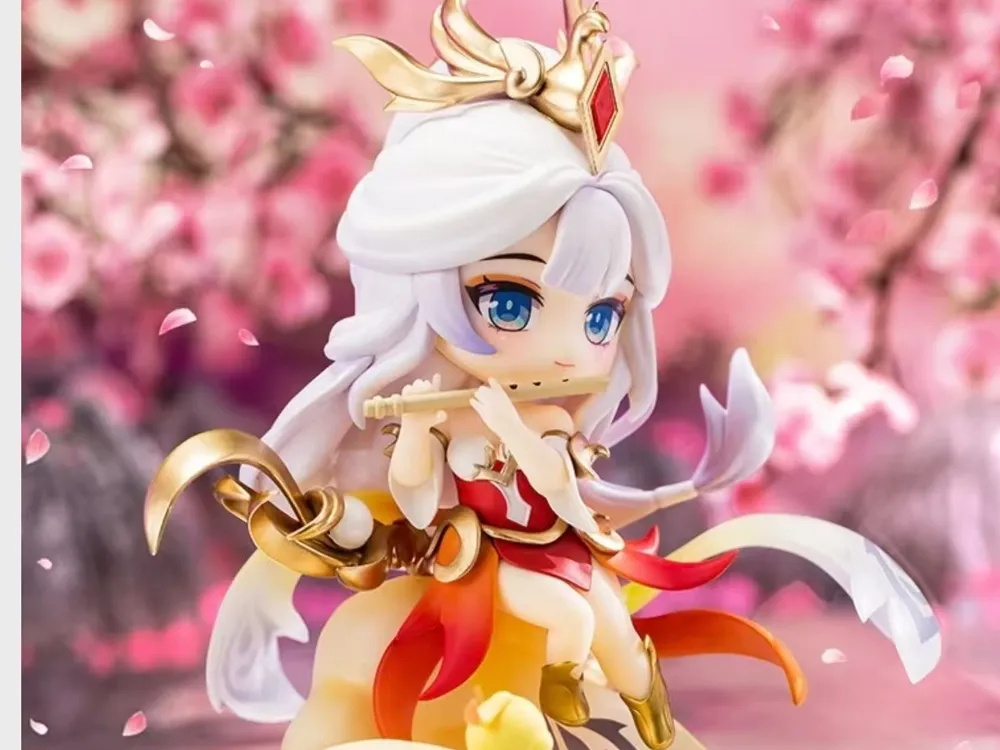
The coloring of this figurine mainly focuses on three major areas: the main character, accessories, and base. The core colors and details for each part are as follows:
1. Character Head
- Hair: Primarily white, with light blue/light pink gradients added to the tips for highlights
- Eyes: Sapphire blue iris, black pupil, white sclera, with light purple eyeshadow around the eyes
- Skin: Light skin tone (warm), light pink lips
2. Clothing and Accessories
- Headdress: Main body gold, inlaid gems in bright red/burgundy
- Clothes: Main color bright red, with gold trim/patterns, ribbons with white/light orange gradients
- Flute: Primarily gold, light brown can be added to details
- Hand and Foot Decorations: Armor/anklets are all gold
3. Base and Decorations
- Cloud Base: Light yellow/off-white, with light orange gradients on the edges to simulate light and shadow
- Base Pattern: Black/dark brown
- Little Yellow Duck Decoration: Bright yellow, orange beak
- Background Splashes/Petals: Pink/light red, with rose red/light gold added to water reflections
4. Light and Shadow, and Transitions
- Dark Areas: Use light brown/dark red for shadows to enhance the three-dimensional effect
- Highlights: Apply white/bright gold dots to the raised areas of metal accessories, hair, and ribbons
The color code reference table for figurine painting is as follows
The following selects two color series numbers: acrylic paints (commonly used for figurine painting) and Gundam model paints (Gunze/Tamiya), to adapt to different painting tools and needs. All color codes are mainstream models commonly available on the market:
Painting Area Acrylic Paint Color Code (Winsor & Newton) Gundam Model Paint Color Code (Gunze) Additional Notes
Main Hair Titanium White H01 White Add light blue (sky blue)/light pink (rose pink) gradients to hair tips
Iris Sapphire Blue H48 Sapphire Blue Use H02 Black for pupils, H01 White for sclera
Eyeshadow Light Purple H14 Light Purple Apply thinly for blending, avoid harsh color blocks
Skin Flesh H08 Skin Tone Warm flesh tone, add H29 Light Brown to dark areas
Lips Rose Pink H13 Pink Apply a thin layer, dot bright white on the cupid's bow for highlights
Headdress Main Body Gold H21 Gold Metal paint requires thin, multiple layers to enhance luster
Headdress Gems Bright Red/Burgundy H04 Red/H10 Burgundy Dot bright red on gem edges for highlights
Clothes Main Color Bright Red H04 Red Use H21 Gold for trim, outline patterns with a fine brush
Ribbons Titanium White+Light Orange H01 White+H31 Orange Use clear water to blend gradient transitions
Flute Gold H21 Gold Outline flute body details with H29 Light Brown
Hand and Foot Armor/Anklets Gold H21 Gold After metal paint dries, apply clear coat for protection
Cloud Base Light Yellow+Off-white H35 Yellow+H01 White Add H31 Orange to edges for light and shadow gradients
Base Pattern Black/Dark Brown H02 Black/H29 Brown Draw with a fine liner brush, avoid bleeding
Little Yellow Duck Lemon Yellow H34 Yellow Use H31 Orange for the beak, dot application is sufficient
I've prepared a figurine painting step-by-step guide, organizing the operation process in the order of “primer - main color - details - light & shadow - topcoat” to make coloring smoother.
Figurine Painting Step-by-Step Guide
Following the process of primer → main color → details → light & shadow → topcoat can make the painting effect more even, three-dimensional, and durable, suiting the painting needs of this ancient style figurine:
1. Preparation
- Sanding: Lightly sand the figurine surface with 1000-2000 grit sandpaper to remove mold lines and burrs, then clean floating dust with a cotton swab dipped in alcohol.
- Masking: Protect areas that do not need to be painted (e.g., base details not yet painted) with masking tape/masking fluid.
- Tools: Prepare a 000 fine liner brush, flat brush, acrylic paints/model paints, palette, thinner (for model paints only), gloss coat/matte coat.
2. Primer Layer (Basic Protection)
- Choose gray surfacer (Gunze B511) or white primer, spray thinly in 2-3 layers, with 10-15 minutes between each layer, ensuring the primer completely covers the figurine surface.
- Primer function: Increases paint adhesion, prevents paint peeling, and highlights the figurine's detailed contours.
3. Main Color Layer (Large Area Coloring)
Paint large color blocks in the order of “from large to small, from light to dark”:
1. Skin: Apply diluted flesh-colored paint thinly in 2 layers, avoiding brush strokes. After drying, lightly sweep light brown paint into the eye sockets and sides of the nose for dark area base.
2. Hair: First apply a titanium white base, then gently blend light blue/light pink paint onto the hair tips to create a gradient effect.
3. Clothing/Base: Paint the main color of the clothes bright red, the cloud base with a light yellow + off-white mixed color, and metal accessories (headdress, flute) with thin layers of gold paint. Apply the next layer only after the previous one is dry.
4. Detail Layer (Fine Detailing)
Use a 000 fine liner brush for small area details:
1. Eyes: First paint the white sclera, then dot the sapphire blue iris, and finally use black to create the pupil. Apply light purple eyeshadow thinly around the eyes and blend naturally.
2. Accessories: Paint headdress gems bright red/burgundy, dot bright red on edges for highlights; outline base patterns with black/dark brown, paint the little yellow duck's beak orange.
3. Lips: Apply rose pink thinly, dot bright white on the cupid's bow for highlights, enhancing the three-dimensional effect.
5. Light and Shadow Layer (Enhancing Texture)
- Shadows: Use a paint one shade darker than the main color (e.g., dark red for clothes, light brown for skin), lightly sweep it into creases, gaps, and depressions of three-dimensional structures to create shadow effects.
- Highlights: Dot white/bright gold paint onto raised areas of headdresses, flutes, and hair. Metal accessories can have metallic highlight paint layered on top.
6. Topcoat Layer (Setting and Protection)
- After all painted surfaces are completely dry (approx. 24 hours), thinly spray gloss coat (for a glossy texture) or matte coat (for a matte texture) in 2 layers, with 15 minutes between each layer.
- Topcoat function: Protects the painted surface from scratches and prevents paint oxidation and fading.
7. Finishing Touches
- Remove masking tape, use a cotton swab dipped in thinner to clean up spilled paint marks.
- If there are paint surface imperfections, lightly sand with fine sandpaper, then touch up and spray another layer of topcoat.
Figurine Painting Pitfalls Checklist;

| Common Problems | Causes | Solutions | Preventive Measures | |
| Paint surface has obvious brush strokes | Paint too thick, brush size too large, thick application in one go | Dilute paint to a milk-like consistency with thinner, use a 00 flat brush for 2-3 thin coats, apply next layer after each is dry | Use diluted paint, choose a soft flat brush for large areas, adhere to the “thin coats, multiple layers” principle | |
| Paint clumping/peeling | Primer not fully dry, uneven paint consistency, humid environment | Gently sand clumping areas with 1500 grit sandpaper, clean, then reapply thin coat | Apply main color only after primer is completely dry, stir paint evenly, paint in a dry and well-ventilated environment | |
| Detail outlining bleeding | Liner brush too thick, paint too thin, applying too much pressure | Gently wipe spilled parts with a cotton swab dipped in thinner, touch up with a fine brush after drying | Choose a 000 fine liner brush, adjust paint to a slightly thicker consistency, draw with light touch and slow strokes when outlining | |
| Metallic paint dull/lacking luster | Thick application of metallic paint, not using specialized thinner | Dilute with specialized metallic paint thinner, spray thinly in 3-4 layers, finally spray gloss coat to brighten | Metallic paint must be applied in thin, multiple layers, avoid buildup, layer only after each coat is dry | |
| Gradient effect harsh and unnatural | Paint too thick when blending, uneven brush pressure | Use a water brush (fine brush dipped in clear water) to lightly sweep and blend at gradient boundaries, or gently dab with a sponge for transition | Dilute gradient paint, use “dotting + light sweeping” method, gradually transition from light to dark | |
| Paint surface scratched/peeling | No topcoat applied, poor paint adhesion | Sand scratched areas with fine sandpaper then touch up, spray topcoat for protection after drying | Primer layer must be sprayed evenly, finally spray 2 thin layers of gloss coat/matte coat as topcoat | |
| Eye coloring crooked/asymmetrical | Not positioned, applying brush too quickly | First gently mark pupil position with a pencil, then gradually color and correct | Before painting, use a pencil to mark the position in the eye socket, color symmetrically from the center outwards | |
| Base pattern blurry/unclear | Outlining paint too thin, brush bristles rough | Replace with a new fine liner brush, adjust paint to a thicker consistency and re-outline, dot highlights after drying | Check brush condition before outlining, ensure bristles are gathered, and paint consistency is moderate |
License

You shall not share, sub-license, sell, rent, host, transfer, or distribute in any way the digital or 3D printed versions of this object, nor any other derivative work of this object in its digital or physical format (including - but not limited to - remixes of this object, and hosting on other digital platforms). The objects may not be used without permission in any way whatsoever in which you charge money, or collect fees.


Comment & Rating (0)