Thank you 17K!! Zoey Fanart (39 cm)


Print Profile(7)


Bill of Materials


Description
Boost Me (for free)
You'd love to print more fanart charcaters of this series? Sure!!! When we reach the 150 Boost we will create the next one!!

Guys!! As promised, you can vote for next Charcter:⤵️
https://makerworld.com/community/post/1518119
UPDATE
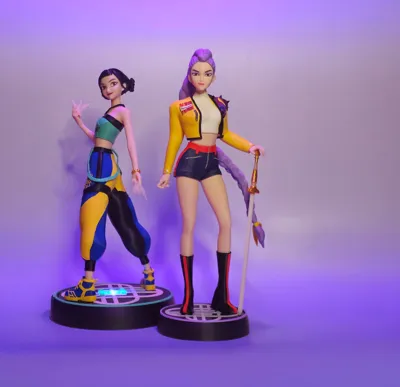
Also MIRA is now available on our page!!
**Now that we see all the Huntrix together and compared the energy of each one of them we thought that Rumi deserves a happier and more lively face!
It wasn't requested but feels a little more in character to us!
If you like it we uploaded it for all the free followers on our Patreon in the freebies collection:
https://www.patreon.com/posts/150288811


Your support is what helps us publish our work on Makerworld! Thanks!!

UPDATE:
For the ones having problems printing the bust. Check the third print profile.
The piece printed very easily adding a block of supports. Hope it helps!
----
Hey everybody!!
Thank you so much for the great welcome given to our Rumi fanart!!
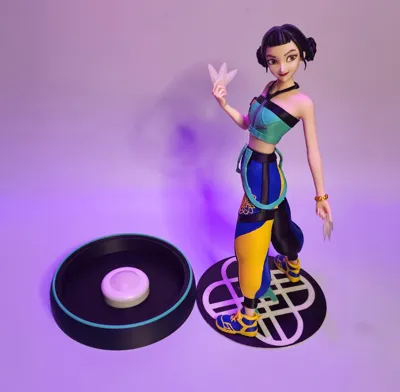
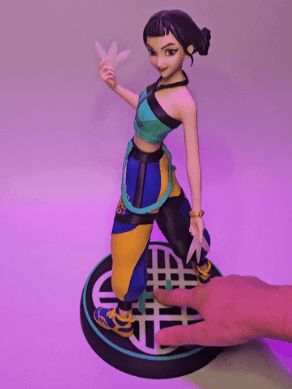
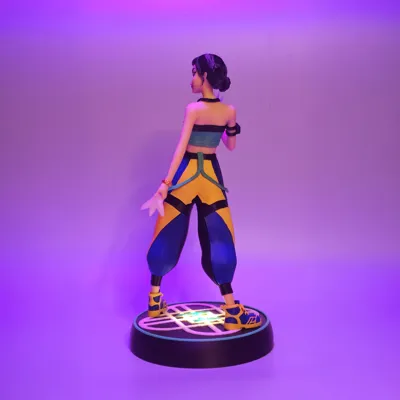
Look at this version of Zoey! Isn't she very pretty??
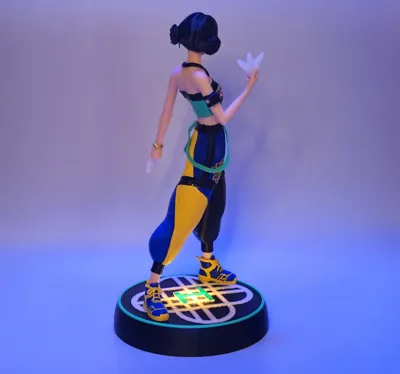
We tought about adding a light to the base! you can use a remote control or just pushing a little the top of the base to switch on and changing colors.
Check in the BOM which are the type of lights we chose!

The model is quite complex. Buy some glue and some patience as you will need a little bit of both for a very good result!
In the beds you see that I didn't put all the skin colors pieces together. The bust and particularly the arm where the toughest one to print!
Make a really good calibration for a best result.
Assembling
Mount the eyes, the mouth and the brows to the face then…
Glue the bangs and quiff piece on the forehead and you'll have the piece to fit in the hair. (you'll need first to clean very well all the residues of supports from all the pieces). See image

This part was one of the though…done.
Other part to do now:
Mount all the trousers pieces.
Take the black “skeleton” of the trousers and do the puzzle part! Not difficult at all but takes some time and some glue.
Glue the pieces and let dry.
Here a pic of how they need to go

That was the other tough part. Done.
Add the bust part to the head, inserting first the collar that will be connected to the bust and the top.

Now add the hand and bracelet on one side and the arm band and arm to the other side.
Mounth the top with the upper black band, the flower patch and the zips.
Now you can mount all the bust and the belly piece. Glue for better sturdiness.

Now you can add the suspenders to the trousers (from the top part connecting the two squared connectors to the holes)

Cool! Add the upper part of the body to the trousers now!
What's left? mount the ankles to the bottom of the trousers and add the shoes (you will need to glue the shoes as they are a tiny bit loose).
Add the weapons to the hands. I didn't glue them but would be better.

Base!
Glue the upper part of the base to the walls base. Do not glue the lower part where there is the space for the lamp (unless you don't want to use it without lights). I created that little easy way to open and close the base in order to change the batteries of the lights (when you need).
Once mounted the two parts of the base (the glued 2 pieces and the base container) simply turning a little bit the upper part the little cube will be stucked and the base will be "locked".

THERE WE GO, once the light is its place (with batteries). you can push on the top and turn on the light!!

License
You shall not share, sub-license, sell, rent, host, transfer, or distribute in any way the digital or 3D printed versions of this object, nor any other derivative work of this object in its digital or physical format (including - but not limited to - remixes of this object, and hosting on other digital platforms). The objects may not be used without permission in any way whatsoever in which you charge money, or collect fees.
Comment & Rating (323)