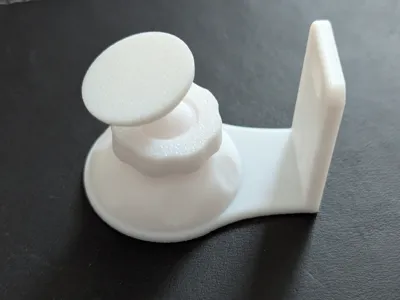
Ball Head Holder


Print Profile(1)

Description
Description
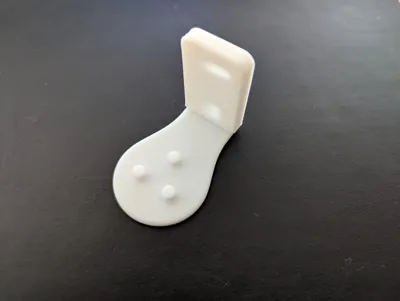
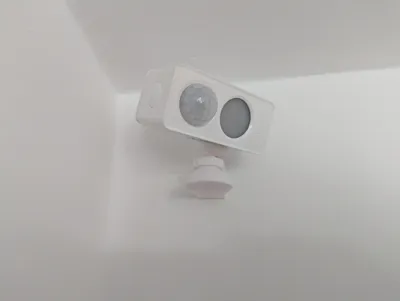
This model is a flexible wall mount for attaching a battery-powered presence detector (Meross MS605).
When designing, I focused on the following points:
- Subtle design.
- Easy alignment of the detector.
- Easy battery replacement for the detector should be possible. For this, the detector must be easy to remove at any time.
- Optional wall mount for using existing drill holes.
- Attachment of the holder using PowerStrips should be possible.
The implementation resulted in a "modular" holder:
- The holder can be used with or without a wall mount.
- The holder can be used standing or hanging.
- Without a wall mount, the ball-head foot is attached using a PowerStrip.
- The detector can be removed from the holder without problems.
- Either remove the ball-head foot from the wall mount by turning and detaching it.
- Or disconnect the ball head by opening the lock.
- The detector has free alignment: The detector can be freely rotated and tilted via the ball head, up to approx. 42 degrees.
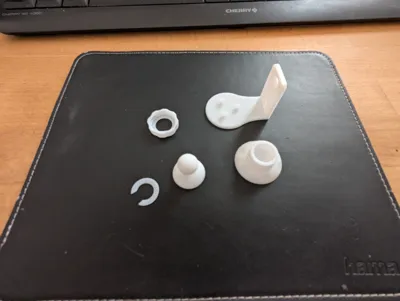
Parts
The holder consists of the following parts. Not all are required depending on the type of use.
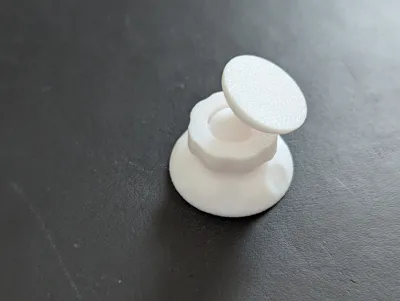
- The Ball Head: It is used to attach the presence detector.
- The Lock: The lock is attached to the ball-head foot by means of a thread.
- The Locking Ring: It ensures that the ball head does not slip through the lock.
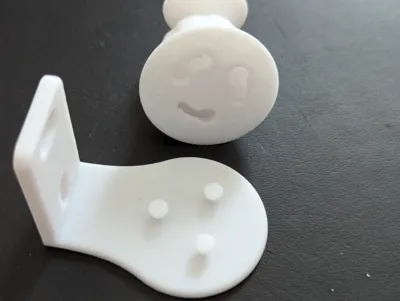
- The Ball-Head Foot: It holds the ball head and is optionally mounted on the wall mount.
- The Wall Mount (optional): Allows attachment to a wall. Screw size and distances are configurable. See text below.
- Cap (optional): Covers the screws on the wall mount (not shown in the drawing below)

WARNING
The holder is intended to carry light items and primarily appear subtle!
Therefore, the following must be observed during assembly and use:
- Do NOT apply great force to the holder.
- When locking with the thread, apply only a little force.
- When securing the ball-head foot to the wall mount, only turn slightly.
Assembly
- The ball head is pushed through the lock.

- The locking ring is pushed between the ball head and the lock.

- The ball head is placed on the ball-head foot.

- The lock is lightly tightened.


- Attachment of the detector to the ball head using a PowerStrip.


If necessary, attach the wall mount and place the cap


- If necessary, attach the ball-head foot to the wall mount by placing it and turning it slightly.


Further Information
The following dimensions are defined for the wall mount:
- Screw diameter: 3mm
- Screw head diameter: 6mm, max. 12mm possible
- Screw head height: 3mm
- Screw spacing: 20mm
- Ball head to wall distance: 16mm

These dimensions influence the design of the wall mount and the cap and can be adjusted in the parametric Model Maker. The "Ball head to wall distance" parameter increases the distance to the wall if the detector needs to be rotated significantly around its vertical axis. It is important to ensure that identical parameters are chosen for the cap and the wall mount to guarantee the correct fit.


License
You shall not share, sub-license, sell, rent, host, transfer, or distribute in any way the digital or 3D printed versions of this object, nor any other derivative work of this object in its digital or physical format (including - but not limited to - remixes of this object, and hosting on other digital platforms). The objects may not be used without permission in any way whatsoever in which you charge money, or collect fees.
Comment & Rating (2)