Speedloader for AR15/STANAG Magazine


Print Profile(3)


Bill of Materials

Description
Membership
This model is covered by my Basic and Advanced Commercial License tiers. You may sell physical prints with an active subscription. See my profile for details.
Speedloader for STANAG/AR15 Magazines 5.56x45 / .223 Remington. You are welcome to test. Feedback appreciated.
´
UPDATE 2.5b: On user request is there a bigger ammo funnel availiable.

UPDATE 2.5a: On user request, a 5 rounds per push version.

UPDATE 2.5: Funnel magazin lock is now in “final” state. Works well, just need some supported lock movemtes for break in. Then it should worrk smoothly. Print Profile 2.5b has all parts in the newest version. Assembly instructions will be updated soon.
UPDATE 2.2: Modified the feeder for better ammo flow to the chamber.
UPDATE 2.0: redesigned almost all parts are redesigned now. Should solve some issues. Recommend “all parts version 2” print profile. Feedback needed for further refinements.
Currently in the feeder, two bullets block each other from dropping into the lower part. I'll try to fix it the next days.

UPDATE 1.2: Recommend the actual build version of the mag well. You can find the files in the STLs.

UPDATE 1.1: Changed the pusher tip for solving the last round problem.
The model works, maybe needs some tweaking, still in development.
Assembly Instructions
Step 1 – Install the locker and the locker stoper into the magazine funnel
Prepare all parts like shown in the picutre. Make sure to remove all support material.

- Insert the locker into the groove of the magazine funnel by hand and push it to the hard stop.
- Press it in as far as possible manually.
- Then put the locker stop into the groove and seal the groove.
- Apply a firm tap with the palm of your hand if you cant get the locker stop in easily.
✔ The locker should be moved about ten times for break-in, maybe with a bit support to go down into the hole.
✔ After a short break-in period, it should move smoothly.


Step 2 – Connect Funnel and Feeder
(Images: Funnel and Feeder alignment)
- Take the magazine funnel and the feeder A.
- Push both parts together until fully seated.
Due to the shape of the alignment pins, incorrect orientation is not possible.
Optional:
- Funnel and feeder may be permanently fixed with adhesive if desired.
- Adhesive is not required for normal operation.


Step 3 – Insert the Pusher
(Images: Rear view of feeder / pusher orientation)
- Insert the pusher from the rear into the feeder.
- Ensure the handle is facing upward.
- Slide the pusher in completely until it reaches its stop.
✔ The pusher must move freely forward and backward.


Step 4 – Secure the Pusher with the Bolt
(Images: Bottom view / bolt insertion)
- Ensure that the slot of the pusher is allinged withe the bolt hole.
- Insert the bolt from the bottom of the feeder.
- Push it through until it fully engages.
- The bolt prevents the pusher from being pulled out.
✔ Bolt must sit flush and secure the pusher reliably.


Step 5 – Mount the feeder B
- Take feeder B and set it into the slot of feeder A.
- Ensure that you do it in the right orientation.

Assembly Complete
After assembly:
- The pusher moves smoothly.
- The locker engages and disengages correctly.
- No parts are loose.
The speedloader is now fully assembled and ready for use.

Speedloader – User Manual
Important Safety Note
- Use only with unloaded firearms.
- Always keep ammunition pointed in a safe direction.
- This device is intended only for loading magazines, not for handling firearms.
Loading Procedure (Steps 1a–6a)
1 – Insert the Pusher Fully
Ensure that the pusher is fully inserted into the speedloader housing.
It must be in its front-most position before inserting the magazine.

2 – Insert the Magazine
Insert the magazine into the speedloader from the rear.
- Open the locker.
- Push the magazine in until it stops. Then push the locker down into locking position.
- Verify that the magazine is securely locked and cannot move.


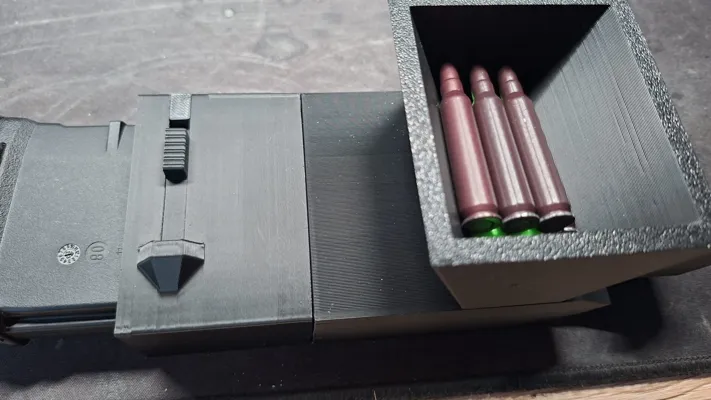
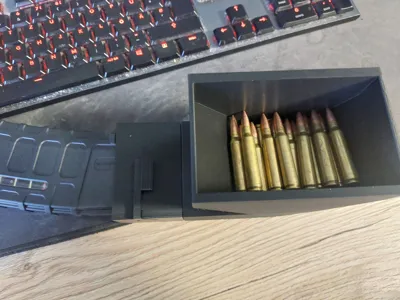
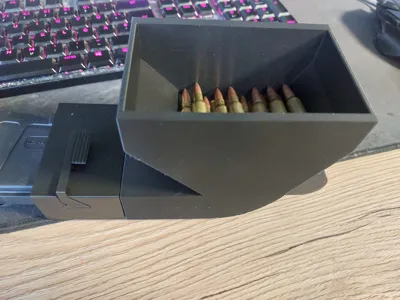
3 – Load Ammunition into the Funnel
Place the cartridges into the funnel in the correct orientation.
- Bullet tips must point forward and downward as shown in the images.
- Ensure all rounds lie flat and are not crossed or tilted.

4 – Pull the Pusher Back and Forward
Pull the pusher straight out as far as it will go.
- This allows up to 6 rounds to feed down into the loading chamber automatically.
- Do not force the pusher beyond its stop.
Push the pusher fully forward to load the rounds into the magazine.
- Ensure that the locking tab (green marked area) remains engaged.
- If necessary, press the locking tab gently with your thumb while pushing.
- The pusher must reach its front-most position.

6 – Loading Complete
After one full cycle:
- 6 rounds are loaded into the magazine.
- Repeat steps 4a–6a until the magazine is fully loaded.
- If the magazine is fully loaded, unlock the locker.
- Pull out the magazine.

Notes & Troubleshooting
- If rounds do not feed smoothly:
- Check ammunition orientation.
- Ensure the magazine is fully locked in place.
- Make sure the pusher is not partially engaged.
- Do not use excessive force.
- Different ammunition types or materials may feel slightly different during loading.
Boost Me (for free)
If you like my design, I'll be happy if you're considering boosting me. Thank you!
License
You may create derivative works based on this object, provided that all such derivative works are published exclusively on the MakerWorld platform and include proper attribution to the original creator. You may not share, upload, host, distribute, or publish this object—or any derivative work of this object—on any other digital platform, marketplace, or distribution channel. Commercial use of this object and any derivative works is strictly prohibited. This includes, but is not limited to, selling, renting, sublicensing, or using the object in any context in which you receive monetary compensation or other financial benefits.
Comment & Rating (71)