Ray Gun Mark 2 - Arduino & RGB LEDs


Print Profile(1)

Description
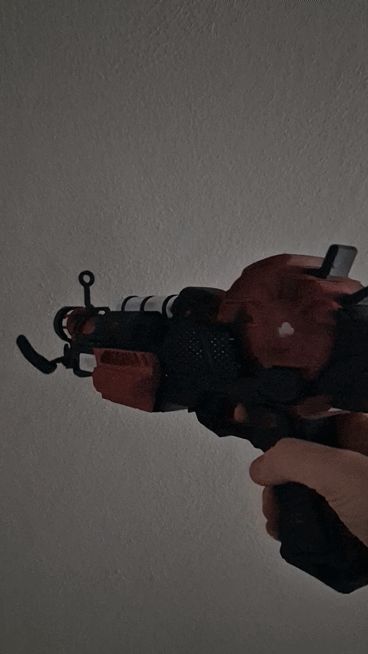
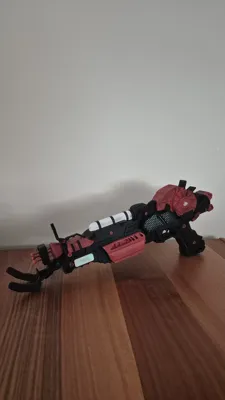
🧟 RAY GUN MARK 2 - FUNCTIONAL REPLICA (ARDUINO)
🇬🇧 [EN] ENGLISH DESCRIPTION
Bring the iconic Ray Gun Mark 2 from Call of Duty Zombies to life! This model is not just a static prop; it is hollowed out and engineered to fit electronics for realistic lighting effects.
✨ FEATURES:
🔹 Firing Animation: Realistic Green/Blue burst effect on trigger pull.
🔹 Idle Mode: "Breathing" light animation when the gun is idle.
🔹 Rechargeable: Dedicated slot for a TP4056 charging module.
🔹 Easy Assembly: Split parts for easy printing.
🛠️ BILL OF MATERIALS (HARDWARE):
To build the fully functional version, you need:
🔸 1x Arduino Nano
🔸 3x RGB LEDs (Common Cathode) + Resistors
🔸 1x Li-Po Battery (3.7V)
🔸 1x TP4056 Charging Module
🔸 1x Tactile Button (Trigger)
🔸 1x Toggle Switch (Main Power)
💻 CODE & WIRING DIAGRAM:
You can find the ready-to-upload Arduino code, wiring diagram, and instructions on my GitHub page:
🖨️ PRINT SETTINGS:
▪️ Material: PLA or PETG (PLA+ recommended)
▪️ Layer Height: 0.16mm (best detail) or 0.20mm
▪️ Infill: 15-20%
▪️ Supports: YES, Tree supports recommended.
🇹🇷 [TR] TURKISH DESCRIPTION
Bring the legendary weapon Ray Gun Mark 2 from Call of Duty Zombies mode to life! This design is not just a model; it is designed to fit an electronic circuit inside for realistic lighting effects.
✨ FEATURES:
🔹 Firing Effect: Realistic Green/Blue burst animation when the trigger is pressed.
🔹 Idle Mode: "Breathing" light effect when the gun is idle.
🔹 Rechargeable: TP4056 charging module slot is available.
🔹 Easy Assembly: Parts are split for easy printing.
🛠️ BILL OF MATERIALS:
To make the electronic version, you need the following:
🔸 1x Arduino Nano
🔸 3x RGB LED (Common Cathode) + Resistors
🔸 1x Li-Po Battery (3.7V)
🔸 1x TP4056 Charging Module
🔸 1x Trigger Button
🔸 1x On/Off Switch
💻 CODE AND WIRING DIAGRAM:
You can access ready-to-upload Arduino code, detailed wiring diagram, and installation guide on my GitHub page:
🖨️ PRINT SETTINGS:
▪️ Material: PLA or PETG (PLA+ recommended)
▪️ Layer Height: 0.16mm or 0.20mm
▪️ Infill: 15-20%
▪️ Supports: YES, Tree supports recommended.
Happy Printing & Zombie Hunting! 🧟♂️🔫

Comment & Rating (7)