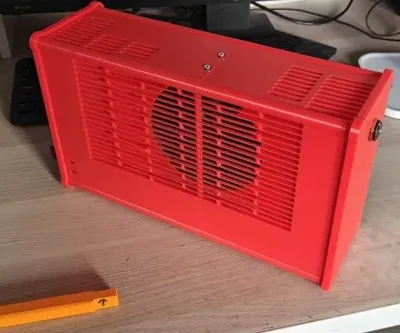
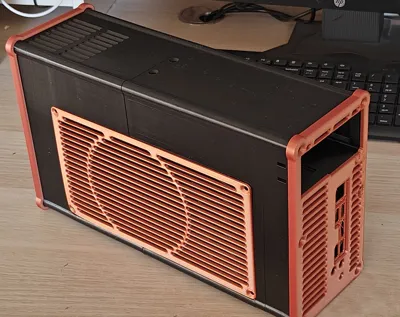
BC-250 BC250 AMD case, for HP server PSU


Print Profile(6)


Description
UPDATE: This project is obsolete. There are better version V4 of it here https://makerworld.com/pl/models/2481620-bc-250-case-v4-for-flexatx-and-hpserver-psu#profileId-2725662 - few changes, few improvements, but idea - is still this same.
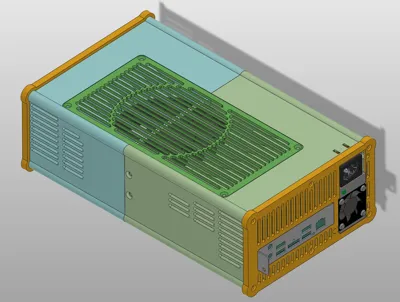
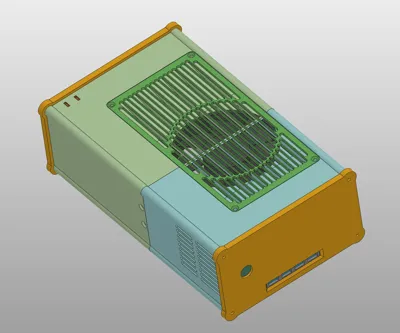
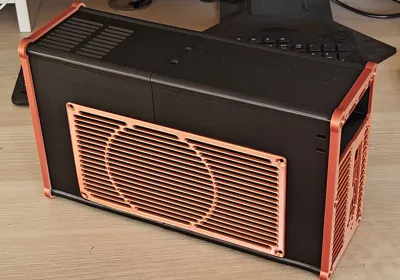
This is a case for BC-250 board-computer.
to use it with cheap 12v PSU - from HP server, like HSTNS-PL28 643954-201 (gen6, gen7 - reachable under 10$/10€ in state "like new"/new).
It can be 460W, 750W …

How to connect it? Its simple:

- Take some old/broken ATX, and cut “PCIe 12v” cable, 6pin is ok, 8pin is good too.
- wire it like mine - solder or screw like me.

- place any 1-47kOhm resistor between 4 and 5 pad on top small pads of PSU.
- first small pad on this connector (first yellow wire on my photo) is PowerON - when grounded (short to black, gnd) - power supply will start, power on. You can short it forever, or add a switch on front panel.
- bonus - on second pad (white wire on my photo) power supply is giving “load” signal - 50mV on every 10W load. So you can connect some (scaled) voltmeter here, and eg. 300mV = 0.3v measured = 60W load ;)
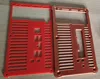
Front panel - can be blank (if You want, you can add some logo to it, in slicer etc), can have hole for power-button (classic 16mm one), and can have place for 4port usb3.0 hub. For securing it in place - is needed “usb hub stopper” small part, screwed to bottom of case.
https://pl.aliexpress.com/item/1005010684322630.html
Cable in this hub is too short, but with short additional angle cable can reach rear usb3.0 in BC250

All holes are sized for standard M3 heat inserts, and M3 screws.
Rear panel - can be “as is” for BC250 with metal bracket, or you can remove metal bracket, and take panel for this version (but it requires printing with supports)

BC-250 for proper cooling MUST have opened radiator fins on top - for airflow.
Fan - I use Arctic Cooling P12Pro PST - because they have good pressure and airflow, but anything 12v PWM capable >1700rpm should be ok.
UPDATE:
The earlier model had specially designed recesses to avoid printing entire walls with a double outline and infill, where large flat areas could simply be printed with two or three outlines (which is much faster and saves a small percentage of material).
Some people complained that artifacts were visible on the outer walls (especially during fast printing and with an imperfectly calibrated printer or filament), resulting from varying wall thicknesses in different places.

This can be visible, so for those who want perfectly uniform side walls and don't want to waste time on a longer print, I'm including the "flat panels" version – with flat side panels, without recesses.
However, the difference in print times is significant – for example, the rear part takes 8 hours to print, vs. 5 hours when have lighter panels.
Both versions are available here.
Comment & Rating (11)