Window Seal for 4-inch Exhaust Duct


Print Profile(3)

Description
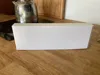
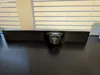
The model uses interlocking boards and a vent. The interlock is an angled dove tail that will provide a very tight seal (more air tight than the typical window seal kit).
The interlocks are modeled with no clearance. You will likely need to hammer the pieces together (I did). This is for a better seal, to be able to move the assembly as one piece, and so in can be used in vertical sealing applications.
I suggest printing two test pieces to see if you need to add assembly clearances in your slicer. A small model is provided for that purpose. You may need to tweak settings like elephants foot compensation. You can also lower your overall flow rate to provide a bit of clearance. If you run into trouble, post a comment with suggested clearances.
No supports needed. The dove-tail was angled so that vent can be printed flat face down without supports.
The two ends should be cut to size using the cut tool in a 3D slicer. One end piece should have the slots and the other the tabs. Basically, print the required full size lengths to get you close filling the window, measure how much you need, and cut two filler board models (on opposite ends) to fit your window.
I used two layers for the sides and 3 layers for top and bottom. It is VERY strong at these settings. You may be able to reduce the layers but print a test to insure that the tabs are strong enough. For infill, I used grid at 10%.
I suggest adding a pliable window strip, especially if your window trim is bowed like mine.
Enjoy
Comment & Rating (65)