Itchy Multi-part (No AMS)


Print Profile(1)
Bill of Materials


Description
Itchy Multipart (No AMS)
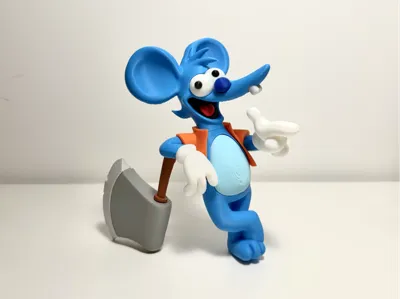
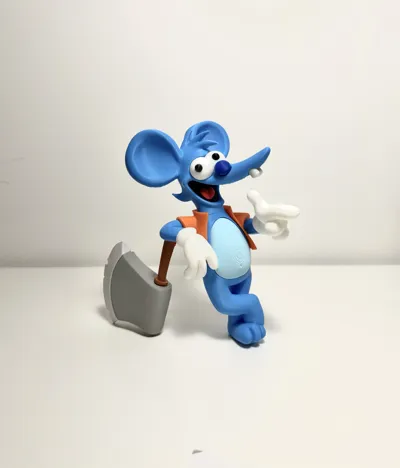
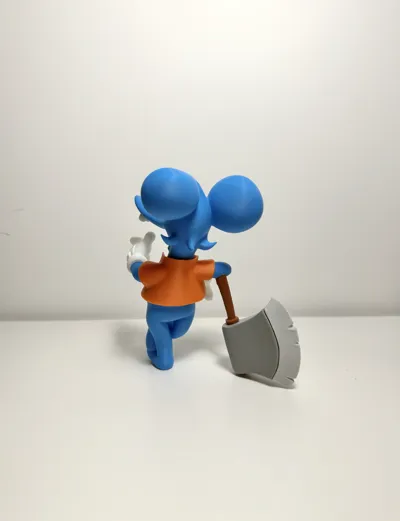
Itchy from The Simpsons
NOTE: This model requires super glue for assembly. Please read the instructions for successful assembly.
No need for AMS. Everything is cut for multipart printing.
Colours used:
Bambu PLA Basic: Black, White, Orange, Cyan, Blue, Grey, Light Gray, Cocoa Brown
Bambu PLA Matte: Scarlet Red, Ice Blue
Assembly Steps:
Assemble the Face
- Attach the Eye dots to Eye Balls
- Apply glue to secure the eye dots to the eye balls.
- Attach the Eye Balls to Face
- Apply glue to secure the eye balls to the face.
- Attach the Tongue to Throat Base
- Apply glue to secure the tongue to the black throat base.
- Attach the Throat base to mouth
- Apply glue to secure the throat base inside the mouth.
- Attach the Nose to Face
- Apply glue to secure the nose to Face.
- Attach the Teeth to Face.
- Apply glue to secure the teeth to front of Face.
Assemble the Arms
- Attach the Right and Left Arm to Right and Left Hand
- Apply glue inside Hand and secure to Arm model (each side)
Assemble the Body
- Attach the Belly to Body
- Apply glue to back of Belly and secure the part to Body.
- Attach the Body to Jacket
- Apply glue inside the Jacket back and attach the body.
- Attach the assembled Face to Body
- Apply glue to black “box” model and secure the parts in top centre of body.
- Attach the Arms to Body
- Apply glue to secure the arms to the body.
Assemble the Axe
- Attach the Add-on to Axe Head
- Apply glue to Add-on and secure to the Axe Head model.
- Attach the Handle to Axe Head
- DO NOT add glue inside the axe head so the handle can move freely for balance.
- Attach the Handle to Right Arm
- Apply glue to secure the Handle to Right Arm model.
I’ll be updating my models as I learn.
If you like them please leave a comment or feel free to boost. I appreciate your feedback.
Enjoy! :)
License
You shall not share, sub-license, sell, rent, host, transfer, or distribute in any way the digital or 3D printed versions of this object, nor any other derivative work of this object in its digital or physical format (including - but not limited to - remixes of this object, and hosting on other digital platforms). The objects may not be used without permission in any way whatsoever in which you charge money, or collect fees.
Comment & Rating (35)