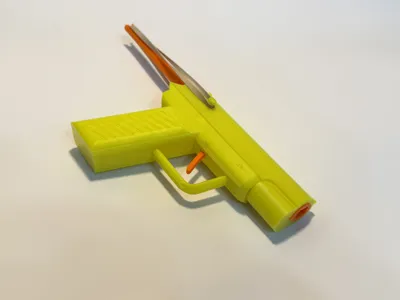
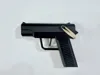
Toy Shooter - Powerful !


Print Profile(3)

Bill of Materials


Description
Powerful rubber band powered toy shooter!
This is a toy but do not fire at people, pets, or anything you don't want broken! It has the potential to seriously harm or blind!!
This is a rubber band powered toy that can fire the projectiles with medium to strong force depending on the number and strength of rubber bands.
- With 1 rubber band I was able to easily shoot across my living room with minimum drop.
- With 2 rubber bands I was able to easily pierce a cereal box.
Video shows capability!
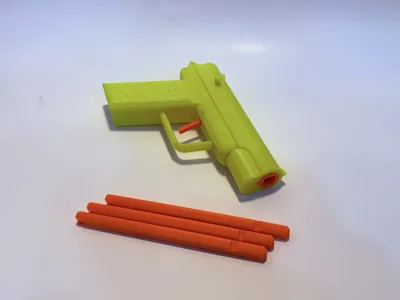
Everything is 3D printed except for rubber bands and raw filament for use as pins during assembly. The projectiles are printed rods with a blunt style tip.
Boost Me (for free)
If you enjoyed this model boost me please! This will help me create more models!
Also follow me please. It's free, unlimited, and greatly appreciated!
I recommend to print the trigger, release, and darts in PETG as in default profile. I have tested them in PLA with some success if using only 1 band, but PETG is ideal. All other pieces can be printed in PLA.
I have also included a single color profile.
Assembly consist of only 5 different 3D printed parts!
Steps to assemble are as follows:
The tolerances are quite tight and some holes may be tighter than others. To help with inserting the filament pins cut the filament a 45 degree angle. You can also use a pick or small drill bit to clear out the hole. To remove the supports use whatever method you are comfortable with. I personally love using these small "picks" that are available at hardware stores.

Attach the trigger and release. Be sure to assemble with the short edge of the release facing the trigger as shown in the photo. Insert a small piece of raw filament as the pin joining them. Either use something to cut the filament flush once inserted (I use cuticle cutters) or measure/mark and cut the filament with scissors then reinsert. The goal is to have no filament sticking past the edges. No need to melt or glue.

Insert the above assembly into the trigger frame from the top. Again insert a piece of raw filament as a pin and cut as flush as possible. Slightly recessed is also acceptable. No need to melt or glue. See photo below for clarification.

- Insert a filament pin through the hole on the trigger and the trigger frame. For this pin you will need to be sure it does not come out. If you filament fits very tight you should be ok. If your filament is loose my preferred method is to lightly melt the ends with a soldering iron. Alternatives are using a lighter, a hot nail, or a very carefully placed drop of glue. If using glue use cation to make sure only the end of the filament is glued to the trigger frame. The trigger must be able to pivot!

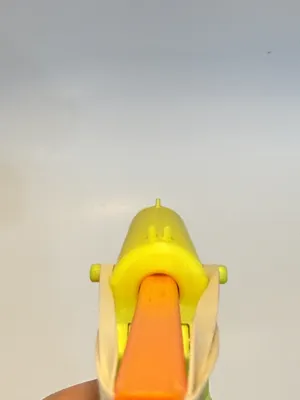
5. Insert the barrel into the top half. Pay attention to the slot on the top half and align it with the ridge on the barrel. Insert most of the way by
hand. Once sure of the alignment press it against a table to ensure it is flush.

6. Attach the top and bottom assemblies. Using a filament pin again melting/gluing the ends to be sure they stay in place. If your filament fits extremely
tight you should be fine.

To Fire
- Insert the dart with the cut out facing down. Pull the trigger while inserting the dart

2. Place the rubber band around the nubs sticking from the sides and pull back. Alternatively is using multiple bands I leave the dart extended and pull
the rubber bands over it will it is locked in place.

If you enjoy launching/shooting models check out some of my other models!


License
You may create derivative works based on this object, provided that all such derivative works are published exclusively on the MakerWorld platform and include proper attribution to the original creator. You may not share, upload, host, distribute, or publish this object—or any derivative work of this object—on any other digital platform, marketplace, or distribution channel. Commercial use of this object and any derivative works is strictly prohibited. This includes, but is not limited to, selling, renting, sublicensing, or using the object in any context in which you receive monetary compensation or other financial benefits.
Comment & Rating (57)