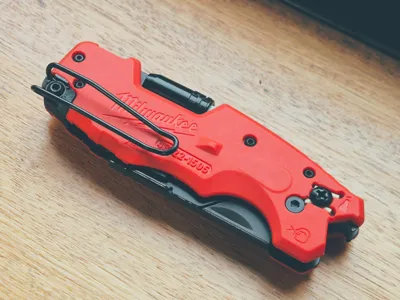
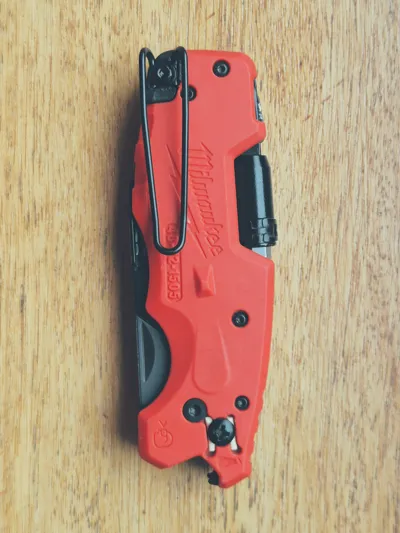
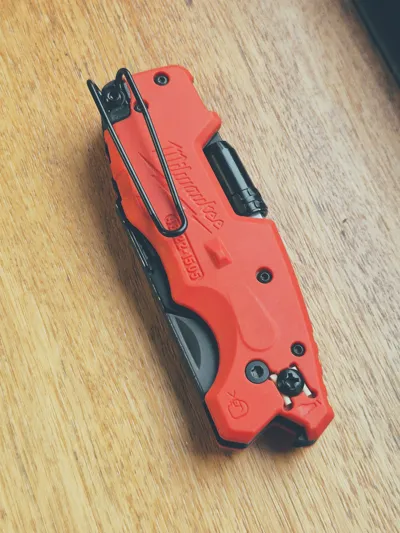
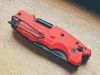
Milwaukee Fastback 6in1 TIP UP Carry (48-22-1505)


Print Profile(1)


Description
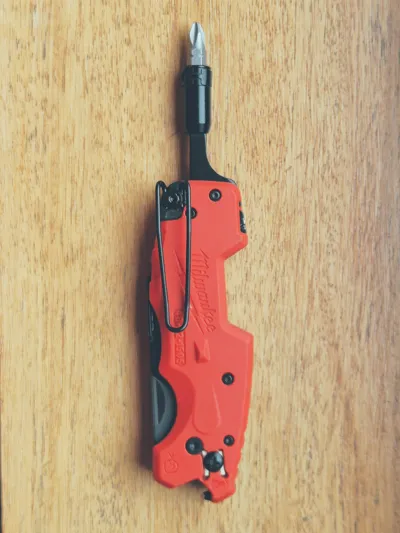
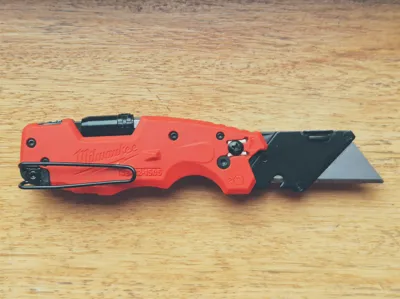
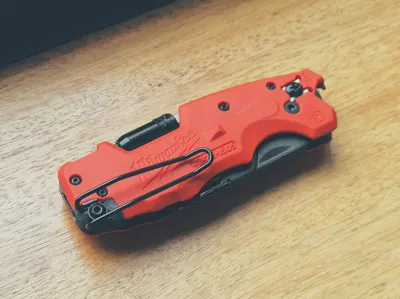
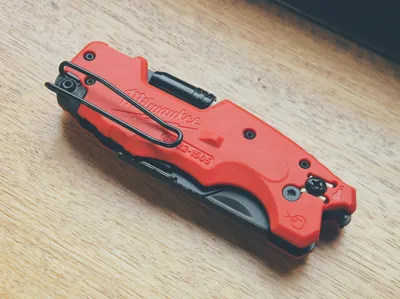
A simple mod for the Milwaukee Fastback 6-in-1 (Model 48-22-1505) to make it tip-up and (somewhat) deep carry.
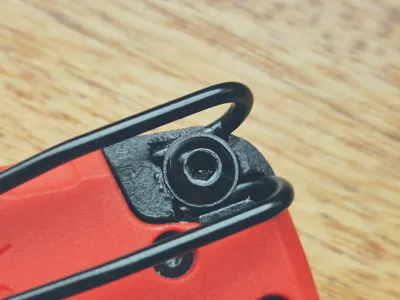
It's a very small print (< 1 gram), that allow us to use the lanyard hole as a holder for the clip to turn the tool tip-up and deep carry.
Please use at least PETG for this print (ASA or ABS should be even better). Because I don't own a enclosed printer, I printed mine in PETG-CF, but it has also been tested with PETG.
I work mostly in heavy industries with hot environments, so I didn't even test the durability of PLA.
The print as some small supports to remove. I know it could be printed without them by changing model orientation, but I believe this is the strongest orientation.
You will additionally need:
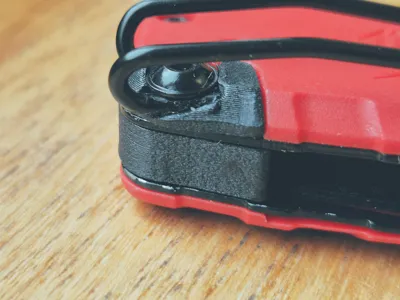
1 - M3x8mm washer head screw (flanged screw) - don't use a normal socket head, it won't hold the clip if higher pressure is applied, or if you do, use a washer, although the clip won't fully sit in the pocket.
You can easily find this screws on Amazon, Aliexpress or in a local store.
Here's the link for the ones I've used: Aliexpress - Washer Head Screws
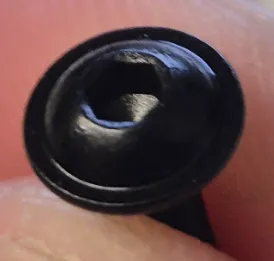
The huge difference between an M3 washer head and an M3 socket head: Washer head:

Socket head:

- 1 - M3 nut - a normal one (non-locking) is fine
Disclaimers:
- I emphasize the need of using a washer head screw
On the assembly descritpion below I suggest using the blade to remove part of the supports. Please only do it if you feel confortable with it.
I take no responsibility for any injuries that may occur during assembly.
Use any other non-cutting tool if you are not experienced.
Boost Me (for free)
Although it is a very small piece, don't be fooled. This took a lot of time testing and redesigning. So please, if it serves you well, please leave your Boost. Thank you.
Assembly instructions:
| 1 - Remove the supports from the top and bottom parts. |
|
| 2 - In the top part, if needed, use the blade to remove supports from the top side (see Disclaimer). Make sure to remove the supports completely for a flat surface. |    |
| 3 - In the bottom part, if needed push the screw from the top to remove the support. |   |
| 4 - Insert the top part into the lanyard hole and press it against a table for it to fully seat. |    |
| 5 - Insert the nut into the bottom part. Make sure it fully seats. Use the screw to fully push it down if needed. |   |
| 6 - Insert the bottom part into the space between scales in the tool. |   |
| 7 - Insert the clip and the screw, and align the clip with the number “48”. |  |
| 8 - Tighten the screw. |  |

Additional tip:
If you want to cover the original screw hole using the original screw, place two short segments of filament underneath the screw.
This acts as a spacer to prevent the screw from protruding and obstructing the blade mechanism:

As soon as I have time, I'll try to work on a proper cover for this.
Hope this works for you as well. I've been using mine daily for well over a month now and had no issues until this moment.
Please do your testing and let me have your feedback. Thank you.
License
You may create derivative works based on this object, provided that all such derivative works are published exclusively on the MakerWorld platform and include proper attribution to the original creator. You may not share, upload, host, distribute, or publish this object—or any derivative work of this object—on any other digital platform, marketplace, or distribution channel. Commercial use of this object and any derivative works is strictly prohibited. This includes, but is not limited to, selling, renting, sublicensing, or using the object in any context in which you receive monetary compensation or other financial benefits.
Comment & Rating (24)