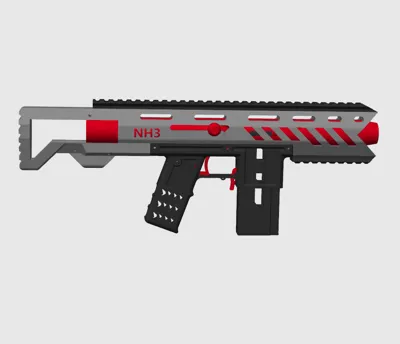
NH3 Foam Dart Blaster with No Hardware


Print Profile(2)


Description
2026.02.10 Old version update: Modified the outer tube gantry position structure to reduce disassembly difficulty If replacement is needed, it can be printed separately The original model file contains 2 models before and after modification, please identify them yourself
2026.03.01 New version update
1 Gantry structure and clearance optimized, solving the problem of the gantry not rebounding and reducing the difficulty of rubber band installation
2 Shell structure and clearance adjusted, increasing structural strength and reducing maintenance difficulty The inner tube can now be directly removed after removing 3 pins
3 Inner tube structure and clearance adjusted, now both sides can pull the bolt The front muzzle can install a bearing tube by itself The rear part is adapted for coiled light hardware
4 Magazine fine-tuned, adopting a new rubber band installation method to reduce the squeezing force on soft darts
5 Added basic sights and buttstock to improve comfort
6 Added hardware adaptation parts
The entire model is PETG printed, no hardware is needed, but the power source is a rubber band (Hardware adaptation parts have now been added)
The rubber band used is a 40mm diameter rubber band, and the soft darts are 13*36mm universal foam darts Compatible with Artisan Straight Dragon Claw magazines The hardware version picatinny rail uses M3*8 cylindrical head screws The bolt uses M3*20mm or longer cylindrical head screws The coiled part uses an outer diameter of 16mm, a wire diameter of 1.4mm, and a length of 140mm
The printed magazine, due to the characteristics of rubber bands, will have greater elasticity the longer it is pulled, making it easy to flatten the foam darts It is recommended to prioritize other creators' constant force spring version magazines
Boost Me (for free)
If you think the model is good, please boost me
The following is the installation sequence for the new optimized version For the old version installation sequence, please search and view the old version installation video on Bilibili
Part orientation and position can be viewed in the assembly view The yellow curves are rubber bands The small holes are all fixed with filament

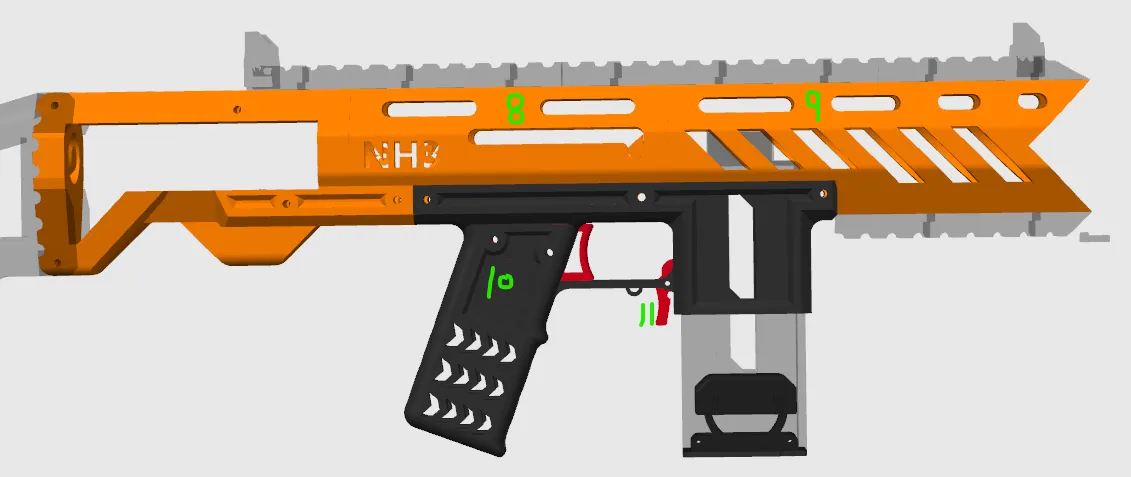

The contact areas between 16 and 17 need to be sanded The contact areas between 17 and 19 need to be sanded Mainly sand the Z-seam

Main body installation complete

Magazine and other accessories installation:


The optimized version installation video is as follows:
License
You shall not share, sub-license, sell, rent, host, transfer, or distribute in any way the digital or 3D printed versions of this object, nor any other derivative work of this object in its digital or physical format (including - but not limited to - remixes of this object, and hosting on other digital platforms). The objects may not be used without permission in any way whatsoever in which you charge money, or collect fees.
Comment & Rating (18)