Meshtastic Node Enclosure for RAK19007 Board


Print Profile(1)
Description
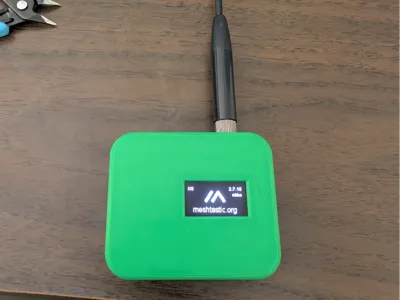
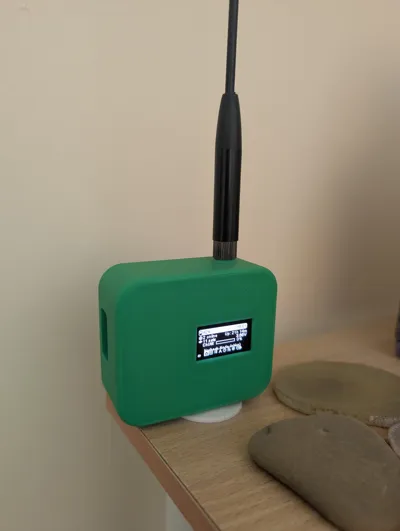
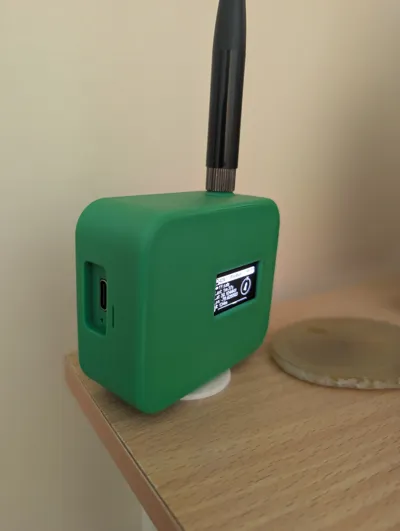
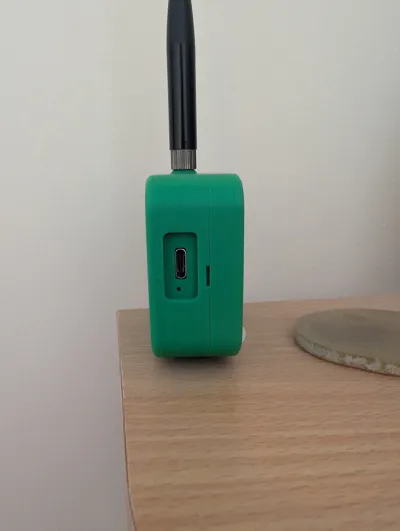
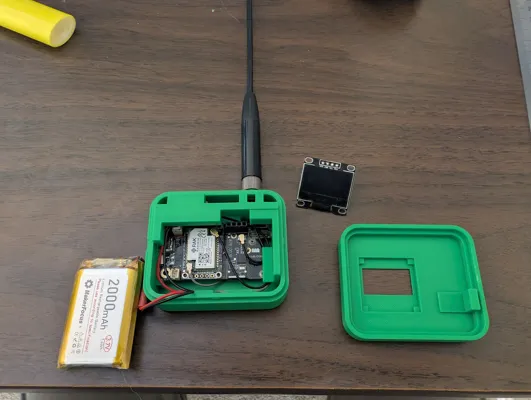
This is a Meshtastic Node Case that I designed for the popular RAK19007 base board.
The case is solid, all parts fit securley with no rattling.
No additional fasteners, screws, or glue necessary, just print the pieces out, assemble, and snap together!
The node performs wonderfully so far, lasting for days on a single charge, even with all the additional sensors installed.
I am excited to see people start using my design so please print it out and let me know how you like it. :)
The components for the device shown in the photos are listed below and can be found on the RAK website, Rockland website, and Amazon. Links at the bottom.
Additional components can be added or removed as long as they are compatible with the RAK19007 base board.
You may need to swap the JST connector that comes on the battery to fit the RAK board. Also double check the polarity of the connector that the board requires.
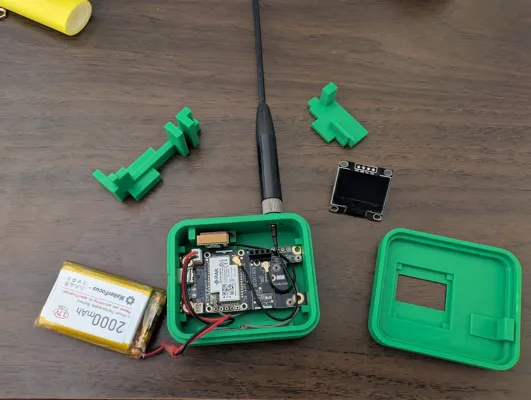
- WisBlock Meshtastic RAK19007 Base Board (with RAK4631 core module)
- OLED Display Solomon SSD1306 (RAK1921)
- RAK12500 GNSS module (GPS)
- RAK1904 3-Axis Acceleration Sensor STMicroelectronics LIS3DH
- Environment Sensor BOSCH BME680 | RAK1906 (temperature, humidity, barometric pressure, and air quality sensor)
- 2,000 mAh 3.7v Lithium Polymer Battery
- 10dBi Meshtastic 915MHz LoRa Soft Whip Antenna
- Bluetooth Antenna (comes with the board)
Print/Assembly tips:
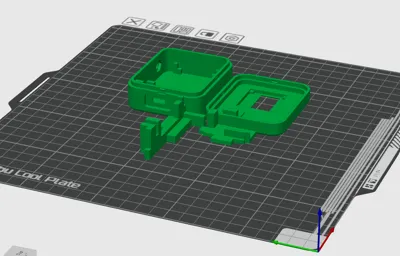
1. Be sure to orient the parts on the print bed as shown in the provided screenshot.
2. Attach any desired sensor modules on to their respective module slots on the RAK19007 board.
3. Place the board into the main slot on the back half of the enclosure, making sure the USB-C port sits in it's slot.
4. Attach the GNSS, BLE, and LoRa antenna connectors on to the respective connectors on the board.
5. The GNSS module goes in the little slot on the top left of the enclosure back piece.
6. The LoRa antenna connector slots in and sticks out of the hole on the top of the enclosure. Be sure to align the hex part properly.
7. The BLE antenna goes into the narrow slot at the bottom of the enclosure.
8. Connect the battery JST connector onto the board.
9. Tuck exess wiring under and around the board.
10. Insert the ‘Key 1’ part in it's slot on the right side of the enclosure. This key must be installed before the second one. It secures the board in place. Be sure it presses down all the way and is not stopped by exess wiring.
11. Insert the ‘Key 2’ part next. As you do this, you may need to adjust the GNSS and LoRa antennas into their slots. This key secures those parts. Screwing the LoRa antenna onto the connector at this point can help.
12. Insert the battery. It sits directly on top of the chip and is also supported by the ‘shelf’ on Key 1. Neatly tuck the battery wiring away.
13. Attach the OLED screen onto the board. It sits on top of the keys.
14. Finally, Double check that the wiring is not interferring with any of the parts fitting, then Line up the enclosure's front piece on top of the back piece and snap it together!
Please let me know if you have any questions and feel free to give me any feedback on ways to improve the design.
Links:
Battery: https://a.co/d/0aJXjLY9
Antenna: https://a.co/d/00KVOvqx
RAK Website: https://store.rakwireless.com/
Rockland Website: https://store.rokland.com/
Comment & Rating (8)