Pocket Sized Ammo Storage and More


Print Profile(46)
Bill of Materials


Description
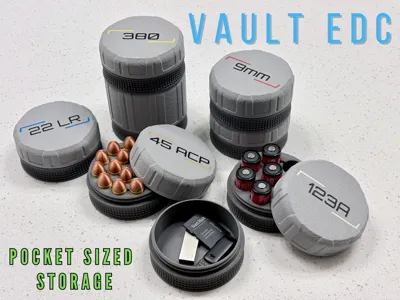
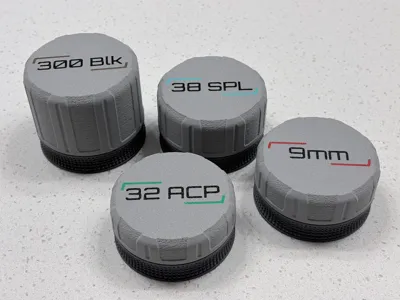
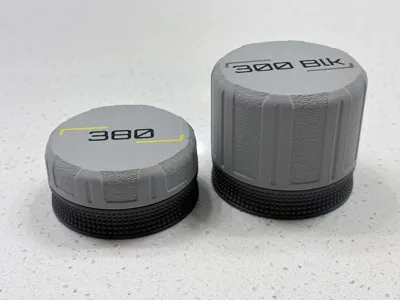
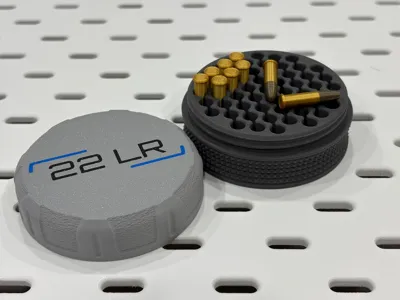
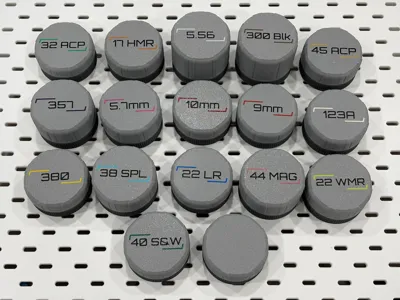
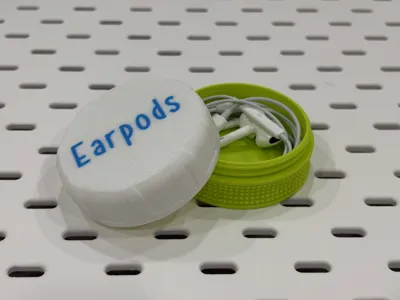
Greetings! This is my latest circular ammo container design, the Vault EDC. It’s a great way to store some backup ammo in your glove box, backpack, jacket pocket etc. Prints great in PLA or PETG for more heat resistance. Can easily be customized with your own text right in the slicer. I've had a lot of requests for different calibers, so there are a bunch more available with this design than my previous containers.
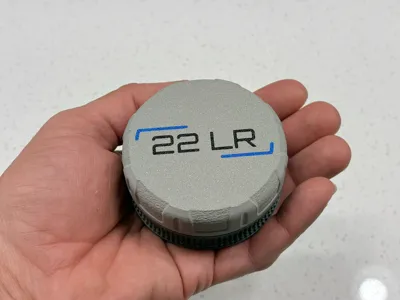
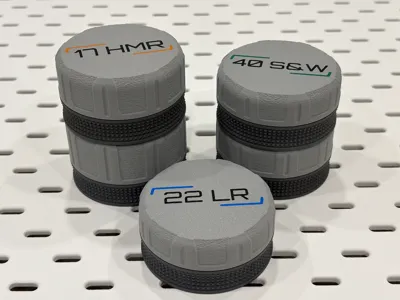
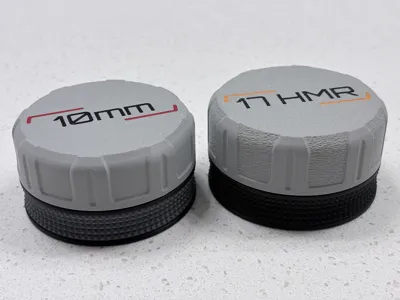
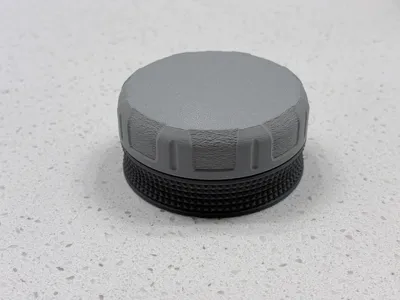
Features a flat base option that doesn't require supports as well as a stackable base which requires supports. Customizable lid texture that uses the paintable fuzzy skin option. Easily remove the font and colored brackets and add your own lettering.
Attention, the stackable base requires a support interface layer that is printed in a different filament than what you are printing the rest of the base out of. Unless you modify the support settings in the 3mf file, you must use one, or you will not be able to remove the support from the bottom of the base.
If you don't want to do that, please print the regular flat base that is included.
You can read up on supports here:
https://wiki.bambulab.com/en/software/bambu-studio/support
Q&A
Q: I can't remove the support, what do I do?
A: You printed it without a support interface layer. Read the printing guide below. It explains everything.
Q: Are there going to be more calibers?
A: If there is enough of a demand, I will look at adding more to the collection.
Q: Is there going to be a larger version with this styling?
A: If these are popular, and you guys want me to, yes.
Q: Are you going to update your older designs with additional calibers?
A: I do not have plans at this time to do that.
Q: Can I purchase a commercial license so I can sell these?
A: Yes, there is a commercial license available through MakerWorld and I have a Patreon page as well.
Q: Do these stack with my older Mini 22 ammo container?
A: Not really, these are several millimeters larger in diameter.
Q: Can I get a lid with no text on it?
A: Yes, check out the print guide below for details.
Q: My ammo rattles, is there a way to fix that?
A: I designed these to be just slightly taller than SAAMI specs to make sure they work with all the ammo types. Not all manufacturers and bullet designs are the same length, so your HP carry ammo may be shorter than a FMJ round. If you need a particular lid dimension to minimize rattle, let me know and I’ll look at making a custom height.
Update - just added 7.62x51, 38TPC, 45-70, 500 S&W Magnum
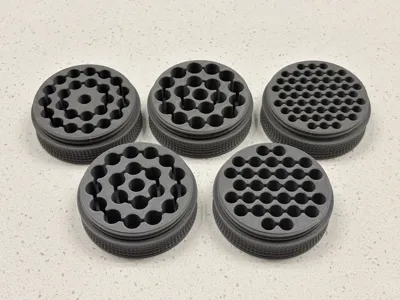
Currently Available Calibers and Round Counts
17 Mach 2 - 55rds
22 LR - 55rds
17 HMR - 55rds
17 WSM - 37rds
22 WMR - 55rds
22 Magnum - 55rds
25 ACP - 40rds
5.7mm - 31rds
32 acp - 25rds
380 acp - 20rds
9mm - 20rds
38 Special - 20rds
357 Magnum - 20rds
38TPC - 20rds
40 S&W - 20rds
10mm - 20rds
44 Magnum - 16rds
45 acp - 16rds
5.56 - 20rds
223 - 20rds
300 Blackout - 20rds
22 ARC - 16 rds
6mm ARC - 16rds
243 Win - 16rds
308 Win - 16rds
7.62x51 - 16rds
30-30 - 15rds
6.5 Creedmoor - 16rds
270 Win - 16rds
30-06 - 16rds
350 Legend - 20rds
400 Legend - 16rds
7.62x39 - 16rds
300 Win Mag - 13rds
450 Bushmaster - 15rds
45-70 - 9rds
50 AE - 13rds
500 S&W Mag - 12rds
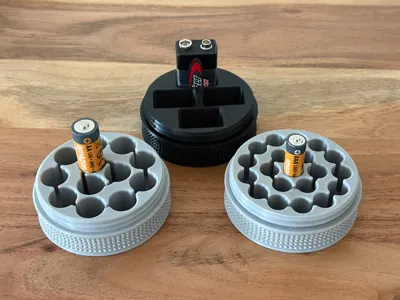
123A Battery - 8 count
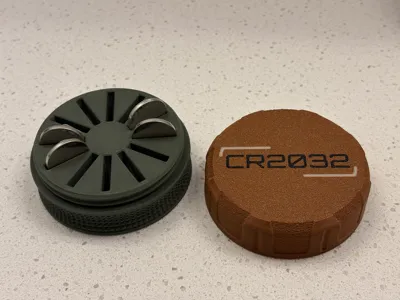
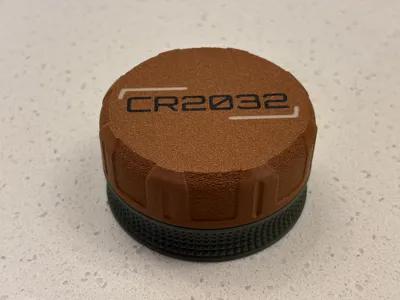
CR2032 - 12 count
18650 Battery - 7 count
9V Battery - 4 count
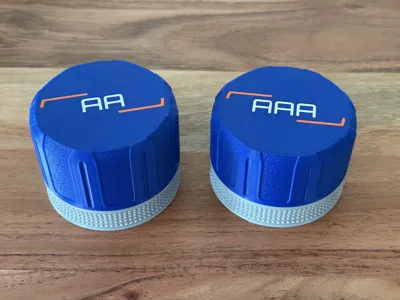
AA Battery - 12 count
AAA Battery - 20 count
Empty container 65mm (2.5") diameter x whatever lid height you choose to use with it
*******PRINTING GUIDE. PLEASE READ THIS FIRST PART, IT'S THE MOST IMPORTANT.*******
These are really easy to print, but if you are new to 3D printing, you may want to take a quick look through this guide as it should answer any questions you might have. For best results, I like using the gold textured PEI plate that comes standard with your Bambu printer. IF YOU DON'T KNOW WHAT A SUPPORT INTERFACE LAYER IS, YOU MUST READ THE NEXT 3 PARAGRAPHS. The quick guide below will tell you what you need to do, and ensure you have a successful print. If you still have questions, shoot me a message.
Each profile has 3 models on it, a lid, a base that stacks and requires a small amount of supports (less that 2mm tall) and a flat base that doesn't have the recess on the bottom and doesn't require supports. The 3mf file is set up to use a support interface filament! This allows for easy removal of the base support and leaves a very nice smooth surface, unlike using regular supports which can be a pain to remove and leaves a nasty surface. I like using Bambu's support filament, but If you are printing with PLA, you could also use PETG as your interface filament, and visa versa. The two interface filaments I use are linked below. I do slightly prefer the one for PLA and PETG over the PLA support.
If you do not use a support interface layer printed in a different filament that doesn't stick to your primary filament that you are printing with, the supports will not be removable. I repeat, THE SUPPORT LAYER WILL FUSE TO THE BOTTOM OF THE BASE, and you will ABSOLUTELY NOT be able to remove the supports if you do not use a support interface layer with how my settings are in the file.
If for some reason you don't want to use an interface layer but still want to print the stacking base, go to the supports tab and reset my settings to default by clicking on the orange reset arrows on each support setting that has orange text. Then you can print them with regular support settings and use the same filament that you are printing the rest of the container with.


After you print your base, if you did the stacking one, you'll need to remove the support. Use your fingernail or a small flathead screwdriver and it should pop right off leaving a nice clean surface.

Next print your top. You can customize the fuzzy skin texture or remove it if you like.


If you want to change the text on the lid, it's very easy to do. The text that's on there now is not a separate body, it is just recessed into the lid at a depth of .001mm, so all you need to do is remove the painted color that's on there now and because it's such a small of a step, the slicer doesn't recognize it and will print a solid lid without the outlines of the text. To add your own text, you can do it right in the slicer if you like.


Or if you only have a single color printer, you can select the cut option in the text menu and recess it into the lid.

You can use any of the lid sizes with the empty container FYI.
If you want to recolor my text again, just get your paint bucket tool and select edge detection and paint in the letters and brackets.

And thats pretty much it. Happy printing!
Membership
Interested in selling these models? Sign up for the commercial license.
License
You shall not share, sub-license, sell, rent, host, transfer, or distribute in any way the digital or 3D printed versions of this object, nor any other derivative work of this object in its digital or physical format (including - but not limited to - remixes of this object, and hosting on other digital platforms). The objects may not be used without permission in any way whatsoever in which you charge money, or collect fees.
Comment & Rating (744)