Bambu Lab P2S Right-Side Filament Waste Chute


Print Profile(3)

Bill of Materials

Description
Membership
Your support directly allows me to invest more time in creating the useful and innovative solutions we all enjoy. Love using my unique designs in your business or products? By subscribing to my Commercial License Membership, you get the legal right to sell prints of my models. Subscribe today and let's build the future of 3D printing together!
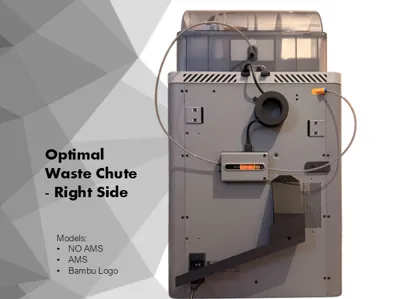
Optimal Waste Bin Chute (P2S)
I designed this chute to be optimal for my own setup, and after using it daily, I genuinely think it’ll fit a lot of other P2S setups really well too.
It mounts solidly to the back using the existing holes (just swap to longer screws for the best fit M3x10 x3 ), and it’s shaped to sit under the rear power switch so the chute keeps the right angle all the way down.
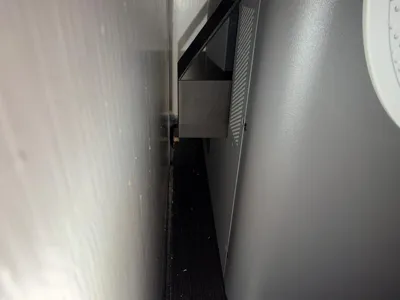
I’ve tested other designs that start steep and then flatten out - and that’s where filament “poop” tends to catch and build up, forcing you to pull the machine out to clear it. This one stays smooth and consistent, and it’s been flawless since day one.
I route mine through a hole in the desk into a bigger bin - but if you need to guide the waste to the right/less common side, this is the cleanest solution I’ve found.
Mounting:
This chute is designed to use the existing holes on the back of the P2S. For a secure fit, you’ll need 3× M3×10 mm Flat headscrews. Make sure the chute sits under the rear power switch before tightening, that position is what keeps the angle working as intended.
If your setup is a little different (desk hole, bin placement, routing to the higher side), feel free to reach out - I’m happy to help you get it dialed in.
Print versions:
I’ve included multiple versions so you can pick what fits your setup and style:
- A clean standard version
- An AMS logo version (multi-color)
- A single-color logo version
Important notes:
As with all functional prints, results can vary slightly depending on printer, material, and calibration. If anything feels tight, don’t force it — lightly sand/trim, test again, and only fully tighten once everything sits naturally.
Before printing, make sure your build plate is clean (soap + water or IPA) and your first layer is dialed in. A reliable first layer matters more than “perfect” settings on parts like this.
Boost Me (for free)
A Boost truly helps more than you might think. It’s a clear signal that you enjoy what I’m building and that this design is worth pushing even further. Every Boost supports my journey to improve every day, learn faster, and keep creating original, useful models for the community. If you also leave a like or a comment, it means a lot and helps more than you know. Thank you so much for the support!
License
You shall not share, sub-license, sell, rent, host, transfer, or distribute in any way the digital or 3D printed versions of this object, nor any other derivative work of this object in its digital or physical format (including - but not limited to - remixes of this object, and hosting on other digital platforms). The objects may not be used without permission in any way whatsoever in which you charge money, or collect fees.
Comment & Rating (9)