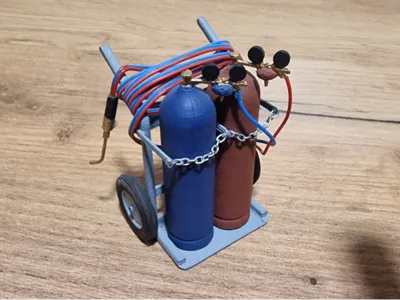
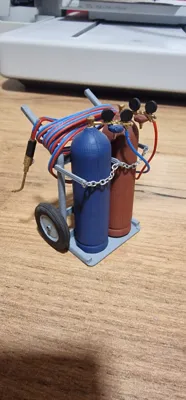
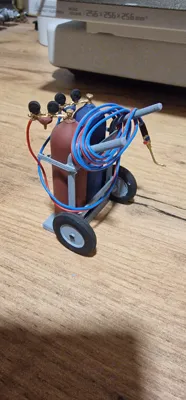
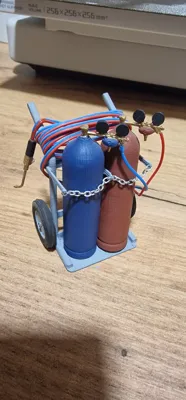
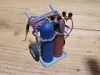
Welding cart 1:14 with gas cylinders and torch


Print Profile(1)
Description
The 1:14 scale model is intended for decorating models and dioramas. It requires some skill to assemble. Adhesive and accessories are required.
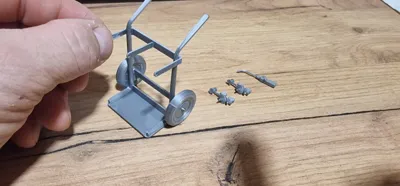
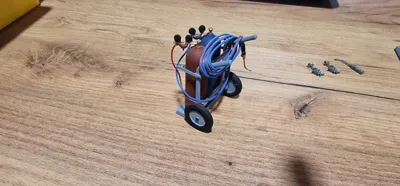
For assembly, two 1.2mm x 8mm or 1.2mm x 10mm screws are required. These are used to screw the wheels onto the cart. This is more stable than a PLA connection and more delicate.
A red-blue twin wire (cable) 2x0.04mm² or 2x0.08mm² serves as the hose. I no longer have a link for this. However, Google can quickly find something similar.
For the chain, I chose one with a 0.35mm wire diameter and 1.35x1.90mm links. I have a link for this. https://knupfer.info/shop/index.php/details-beschlage-1/ketten/bk-62.html But you can also find such items elsewhere in model building supplies.
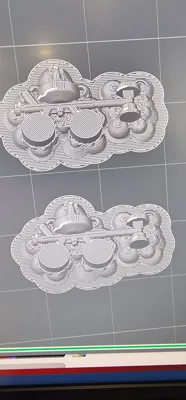
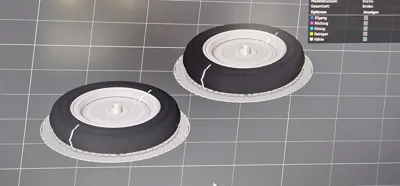
The model is deliberately not designed for multicolor printing because it takes too much printing time. Moreover, painting with Revell, Vallejo, or similar paints is easier and sometimes looks better. Nevertheless, I have created a two-color print plate for the wheels so you can choose.
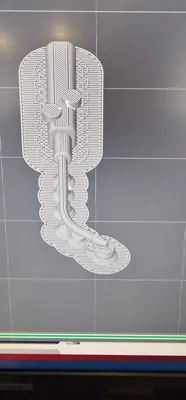
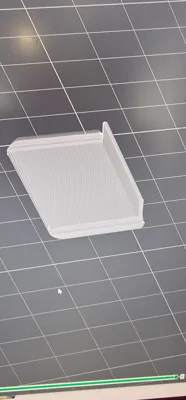
It makes sense to first glue both spars to the base plate (the part from print plate 2) with superglue. Then, glue the upper retaining plate (the one for the chain). Now, screw the wheels onto the wheel holder at the bottom (the bridge sits over the screws). Then, glue the wheel bridge to the spars. It's easier if the base plate sits at the bottom, so you only need to push the wheel bridge against the spars. For the chain, it's best to cut the PLA towards the hole, insert the chain, and secure it with a drop of superglue. The pressure regulator is glued to the bottles. This is where it gets a bit more difficult. The cable must be separated a bit on one side and glued to each pressure regulator. Keep your nerves, it's worth it. I have provided two holes in the burner for the other end of the cable to make gluing easier.
Have fun crafting.
License
You shall not share, sub-license, sell, rent, host, transfer, or distribute in any way the digital or 3D printed versions of this object, nor any other derivative work of this object in its digital or physical format (including - but not limited to - remixes of this object, and hosting on other digital platforms). The objects may not be used without permission in any way whatsoever in which you charge money, or collect fees.
Comment & Rating (0)