Metric Disc Magnet Clearance Test Prints


Print Profile(8)
Description
This is a customizable disc magnet clearance test print.
I designed this one to be filament efficient while still being able to gauge both the diameter and depth a recess needs to be to achieve the desired fit.
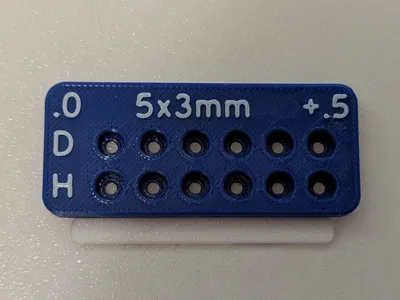
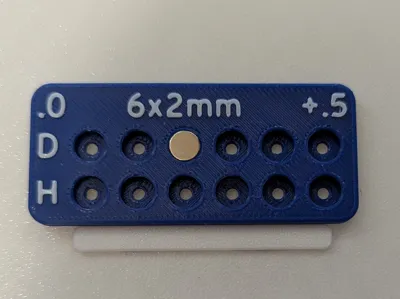
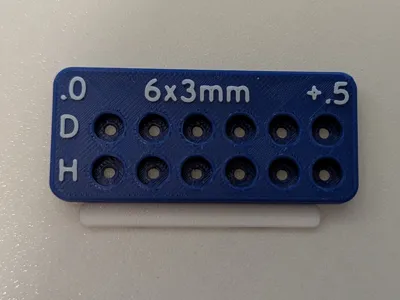
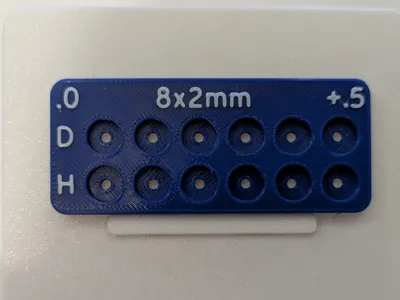
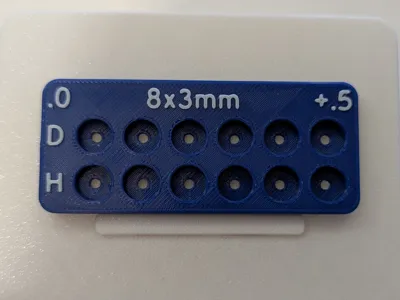
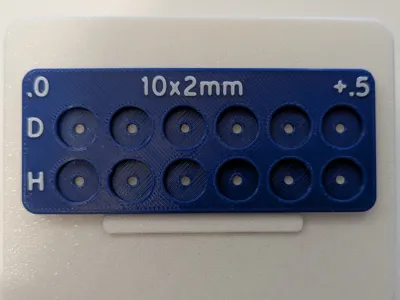
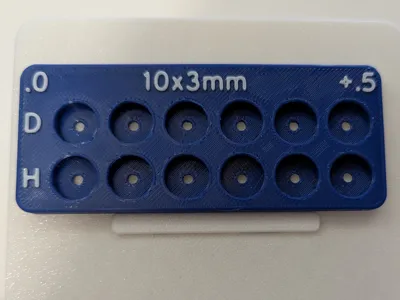
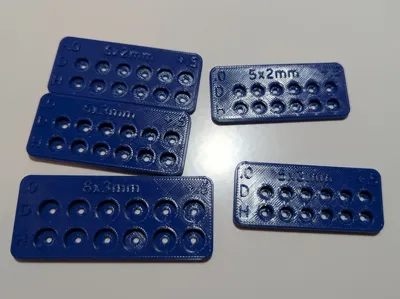
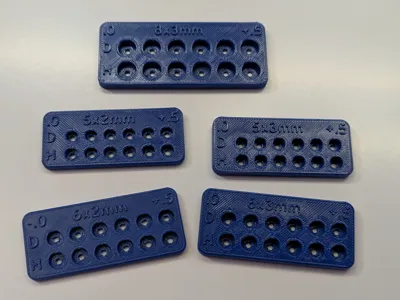
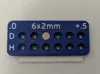
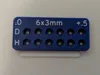
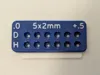
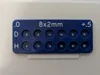
There's two rows of 6; the top row (D) is the diameter test. Each recess increases in diameter from .0 (the actual magnet diameter) to +.5mm in .1mm increments. All of these recesses are .1 deeper than the magnet's nominal diameter to ensure the magnet is fully seated when gauging the desired fit.
The bottom row (H) is for determining the height of the recess in your project for the desired depth your magnet will sit. These recess range from .0 to +.5mm in height relative to the magnet's height in .1 increments. These recesses are all +.4mm larger than the magnet's stated diameter so they're easy to remove.
There's a couple of features I built into the model that make using them easier.
First, I designed all the recesses to have 2.5mm though holes. This allows a 1.5mm hex key to be used for easier removal of the magnets, particularly in the diameter strip. And every Bambu printer comes with a 1.5mm hex key. 😉
The second feature I designed into the model is clear labeling of the magnet size, diameter and height rows, and increment range. You can print in either single or dual color with the text being a contrasting color. Single color is perfectly readable though.
Using the customizer is very easy; just enter your magnet's diameter and height values and it will generate a model in your needed size. The magnet size label will update to whatever you entered.
In Bambu Studio, you can elect to just print single color, or two color. The easiest way is to just use the painting tool, but if you want the most precision, right click on the model and select split to parts. This will separate the body from the text while everything stays aligned and in position. Make sure not to choose split to objects and that positioning will be lost and the text will drop to the build plate. Once the text and body is split properly, you can highlight just the text and apply your desired color. Keep in mind each text character will be it's own part, so the easiest way to change them all at once is to use the data panel on the left, switch to “objects” instead of global, and holding ctrl and clicking on each character. You could also highlight the first character, hold shift and left click on the last character to select them all.
Using the print to test your magnet's fit is easy. Just put your magnet in each hole until you find the desired fit in both diameter and height, and those will be the values you enter in your design. Remember that each recess is .1mm larger than the last, and the first hole is the exact diameter/height of your magnet. So for example with a 6x2mm magnet, the fit you desire is the third hole over on the diameter row and the second on the height row. That means you would enter 6.2 as your diameter in your project's design, and 2.1 as the height. Make sure to print the test out of the same material you'll be using on your project.
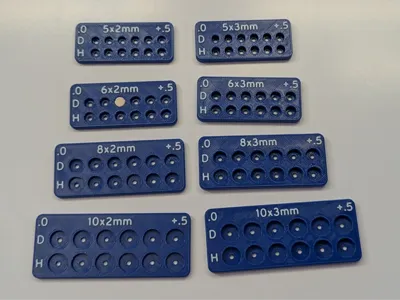
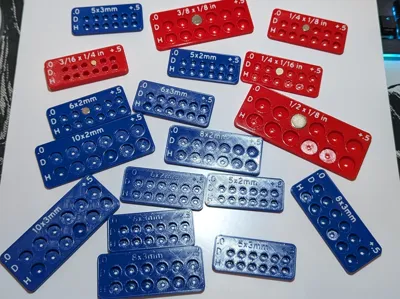
I have several popular sizes ready to go; each print profile will have a single magnet size, and two plates; dual color and single color.
I also have an imperial version that displays the fractional size of your magnet, so check that one out if you have a bunch of imperial magnets sitting around like I do!
Thanks for stopping by and happy printing! 🍻
License
You shall not share, sub-license, sell, rent, host, transfer, or distribute in any way the digital or 3D printed versions of this object, nor any other derivative work of this object in its digital or physical format (including - but not limited to - remixes of this object, and hosting on other digital platforms). The objects may not be used without permission in any way whatsoever in which you charge money, or collect fees.
Comment & Rating (4)