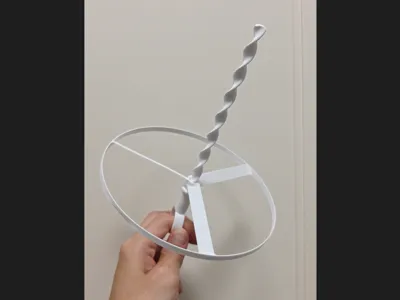
Pull Copter V2

Print Profile(3)
Description
Pull CopterV2, not satisfied with V1, V1 is directly delisted, redesigned
The new version launches easier and higher

Hope everyone can share print actual photos, issues, and suggestions
More samples allow for better analysis, which can further improve print quality and success rate
Even with my A1 mini + Bambu Lab PETG Basic, the measured print success rate is almost 100%
There's still a 1-star rating, unfortunately I cannot know the reason for it
2026-03-19: I personally tested it, the thickened version also flies quite high, it's recommended to directly choose the 25% thickened frisbee
2026-03-19: Based on feedback, to reduce printing difficulty, two new thickened wing options are available for printing, but the actual flight performance is unknown, feel free to try if interested
(Original wing thickness 0.4, new additions 0.45, 0.5)

2026-03-14: Accidentally switched print profile, lost original line width settings, reverted to default parameters, causing cracks at the rotary wing, so if you want to use your own print profile, remember to increase the line width to 0.6mm yourself
2026-03-08: Tested PLA Basic, it's as smooth as ever, no spaghetti issues

2026-02-23:
Some users reported spaghetti, which is likely due to poor first layer adhesion, causing parts to detach easily when suspended in the first 30% of the print. Analysis of influencing factors includes:
(The first configuration test scenario was: Bambu Lab PETG Basic + uncoated build plate + DIY enclosure + ambient temperature around 15%)
- Filament - PLA is weaker than PETG, Matte is weaker than Silk; damp filament; parameter differences between brands, etc
- Build plate - uncoated is weaker than coated; without adhesive is weaker than with adhesive
- Chamber temperature - large temperature differences in winter, large parts without an enclosure are prone to warping and detachment
Therefore, two print profiles have been added, hoping to improve the print success rate for different materials:
One is to increase the brim area to improve adhesion

The other is to add a raft to reduce warping due to temperature differences

V2 version:

V1 version:

Stay away from trees


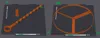
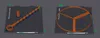
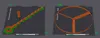
Print horizontally, which better aligns with the force direction

Friendly Reminder
When adults launch it with force, the friction surface may experience material overheating and melting adhesion causing a "brake"
On one hand, it is highly recommended to use Silk-type filament
On the other hand, it is highly recommended to apply some lubrication here below (I use Vaseline, it works well)

Friendly Reminder
Printing requires a small amount of brim and supports, which need to be cleanly cut with a knife to improve smoothness, and it's even better to file it a few times


Ring handle, easier to exert force, fits adult thumb size

Placed horizontally, the A1 mini can also print it, with a sufficiently long travel distance

Increased connection area, more robust

Extreme weight reduction, hollowed out

License
You shall not share, sub-license, sell, rent, host, transfer, or distribute in any way the digital or 3D printed versions of this object, nor any other derivative work of this object in its digital or physical format (including - but not limited to - remixes of this object, and hosting on other digital platforms). The objects may not be used without permission in any way whatsoever in which you charge money, or collect fees.
Comment & Rating (36)