Starlink Mini Flat Mount REV 2


Print Profile(2)
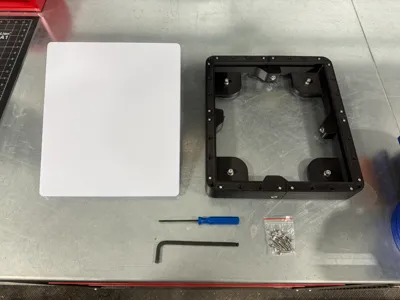
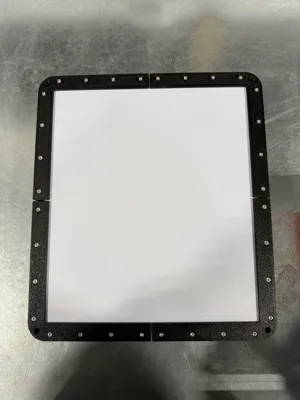
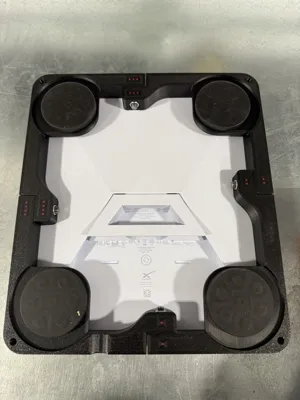
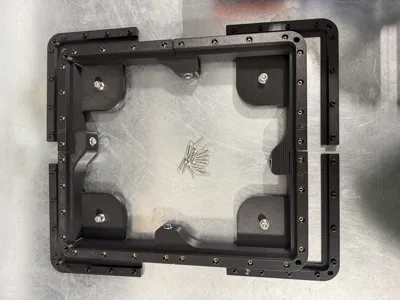
Description
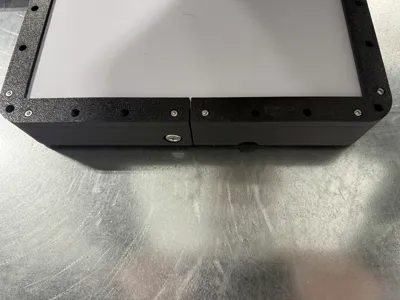
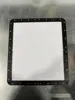
Starlink Mini Dishy Flat Mount – REV 2
This is the updated and refined version of my original REV 1 mount, which you can still find here:
Starlink Mini Flat Mount REV 1 - Free 3D Print Model - MakerWorld
What’s New in REV 2
REV 2 includes several improvements based on real‑world use and feedback:
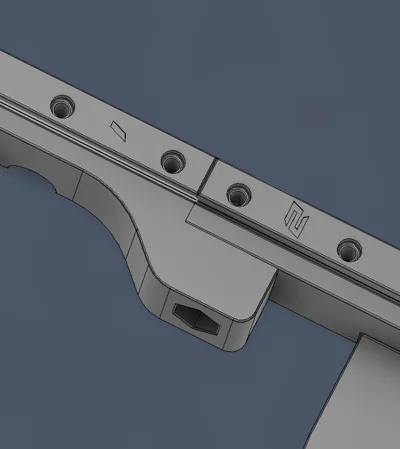
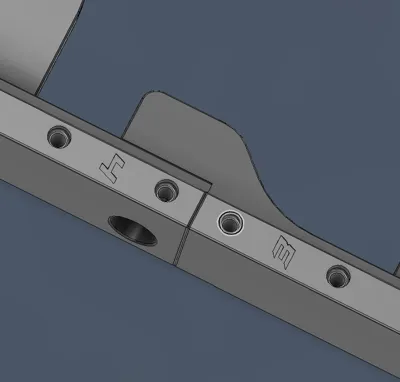
- Numbered pieces for easier reprinting and replacement
- Reinforced bolt locations for increased strength
- Adjusted tolerances so the dish seats more comfortably
- Smaller cable cutout for easier printing
- Included .f3d (Fusion 360) source file so you can add custom text to the LH lower piece—great for labeling dishes identifiers or adding Wi‑Fi details
- Must be edited in Fusion 360
- Emboss depth is 0.01mm. This works well if printing text in contrasting color
- Change emboss depth to 0.5mm if printing in same color as mount
Description
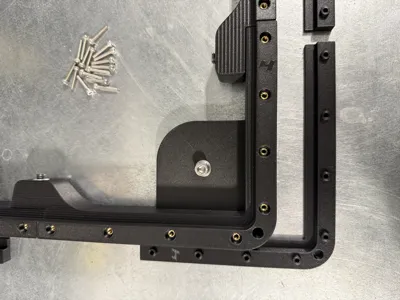
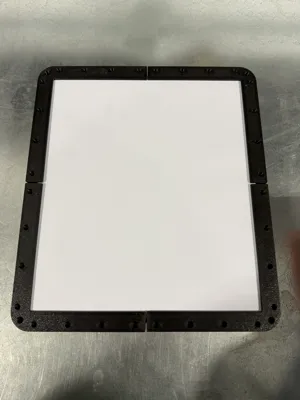
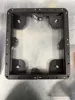
- 8‑piece design
- Bottom pieces can be printed with or without magnet recesses
Recommended Print Settings
- Layer height: 0.2 mm (or 0.15 mm for finer detail)
- Infill: 35% Gyroid
- Walls: 6 perimeters (4 may be sufficient depending on material)
- Supports: Required from build plate only for magnet recesses
- Material: PETG recommended for durability. I prefer PETG-CF or PETG-GF
- Print profile does not include the non‑recessed lower pieces
Optional
- Each bottom piece has dot markers that can be printed in a contrasting color to simplify assembly
Hardware Required
- 4× round puck magnets
- 4× M6×16 mm screws
- 32× M3×6 mm brass heat‑set inserts
- Holes sized for standard knurled inserts
- Example: iplusmile Brass Nuts, Threaded Inserts Brass Knurled Nuts Threaded Heat Set for Printing 3D Printer and More Projects, 100pcs, M3*4.6 * 5.69 : Amazon.ca: Tools & Home Improvement
- 32× M3×16 mm screws
- 4× M8×35 mm screws
- 4× M8 nylon lock nuts
Assembly Instructions
- Heat‑set all 32 M3 brass inserts into the lower halves of the mount pieces.
- Attach the 4 puck magnets using the M6 screws.
- Loosely assemble the four lower pieces using the M8 screws and lock nuts on a flat surface.
- Place the Starlink Mini Dishy into the loosely assembled base.
- Position the four upper pieces over the dish and install the M3 screws—snug, but not fully tightened.
- Tighten the M8 screws to lock the dish securely in place.
- Finish by tightening all 32 M3 screws.
- Enjoy your newly mounted Mini Dishy.
Other Designs
- Original Mini Flat Mount (REV 1) – MakerWorld
- Starlink Gen 3 Flat Mount – MakerWorld
Documentation (1)
License
You may create derivative works based on this object, provided that all such derivative works are published exclusively on the MakerWorld platform and include proper attribution to the original creator. You may not share, upload, host, distribute, or publish this object—or any derivative work of this object—on any other digital platform, marketplace, or distribution channel. Commercial use of this object and any derivative works is strictly prohibited. This includes, but is not limited to, selling, renting, sublicensing, or using the object in any context in which you receive monetary compensation or other financial benefits.
Comment & Rating (45)