Search models, users, collections, and posts

P1S - P2S Multiboard Side Wall
IP Report
Print Profile(1)
P1S - P2S Multiboard Sidewall
Designer
26.1 h
10 plates
Open in Bambu Studio
Boost
169
923
30
23
468
295
Released


Description
Boost Me (for free)
Feel free to give the model a boost if you enjoy it!
P1S-P2S Multiboard Side
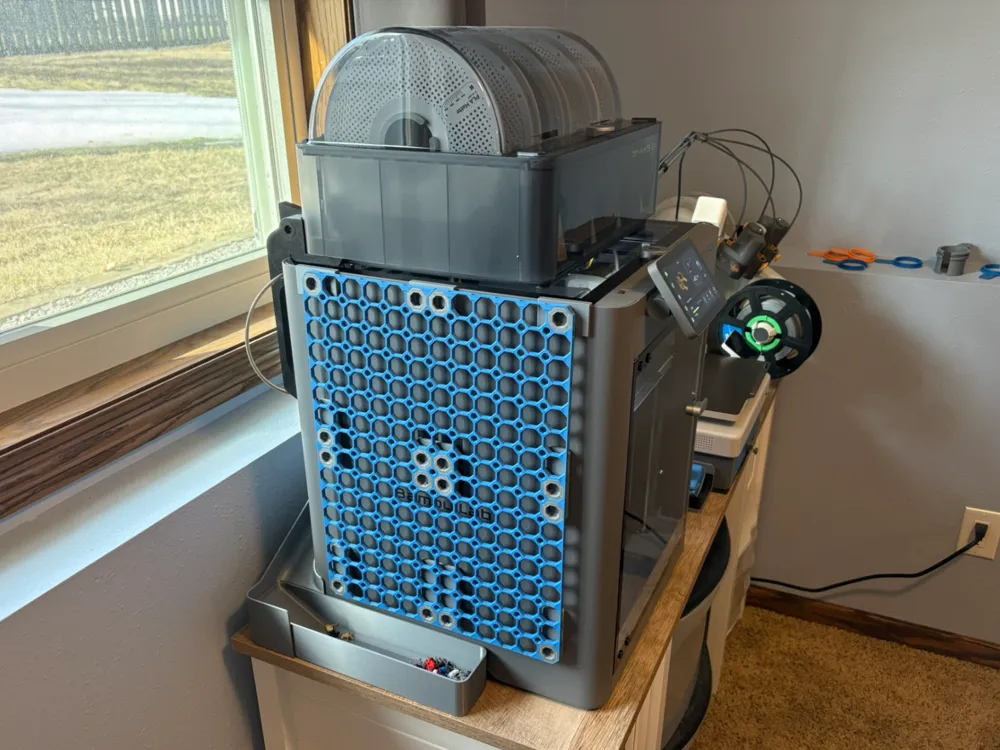
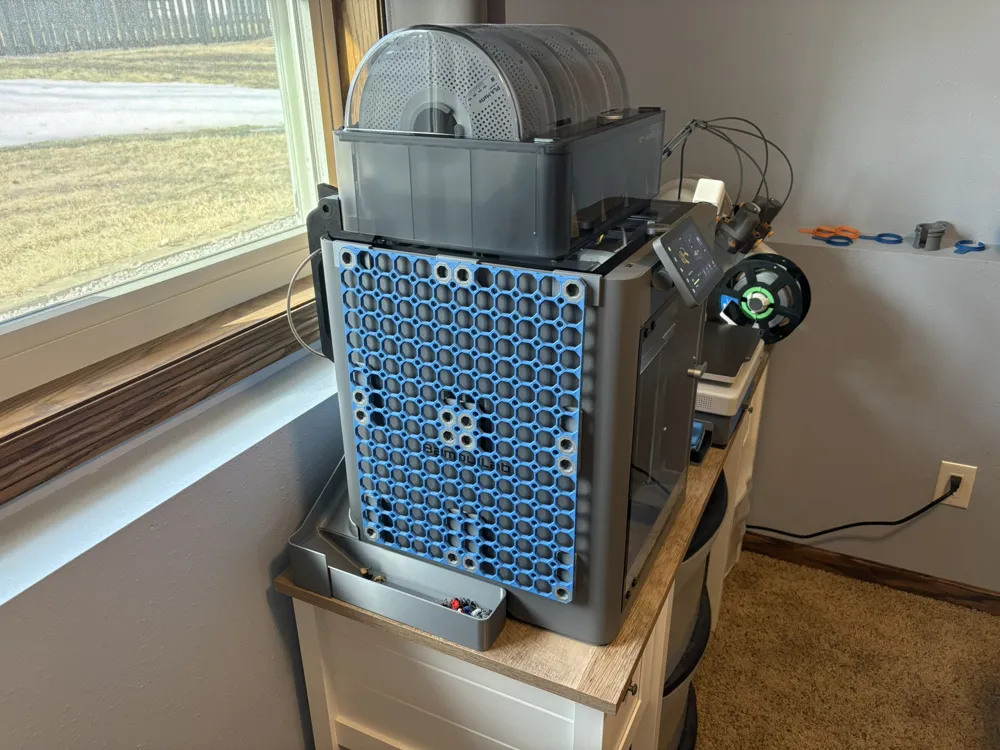
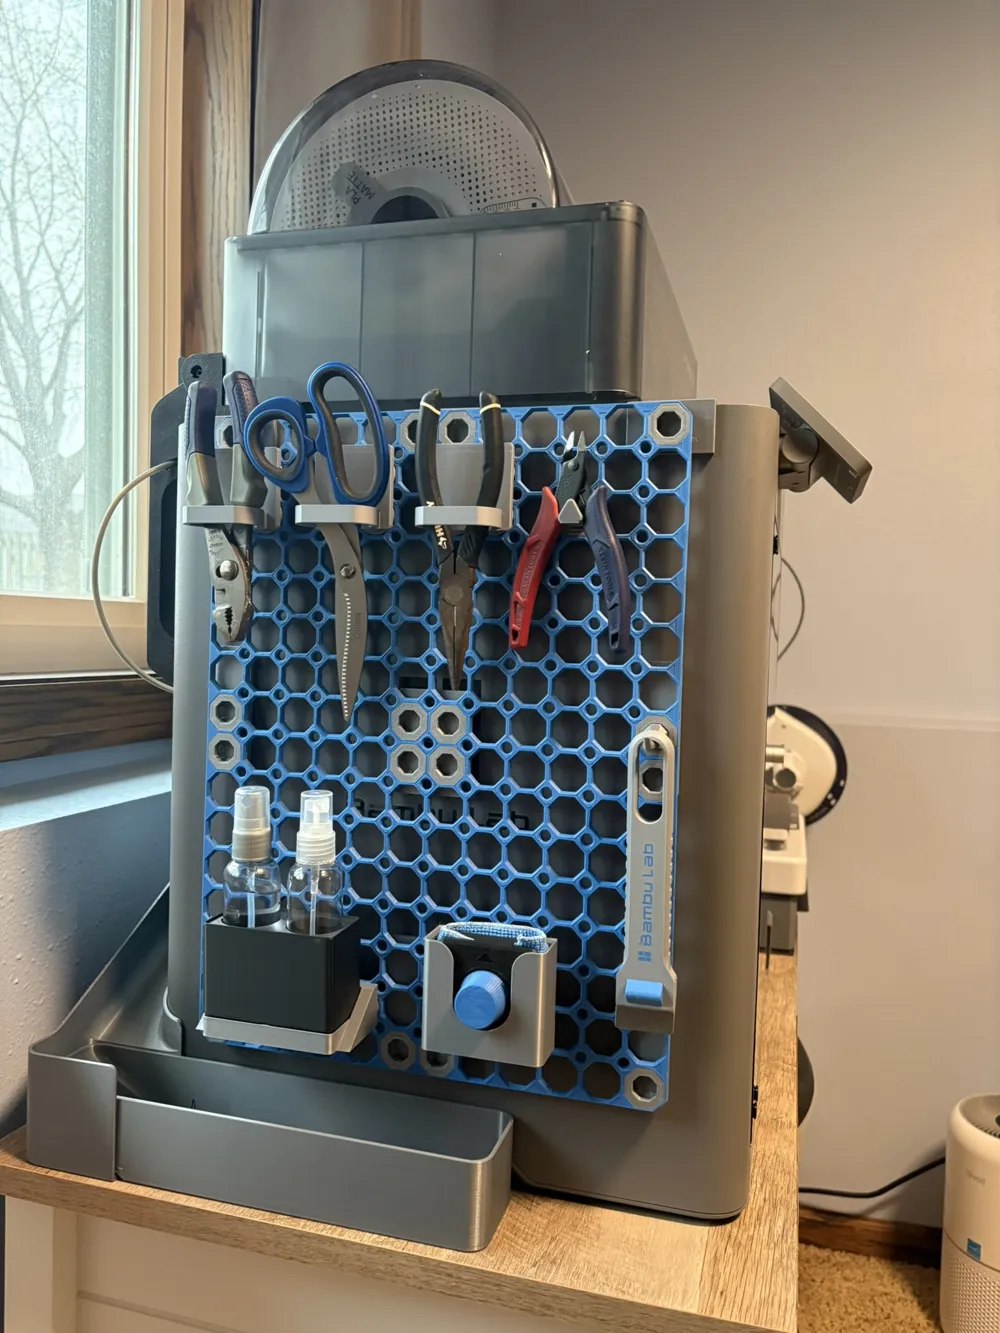
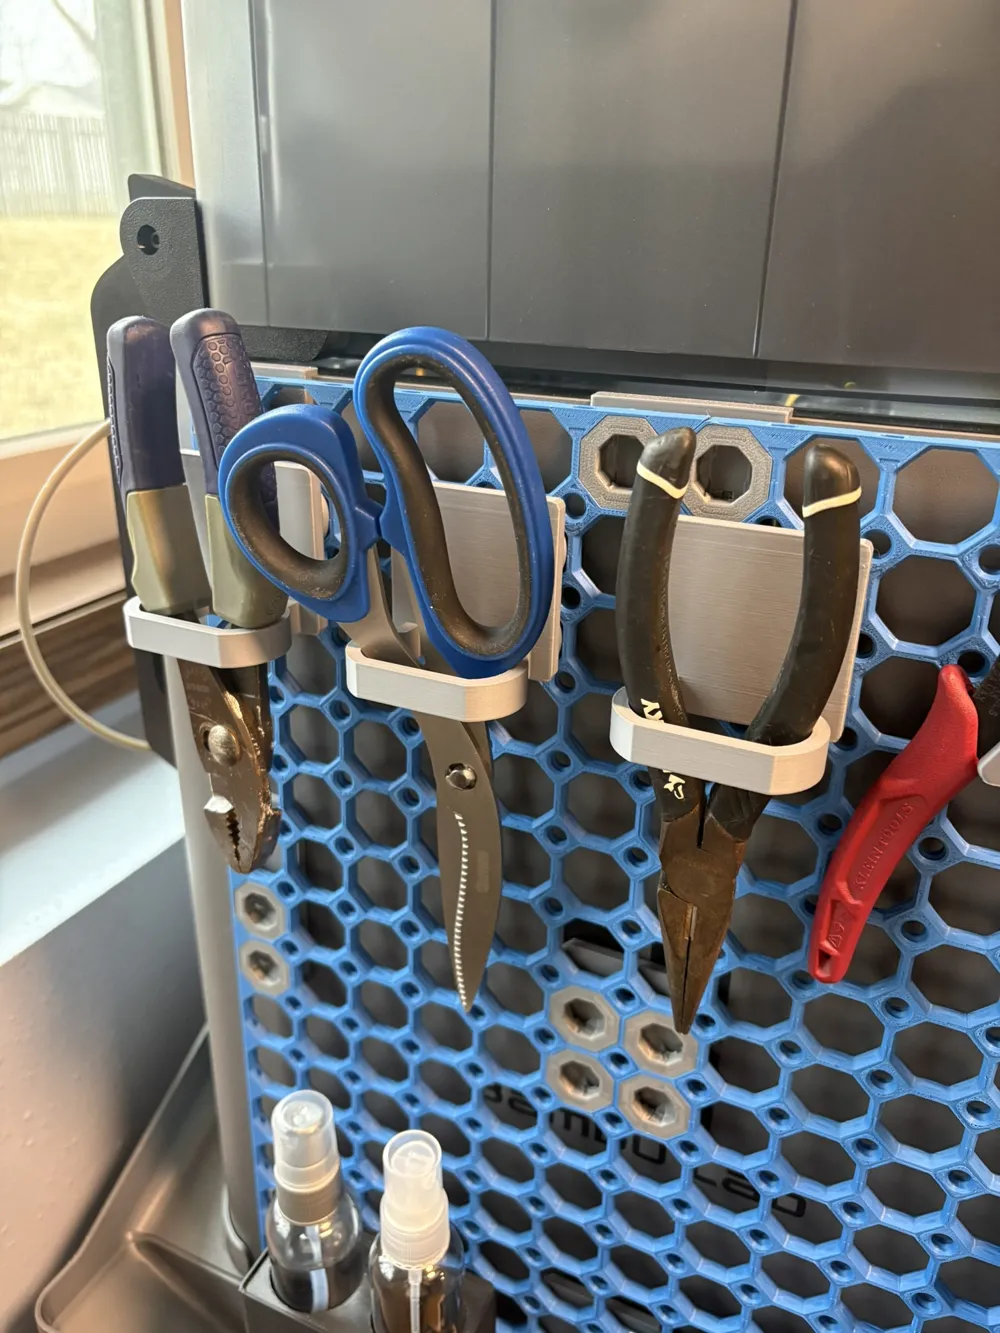
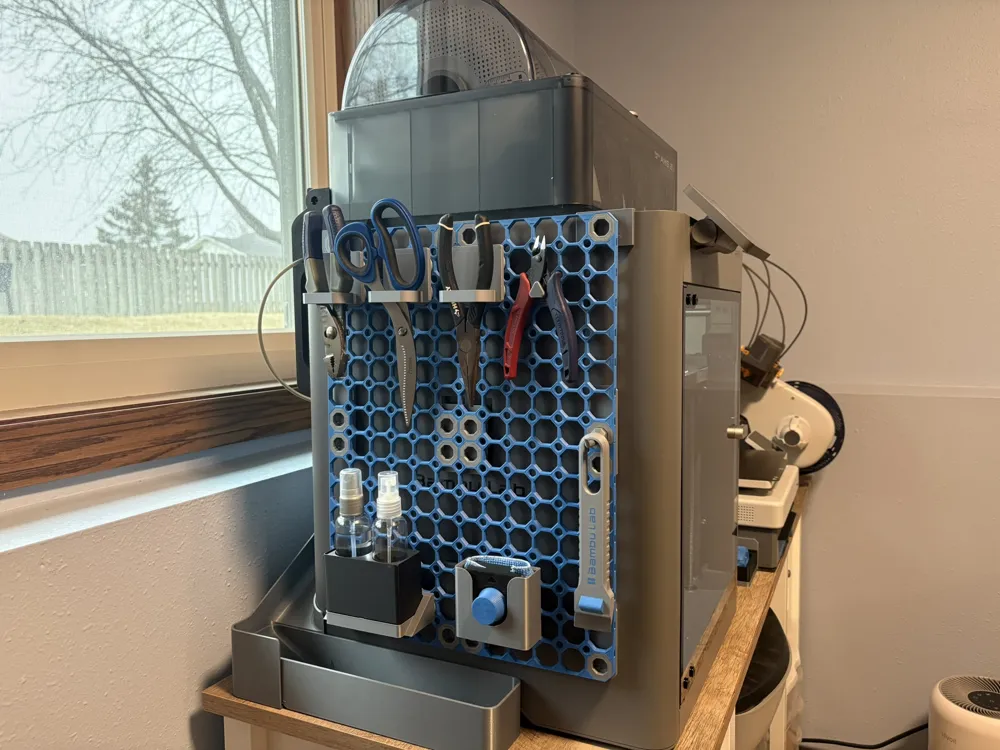
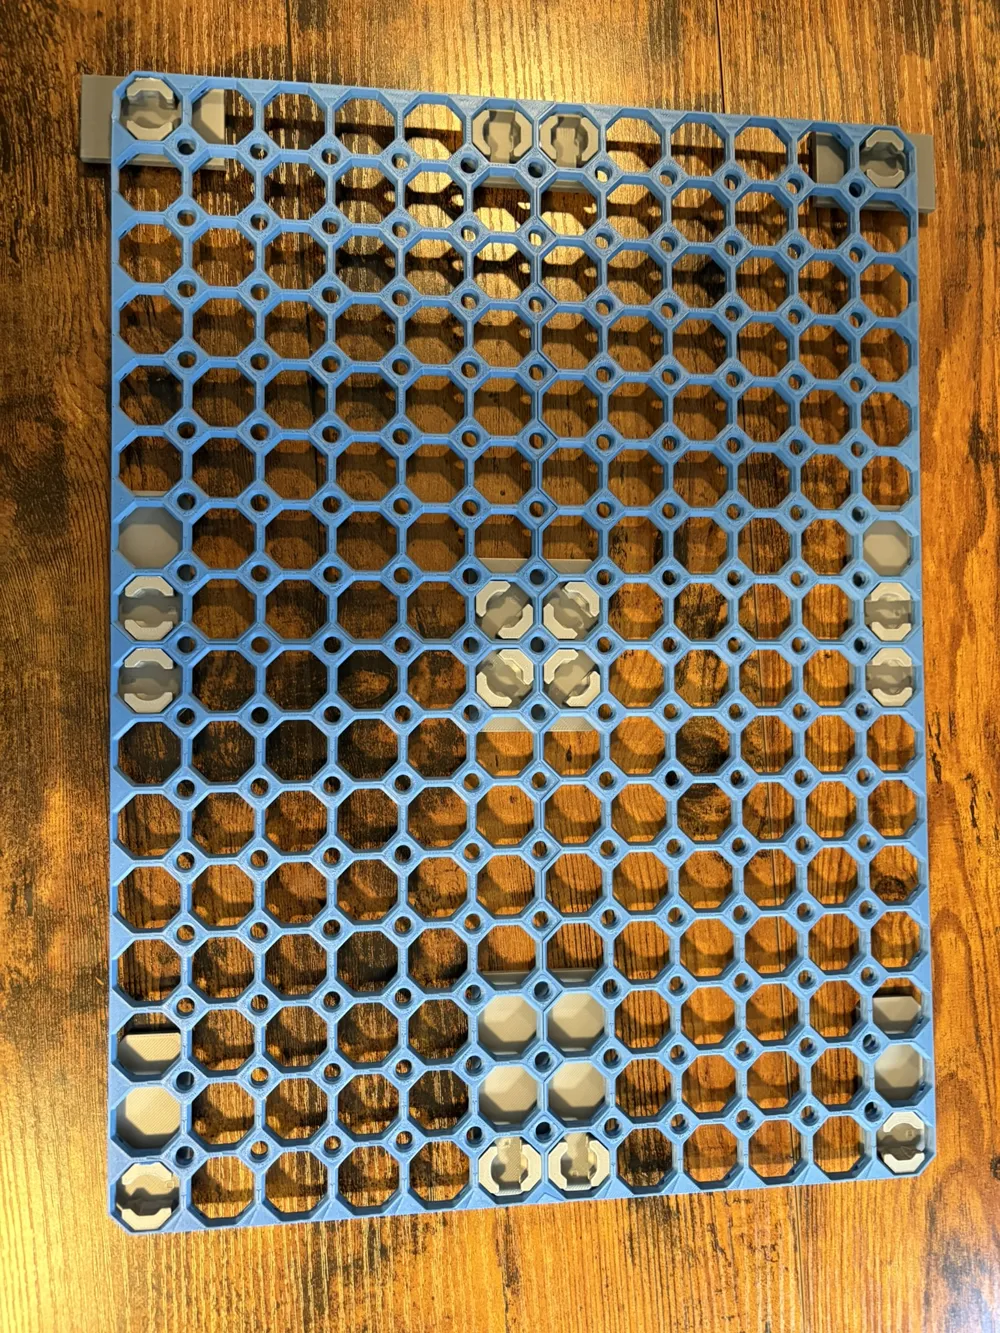
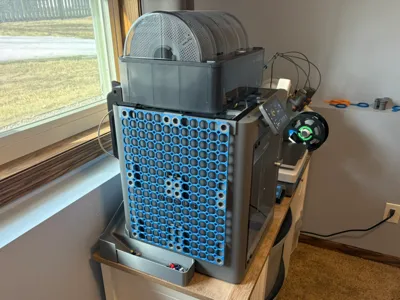
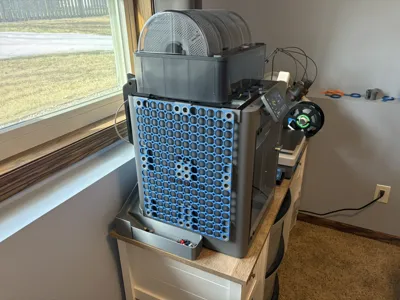
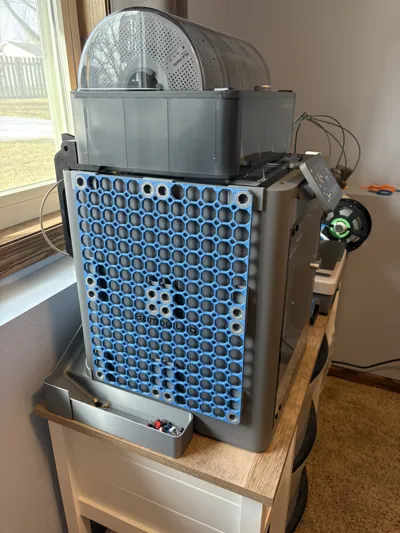
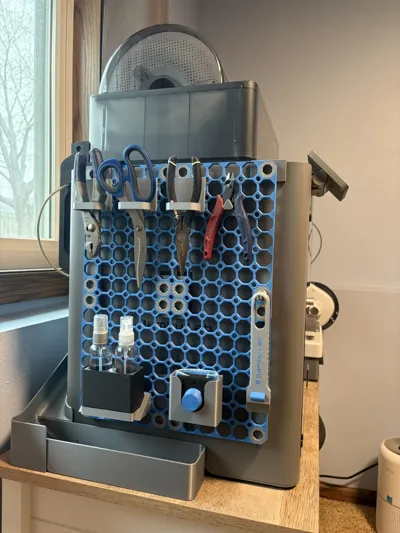
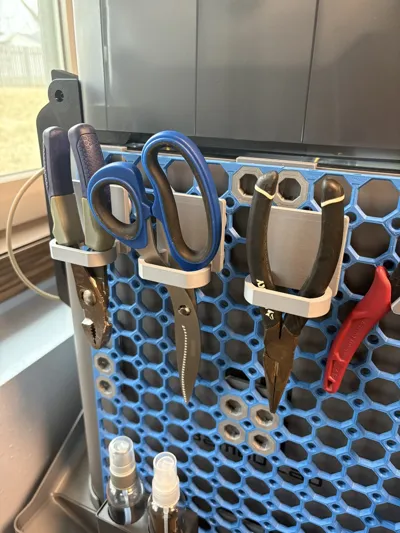
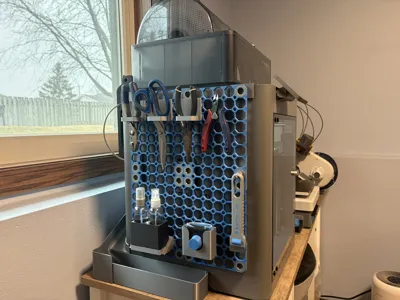
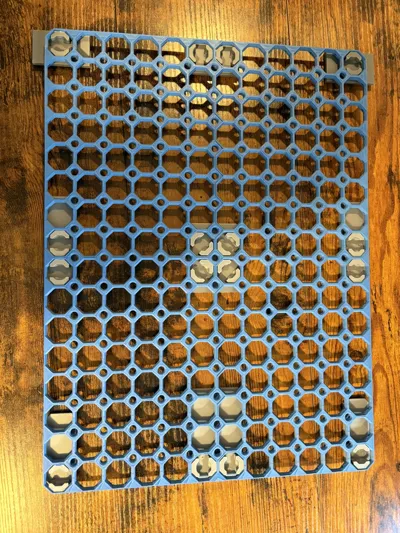
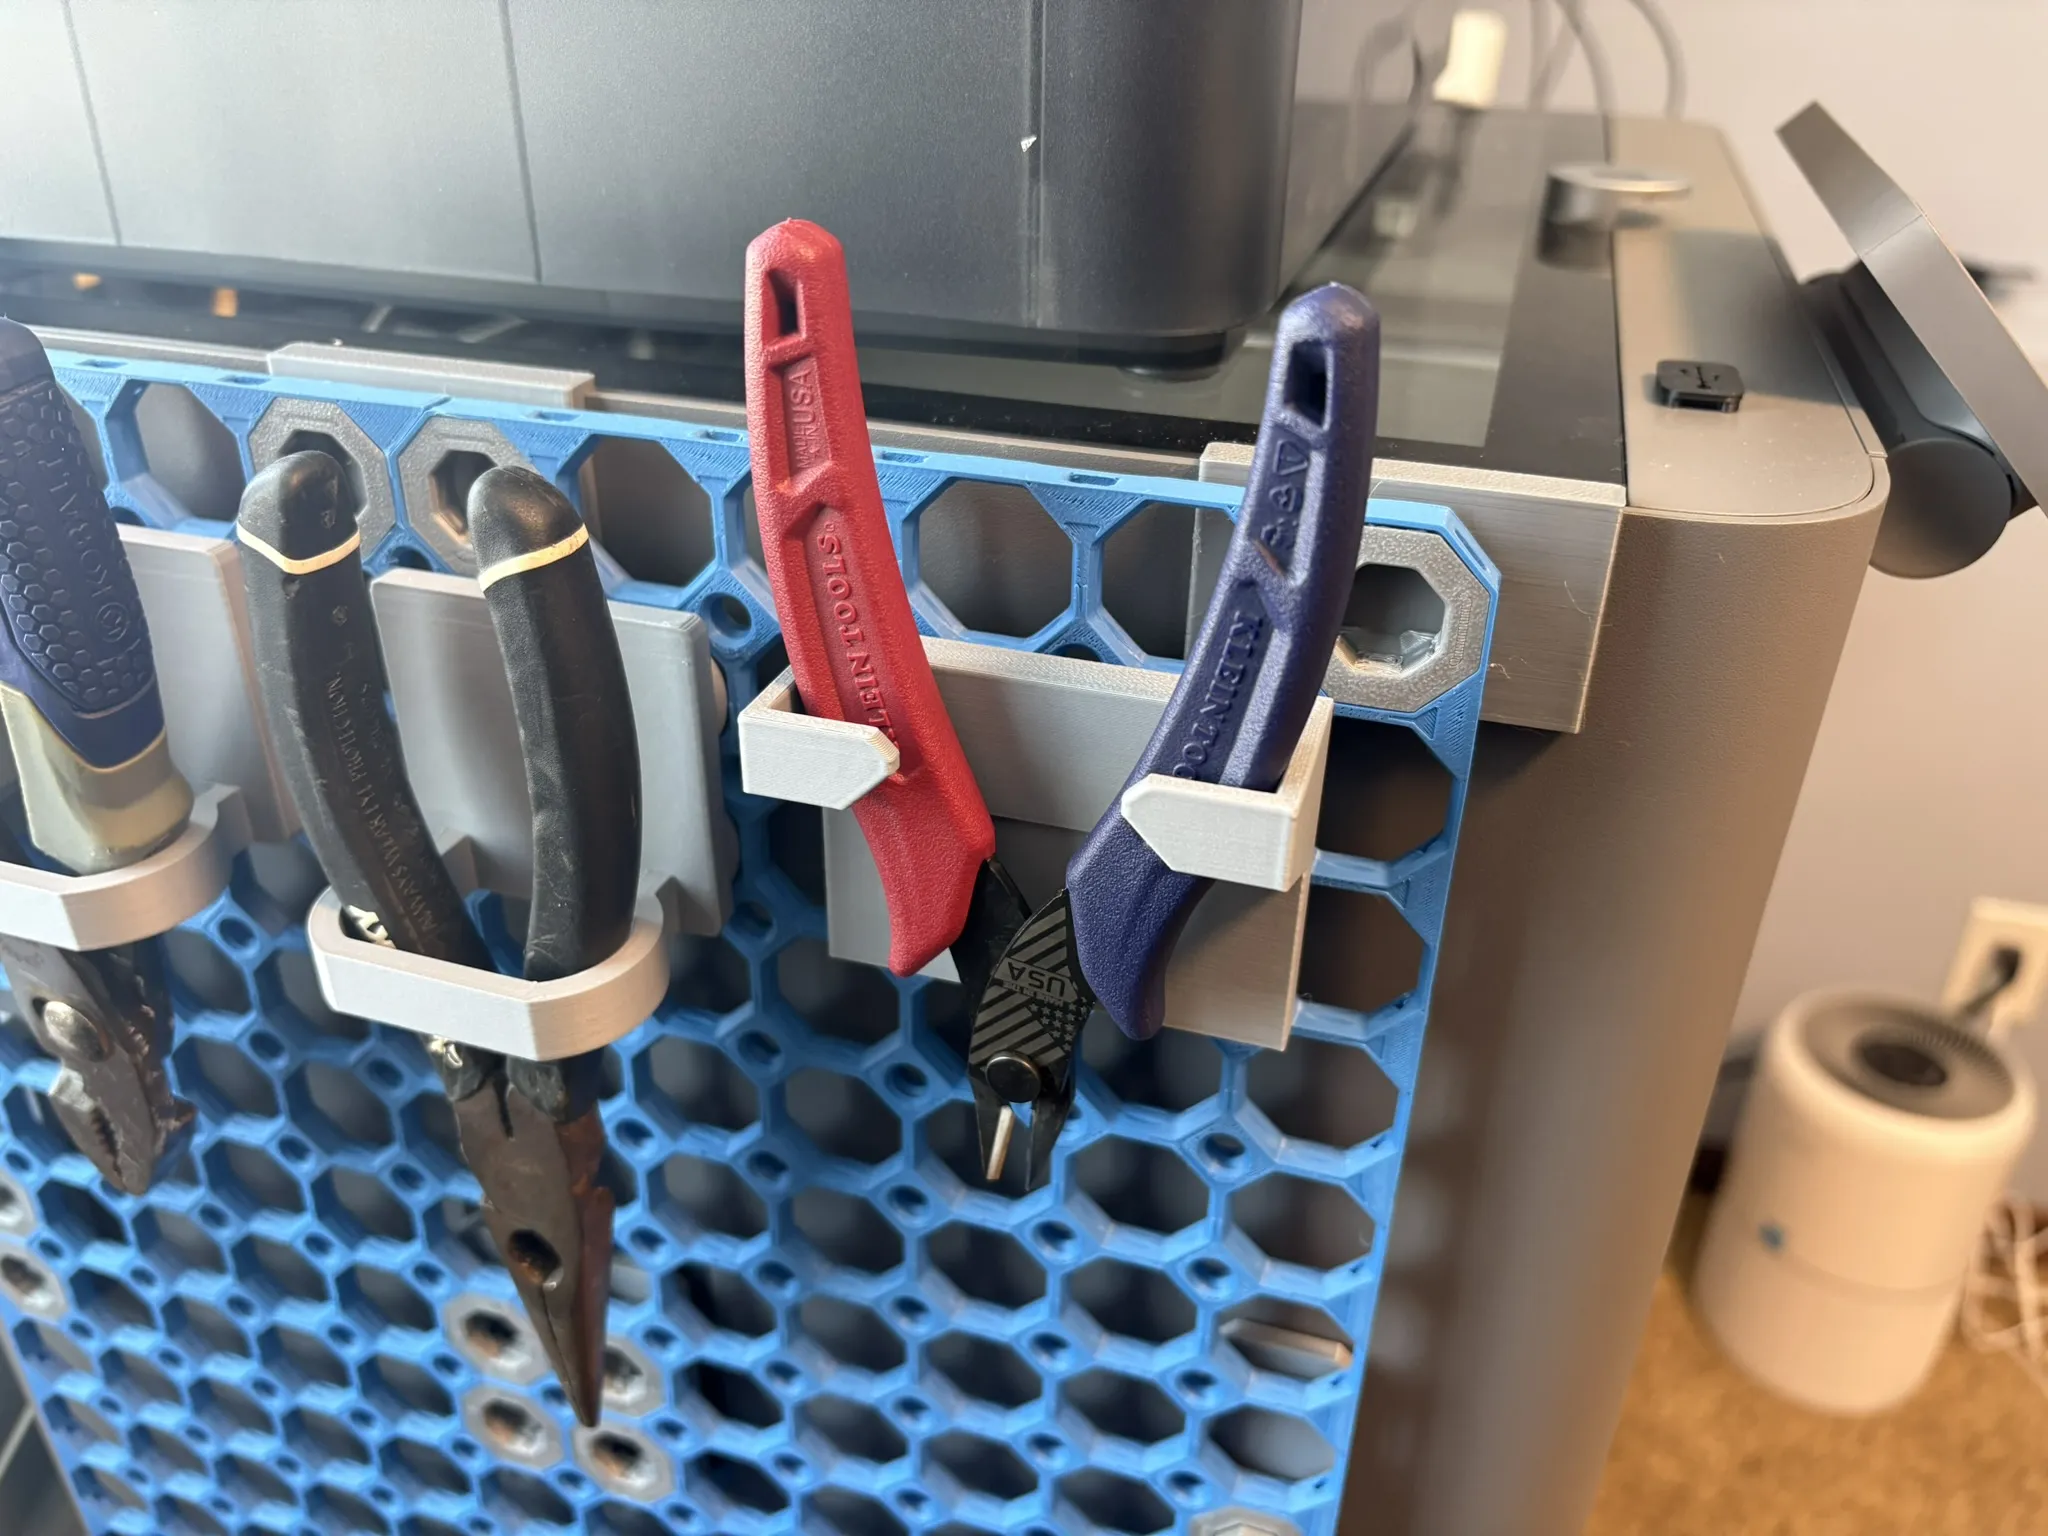
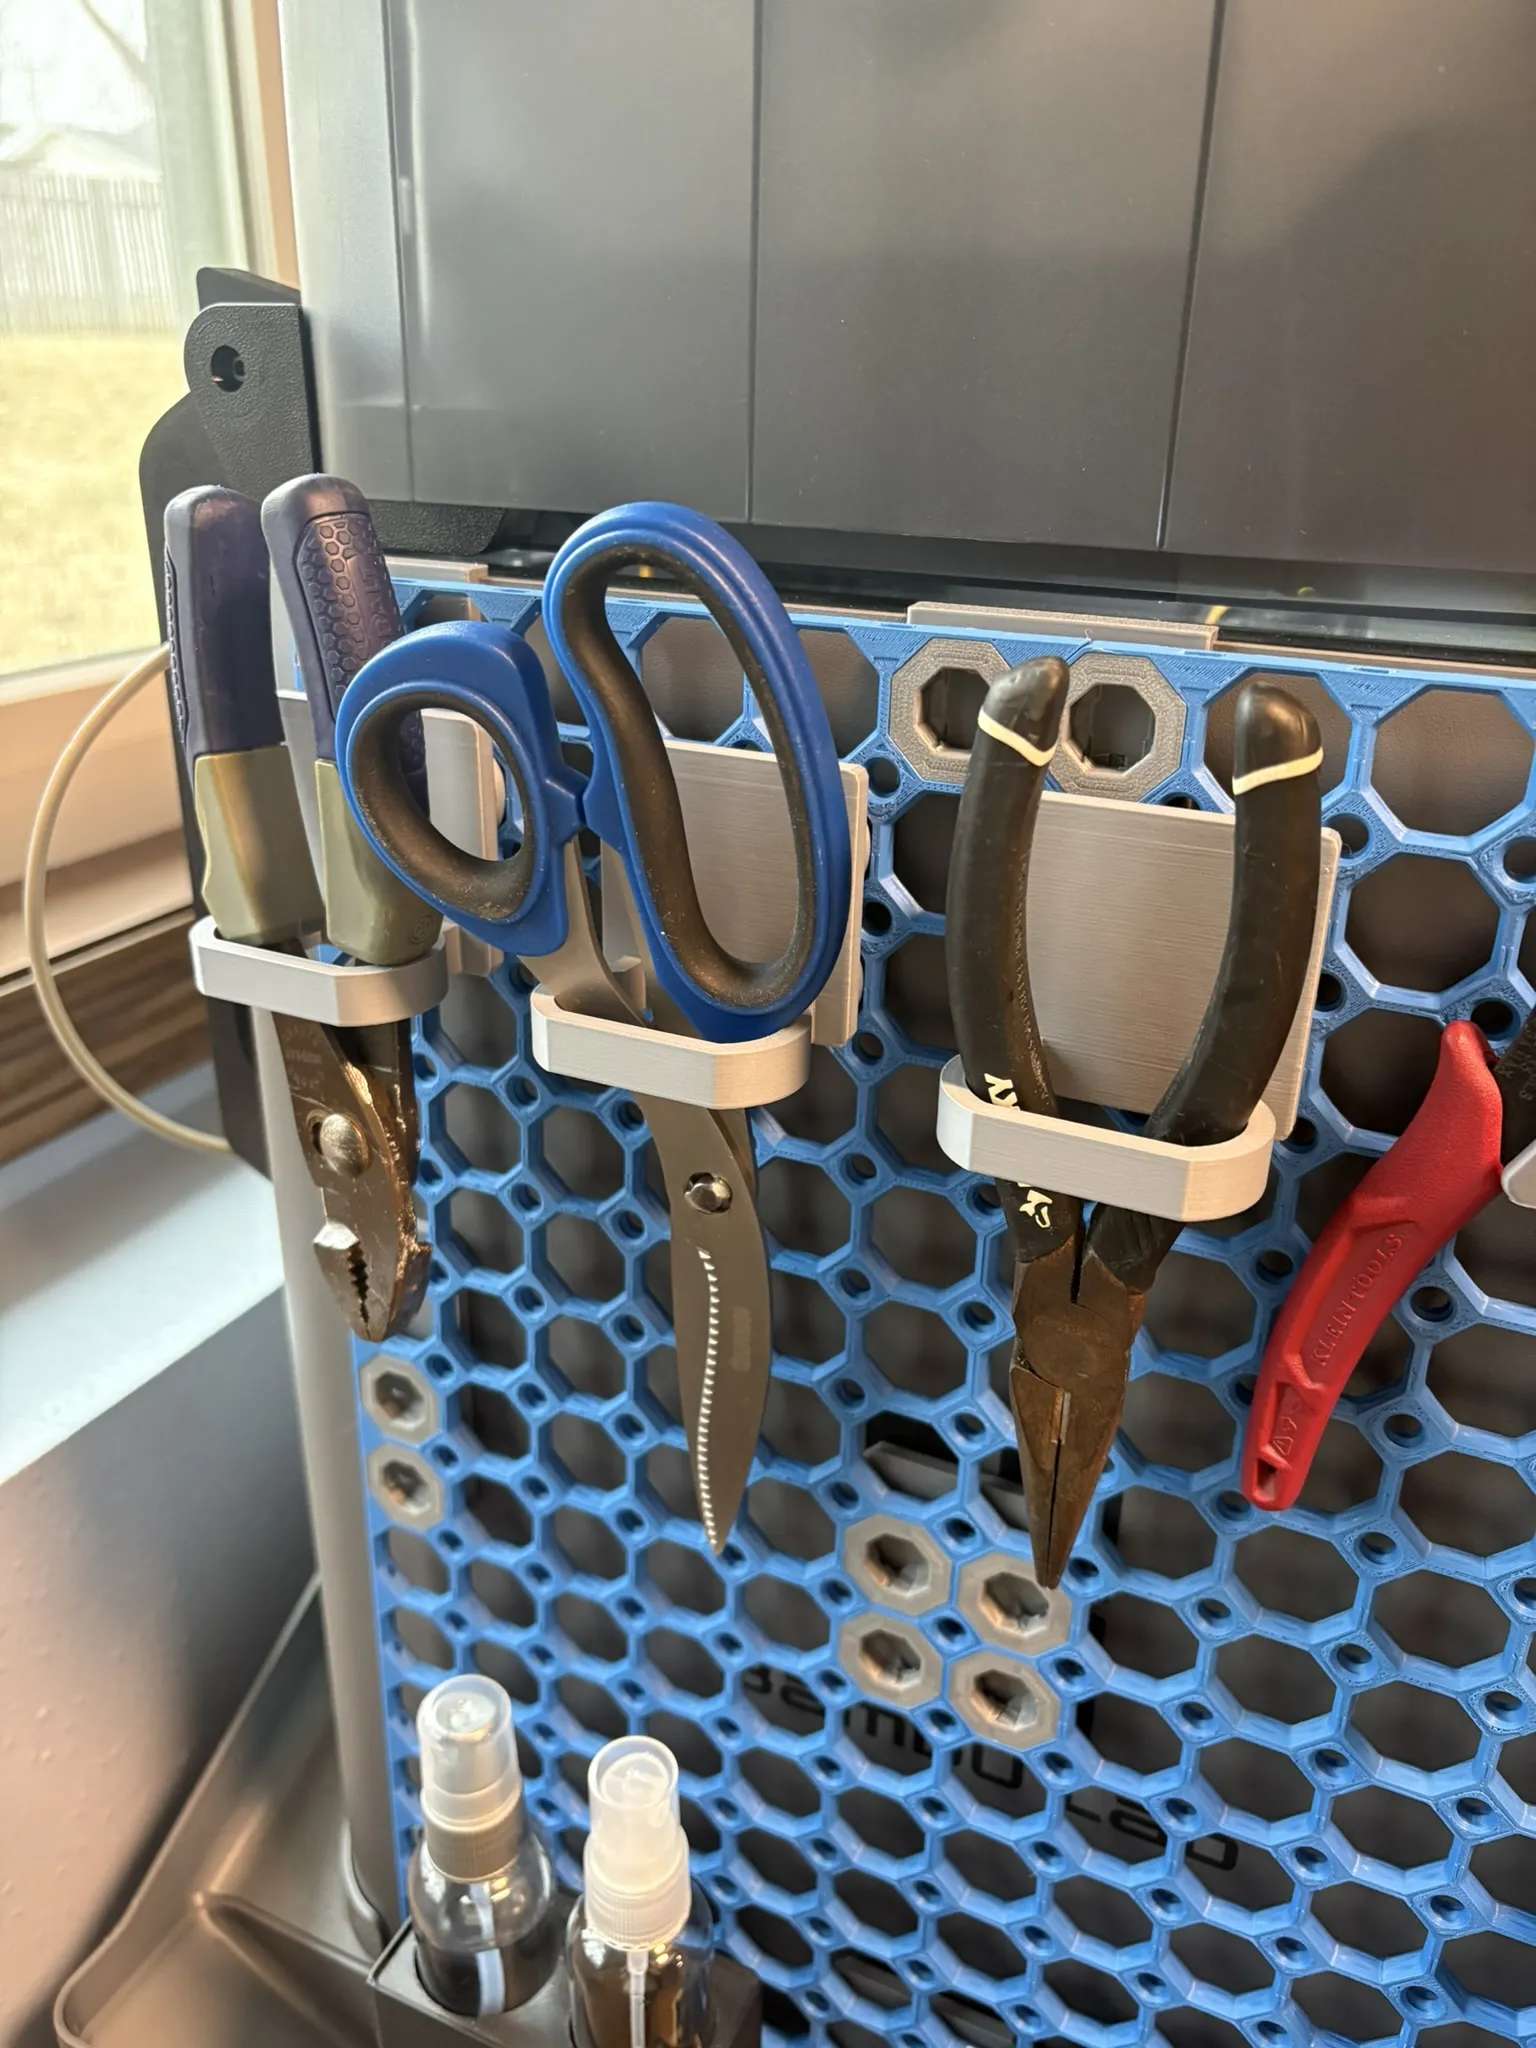
I wanted somewhere to store some of my 3D printer tools but did not have any desk space left so I designed this Multiboard wall that hangs on the side of the P1S or P2S printers
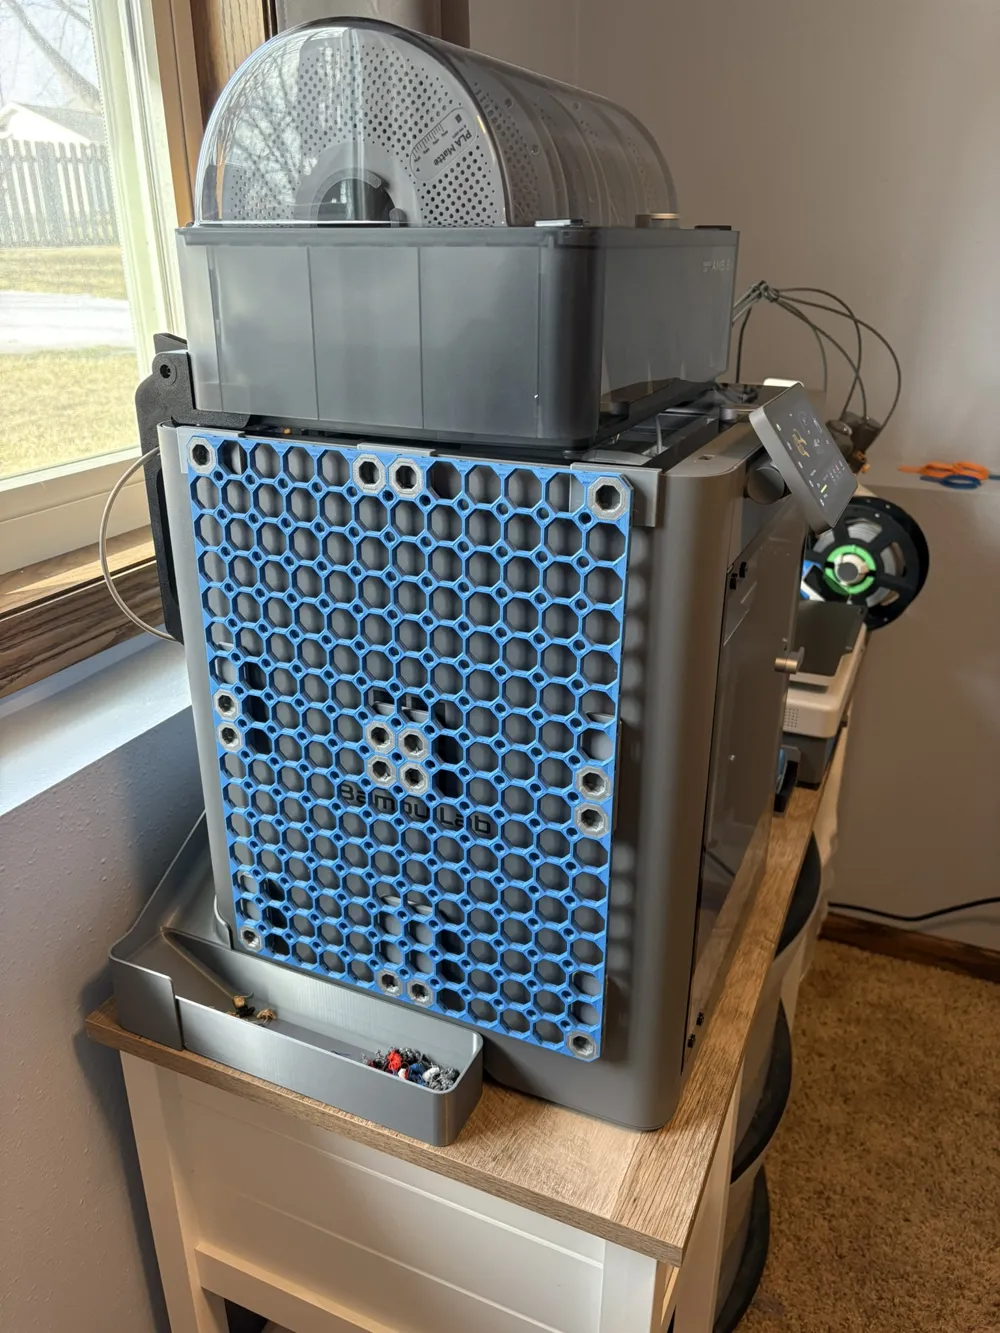
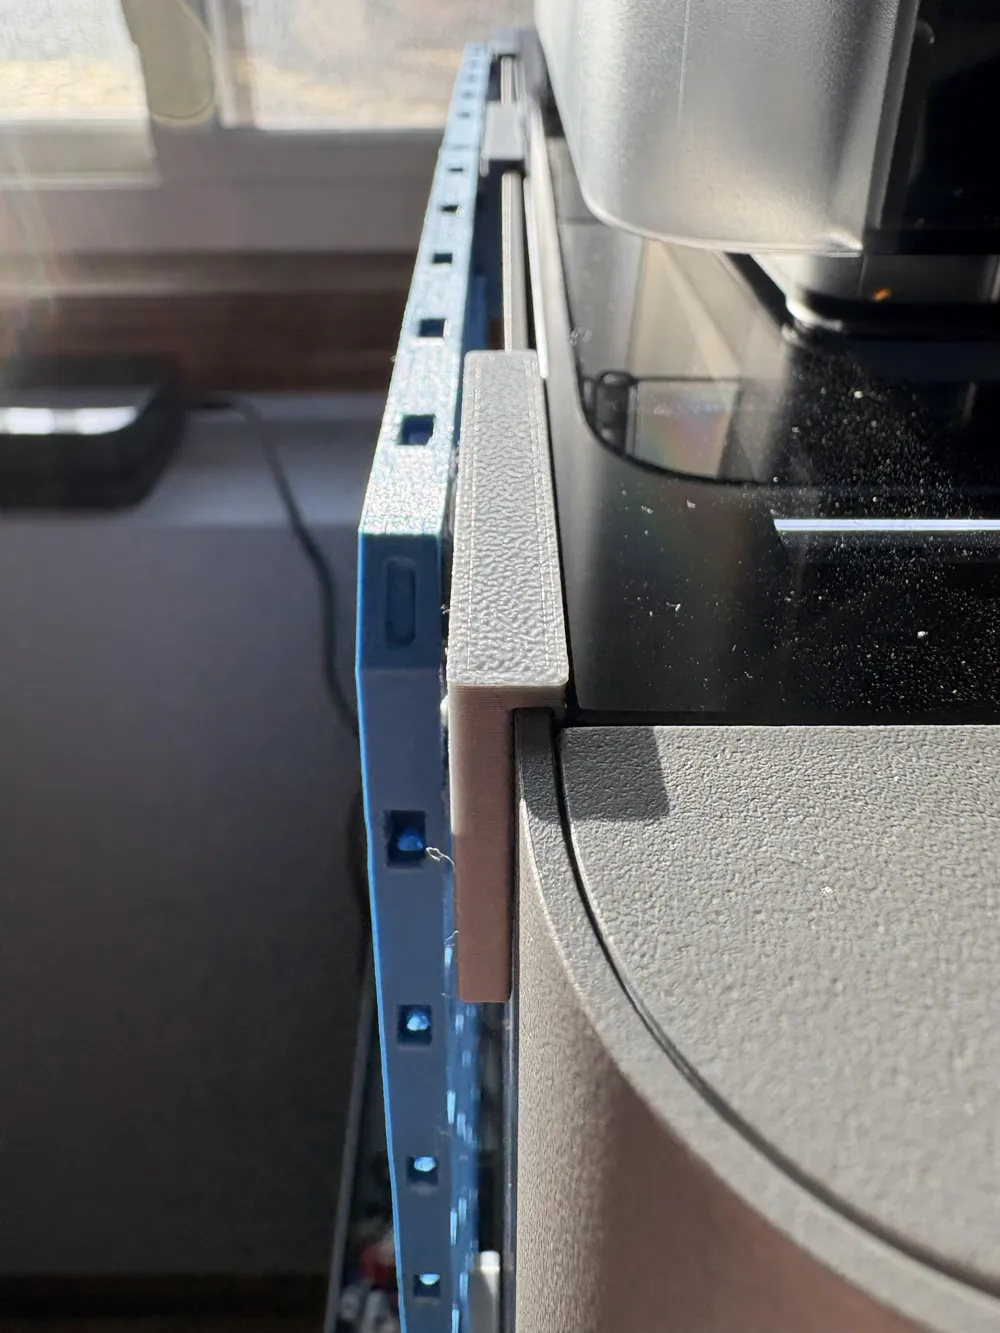
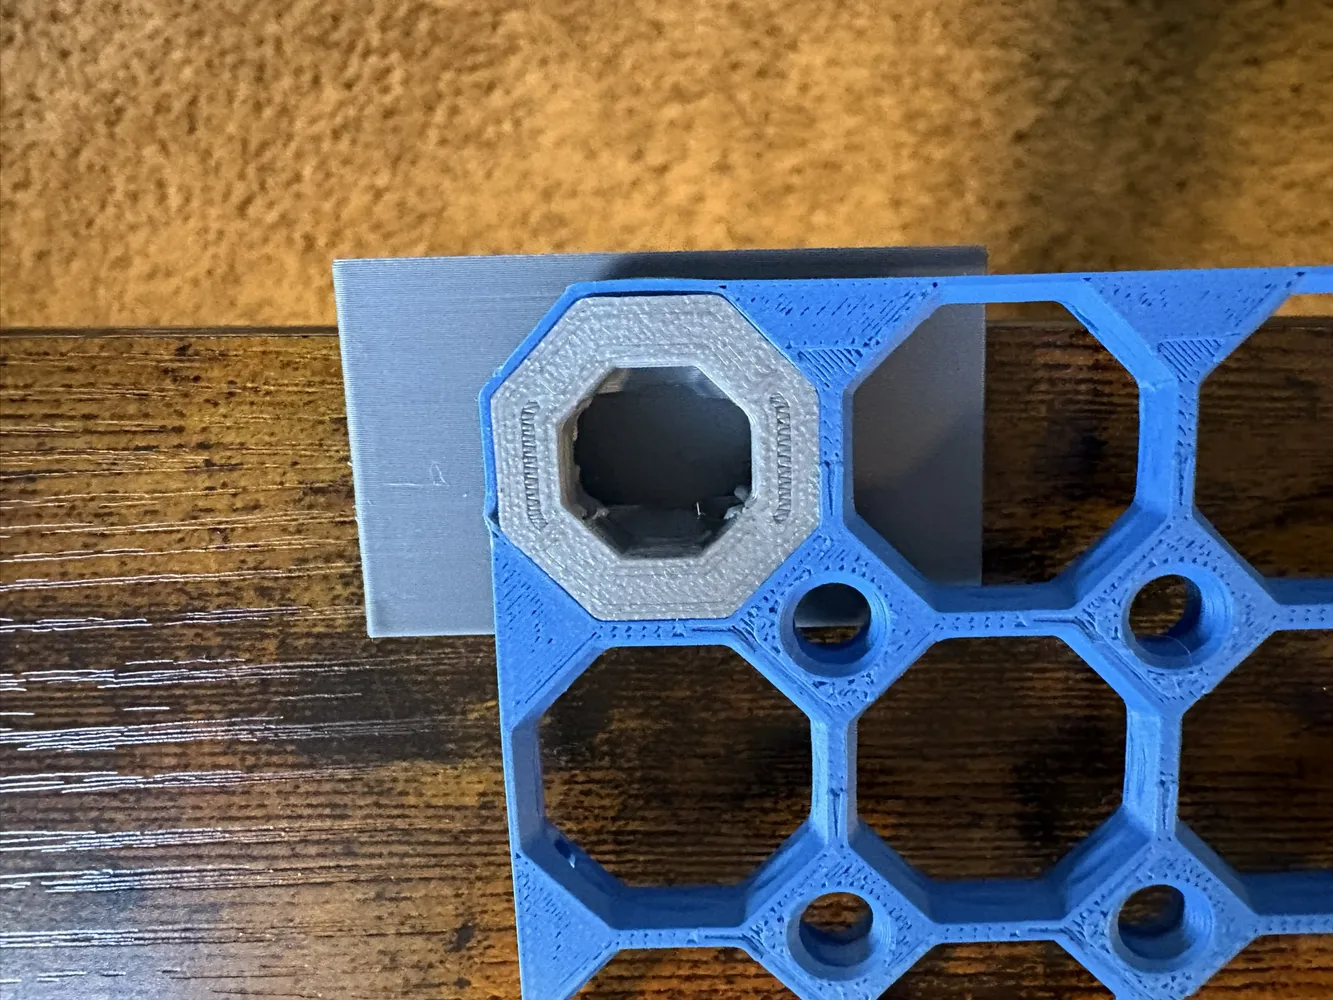
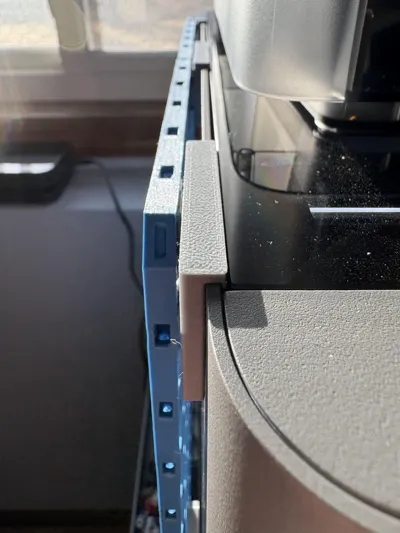
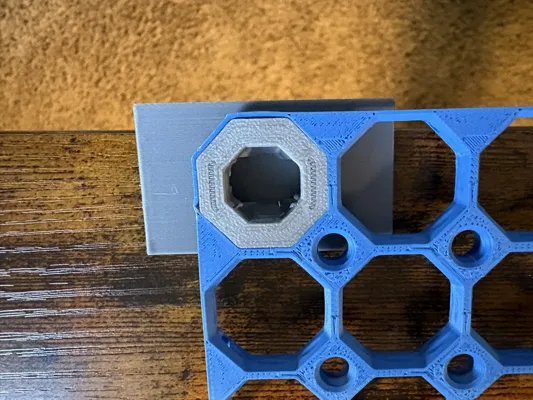
The 3 clips that hang on the top of the printer, slide in right between the printer wall and the top glass. The top glass still is functional and you can still remove it
You have a few choices on what kind of Multiboard snaps you would like to use:
Flush Standard Part B
Flush-Tight Part B
Raised-Standard Part B
Raised-Tight Part B
I would recommend the Flush Standard snaps as they look the best and are easiest to install
Installation
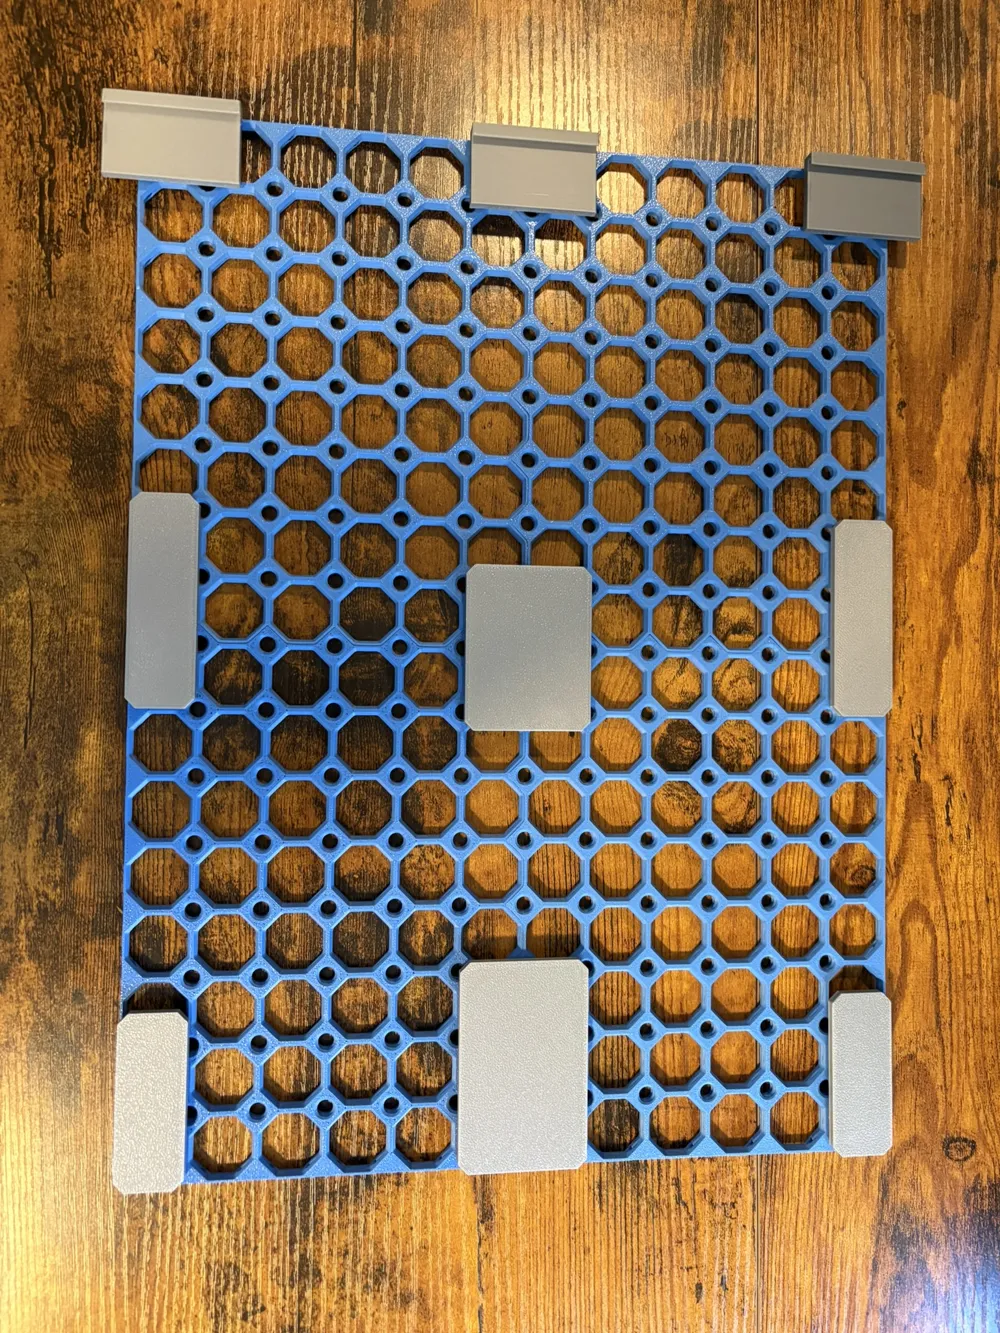
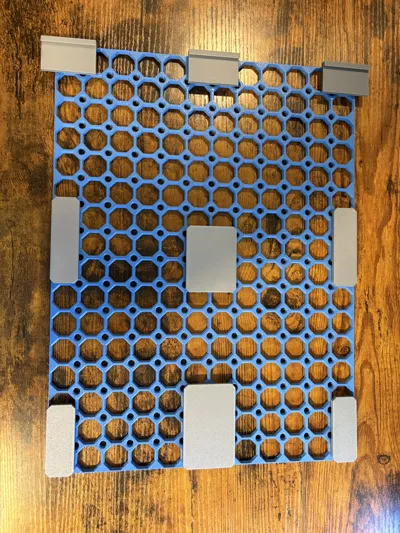
I recommend printing all of the parts and putting the Multiboard tiles together face down on a table. Then flip it over and press in the Part B snaps to lock everything together
You could just let the Multiboard wall hang without attaching to the side of the printer and it would be just fine. I did install a few command strips just to stick it to the side of the printer and keep it from shaking/swaying
As shown in the pictures above, it is best to have the top hanging brackets rest over the side of the table while installing the Part B snaps so you do not break the hanger off (don't ask me how I know)
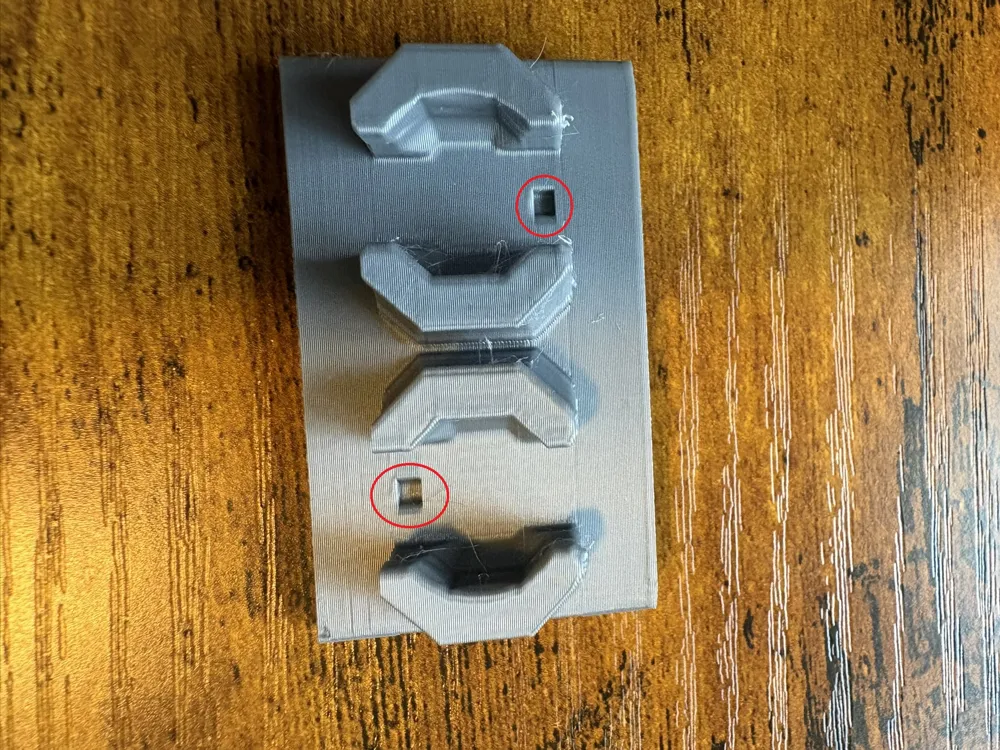
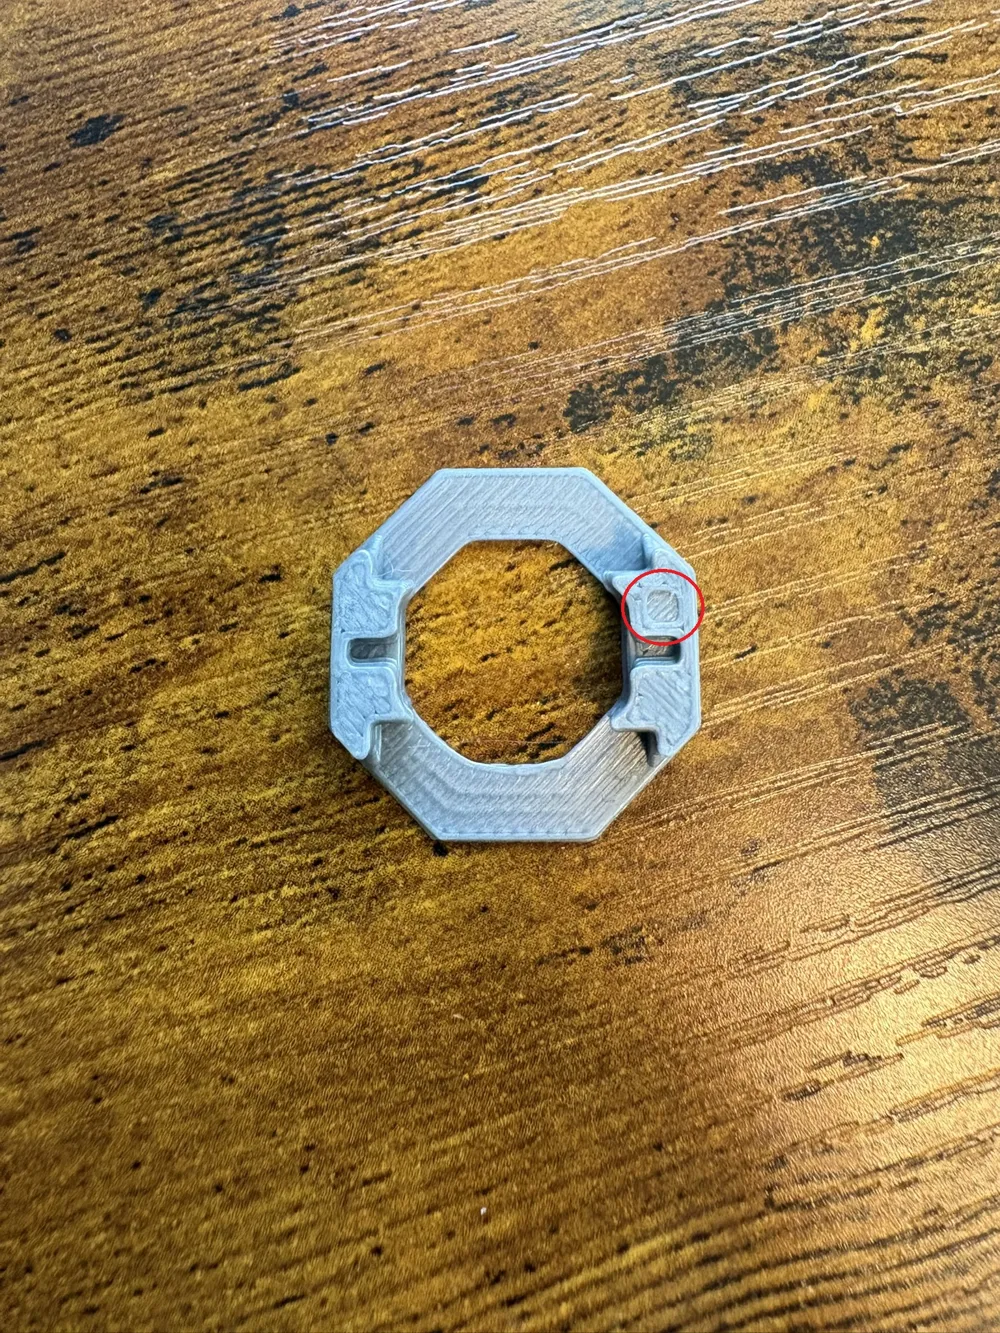
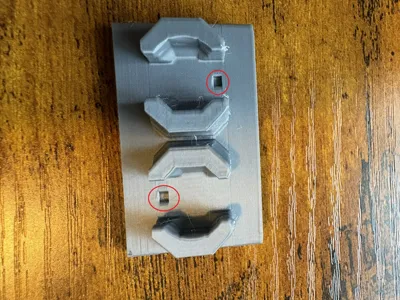
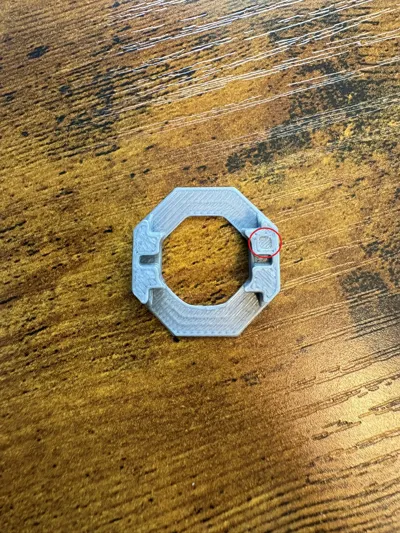
Also shown above in the pictures, the Multiboard snaps apparently are directional and you match up the little “square” on the Part B snap to the same side the "square" is on the Part A snaps. I did not realize this until this project but they did seem to install easier
Check out some of my Multiboard item holders that work perfectly for this model:
Multiboard Flush Cutter Holder
Multiboard Pliers/Scissors Holder
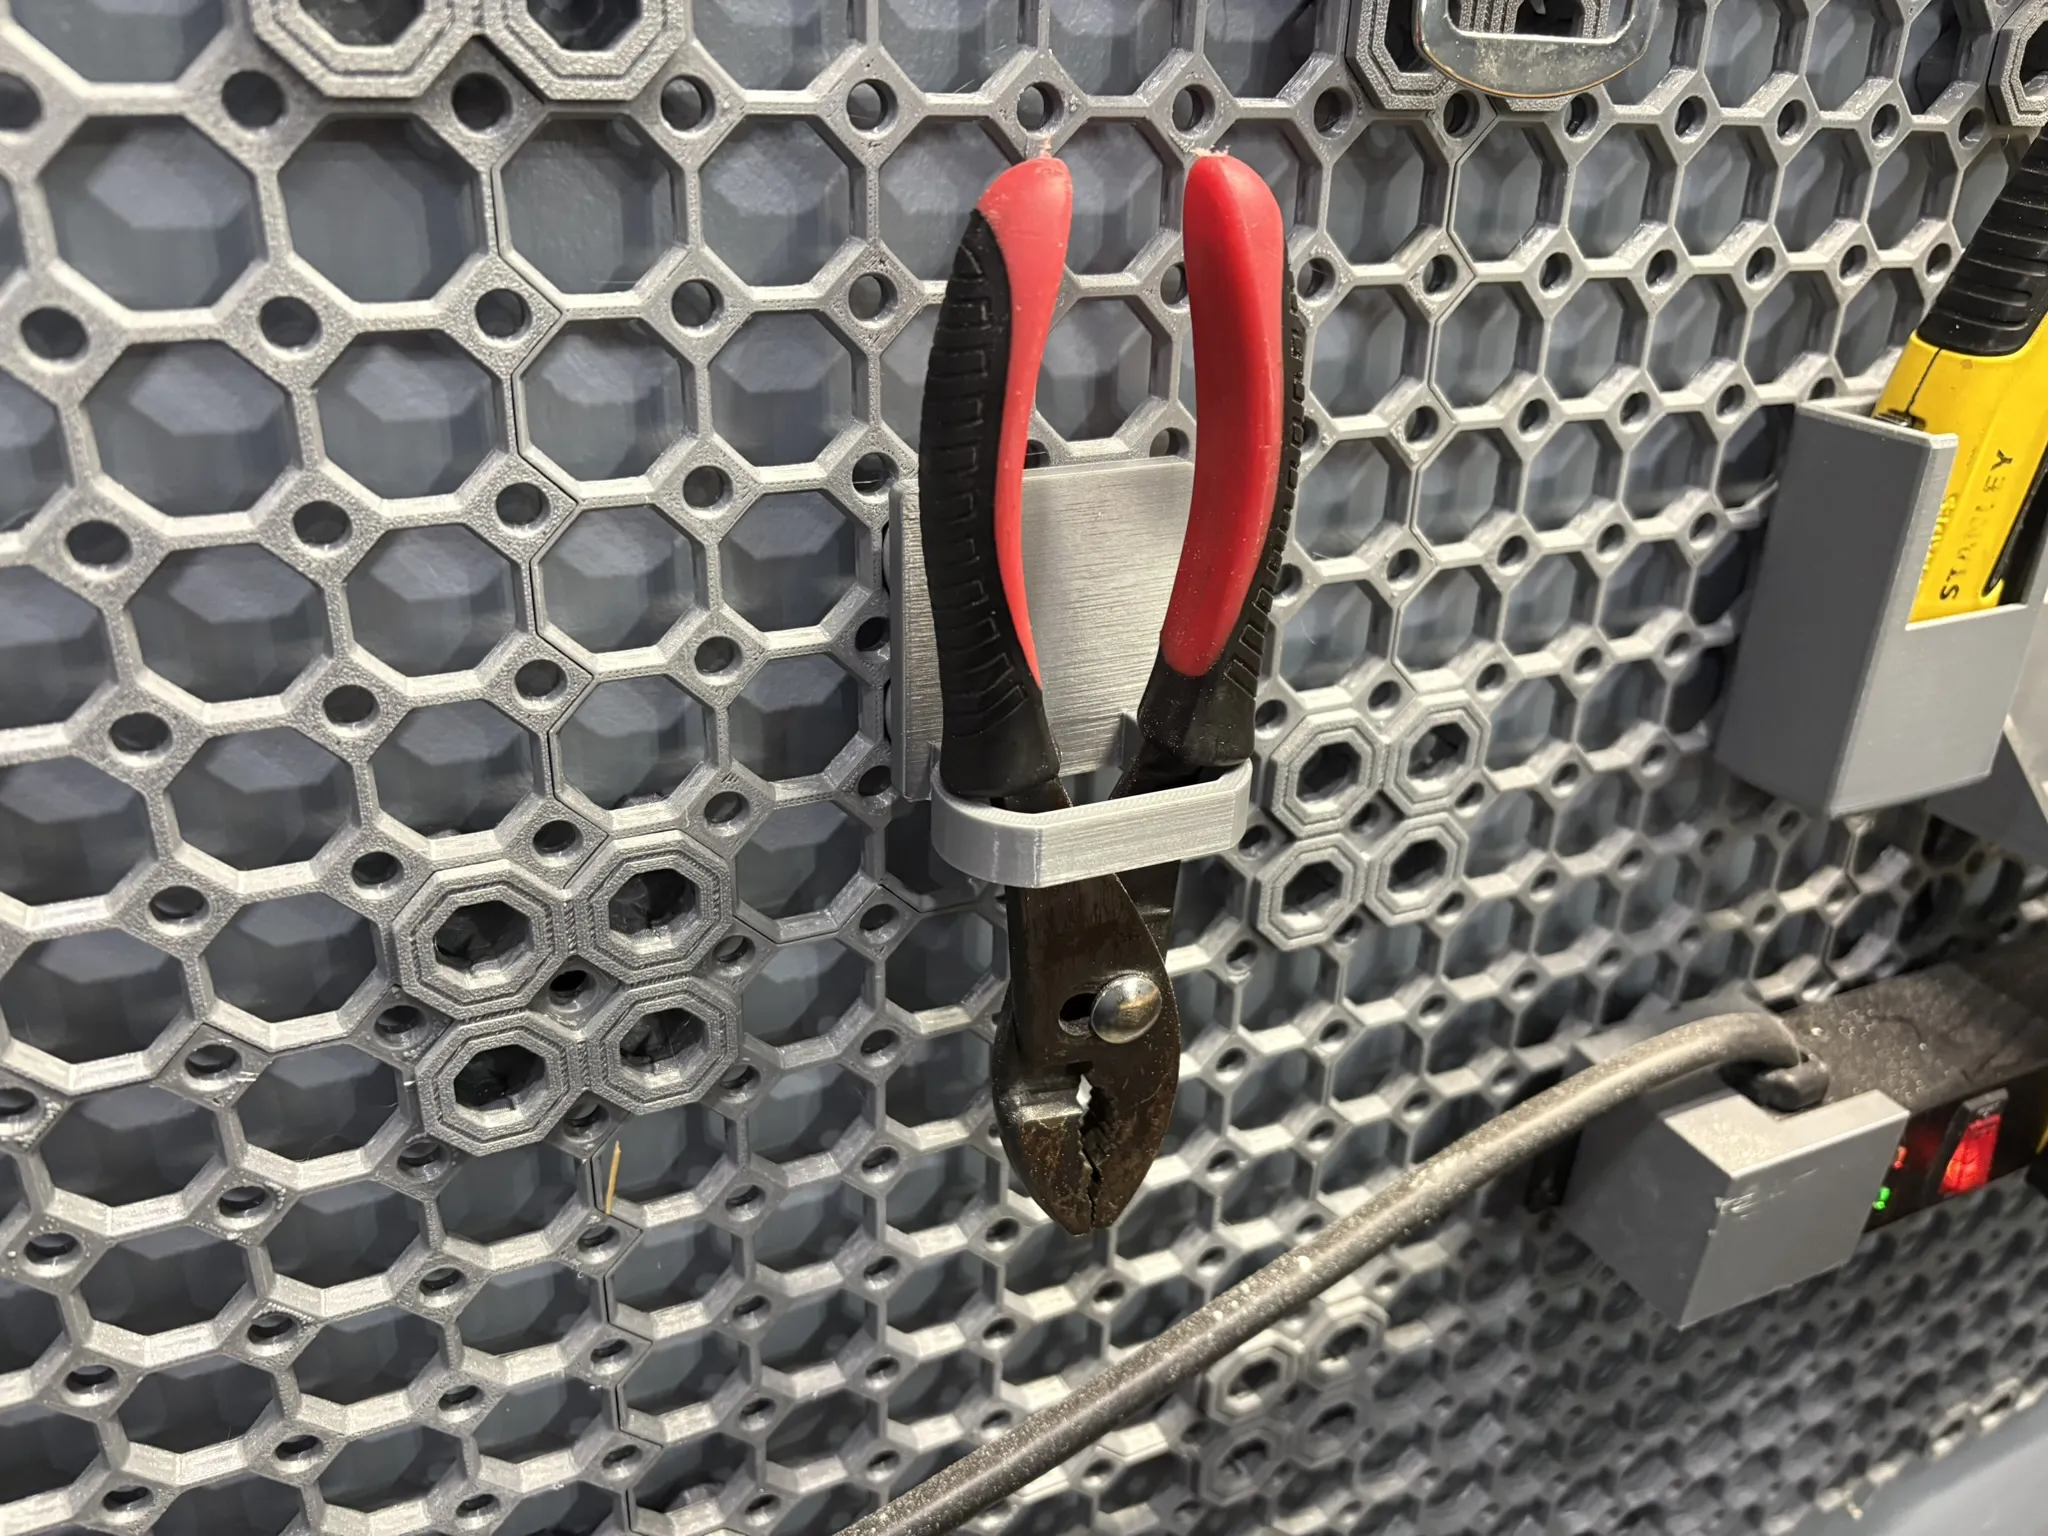
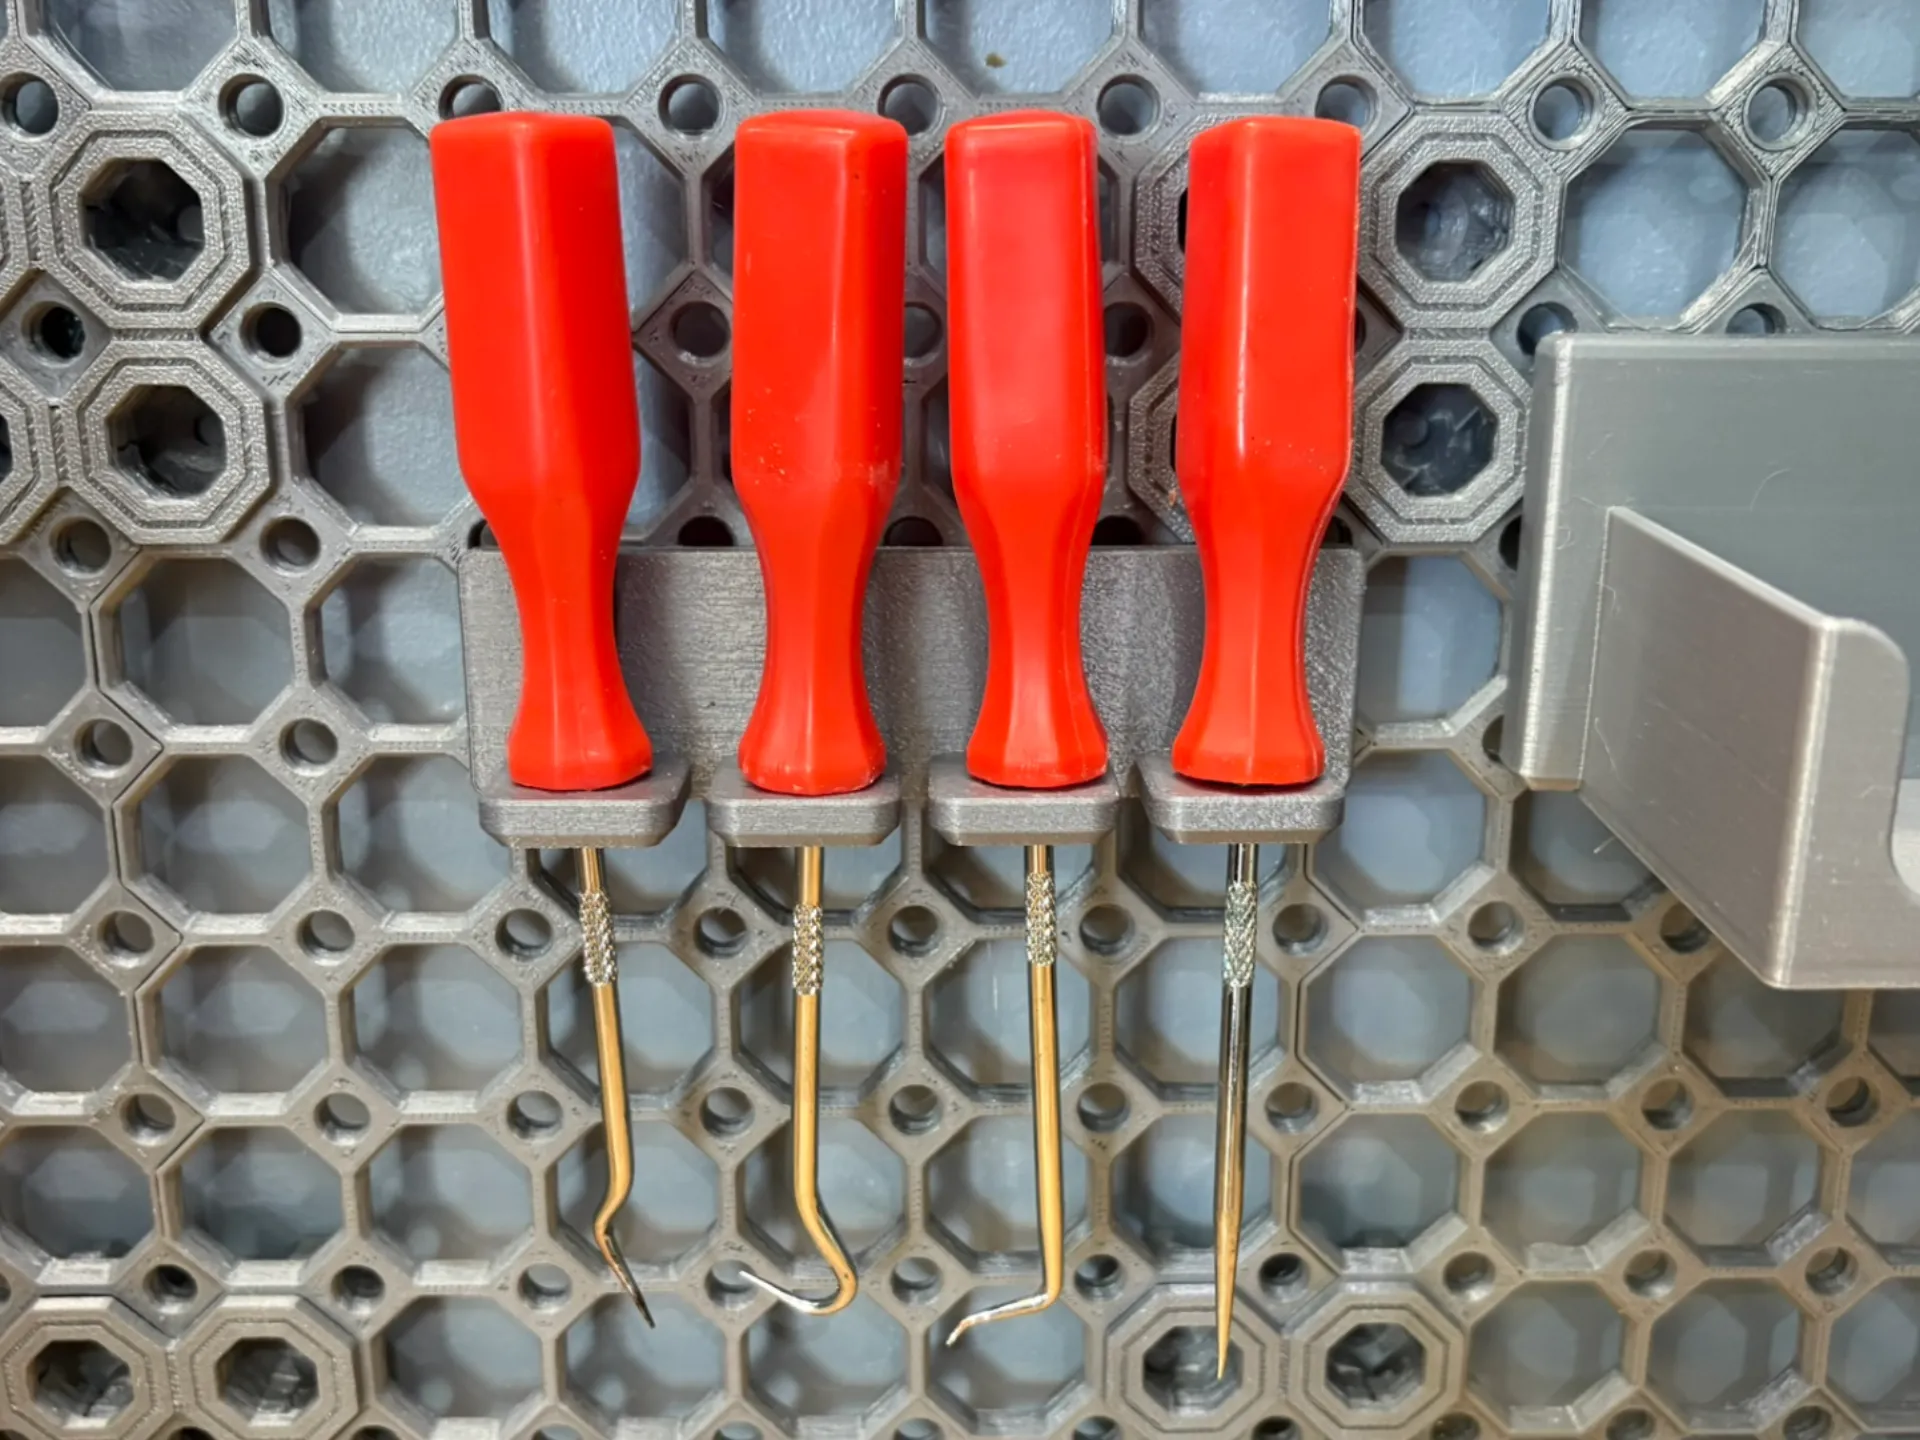
Multiboard Pick Holder
MultiBoard
Multiboard
multiboard
multiboard accessories
multiboard accessory
multi board
multi board mount
multi-board
multi-board mount
multiboard side
P1S
P1S Bambu
p1s
p2s
P2S waste
p2s side
p1s side
p1s multiboard
p2s multiboard
printer accesories
printer organization
printer organizer
p2s tool
p1s tool
p1s tool hanger
p1s tool holder
p2s tool holder
p2s tool hanger
License

This user content is licensed under the MakerWorld Exclusive License.
You may create derivative works based on this object, provided that all such derivative works are published exclusively on the MakerWorld platform and include proper attribution to the original creator. You may not share, upload, host, distribute, or publish this object—or any derivative work of this object—on any other digital platform, marketplace, or distribution channel. Commercial use of this object and any derivative works is strictly prohibited. This includes, but is not limited to, selling, renting, sublicensing, or using the object in any context in which you receive monetary compensation or other financial benefits.


Comment & Rating (30)