
Easter Egg Painter


Print Profile(4)




Description
The Egg-ceptional Utility to Transform Ordinary Eggs into Works of Art
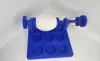
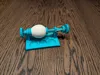
Say goodby to messy hands with this egg painter. The holder is equipped with two gears, allowing you to rotate the egg and paint it from all sides. All you need for assembly is a rubber band, nothing more! Integrated into the base are six pots for paint and a brush holder left and right.

(note: please click on the image above if the animation does not play automatically.)
Parts Needed
All you need is a rubber band with a diameter of approximately 4 cm.
Assembly

(note: please click on the image above if the animation does not play automatically.)
- Remove the supports carefully.
- Insert the short rod into the hole on the left side of the base.
- Attach one of the gears to fixate the rod. The gears are press-fit. If it does not go in well, turn it around. Sometimes due to elephant's foot one side of the hole is tighter than the other.
- Insert the long rod on the right side of the base.
- Take the wheel with the two notches and put it onto the long rod from the right side. The notches should face outwards.
- Attach the second gear to the long rod. Again, turn the gear around if the fit it too tight.
- Take a rubber band of about 4 cm.
- Guide it through the two notches of the wheel.
- Then, attach the two ends of the rubber band to the cantilever-like sections from the base.
- The rubber band pulls the long rod to the inside with enough force to hold an egg.
- If the force is not sufficient, take a shorter rubber band or loop it around more.
- If the tolerances of your print are good, you should be able to turn both rods using the gears.
Printing Instructions
The model does not require any special filament. Regular PLA should be enough. I took quite some care to optimize print settings. The rods need to be printed in vertical direction so that they are perfectly round. The tree supports should give enough stability.
Commercial Use
The model on this website is only available for non-commercial use. This means you can print it for yourself or as a gift for others, but you may not sell or alter the model. If you are interested in obtaining a commercial license, please visit https://cults3d.com/en/3d-model/tool/easter-egg-painter-for-commercial-use
Boost Me (for free)
License

You shall not share, sub-license, sell, rent, host, transfer, or distribute in any way the digital or 3D printed versions of this object, nor any other derivative work of this object in its digital or physical format (including - but not limited to - remixes of this object, and hosting on other digital platforms). The objects may not be used without permission in any way whatsoever in which you charge money, or collect fees.


Comment & Rating (625)