Enchanted War Gauntlet DCC Large Glove Remix


Print Profile(2)
Bill of Materials

Description
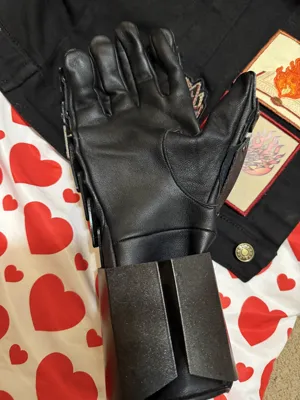
This is a remix of WaterKangaroo's take on Luciano Fleitas' artwork of the Enchanted War Gauntlet of the Exhalted Grull from the Dungeon Anarchist's Cookbook book cover.
This remix resizes many parts to work with a large size glove and extend the bracer so that the glove does not show at the end of the bracer.
I am going to try and list all materials and tools I used to create this to make it easier for any Donut Holes that wants to try to make this after me. Please leave comments or DM me if you have questions. I have included both the original files with a longer final bracer that will work with a medium glove and my resized files that I used for my large size gloves as WaterKangaroo originally made it for medium gloves.
I am going to try and make more revisions to the bracer pieces to add more spikes as latest artwork seems to add more spikes to the glove, but these should be easily replaceable with the screw rivets later.
Orientation of parts:
All letter/number identifiers have the tops of the letters/numbers going towards the fingers with the bottoms going towards the elbows. So if you looked at your palm, you could read them orientated correctly if you could see through your hand/glove.
Number order is sequential with the lowest number being closer to the tips of the fingers and the higher number closer to the elbow.
T1-T3 is for the thumb, large thumb guard doesn't have a mark
P1-P5 is for the pointer finger
M1-M5 is for the middle finger
R1-R5 is for the ring finger
p1-p5 is for the pinkie finger
1-4 is the wrist guards
For the spike piece, shorter side goes towards the fingers, longer side towards the elbow.
Materials List:
Large Medieval Gloves - https://a.co/d/05xEbLzT
Black Leather Trim Piece (Can cut up and use left glove for this) - https://www.hobbylobby.com/crafts-hobbies/leather-craft-supplies-tools/leather-pieces/black---suede-leather-trim-piece/p/81212418
Epoxy Resin - https://a.co/d/05KMXm97
Leather Glue - https://www.hobbylobby.com/crafts-hobbies/leather-craft-supplies-tools/tools-finishes/leather-craft-adhesive/p/157321
Hammered Dark Bronze Spray Paint - https://a.co/d/0e4OPNIR
Finger 6mm x 8mm Cap Rivets and Punch - https://a.co/d/0ayKNW0f
Optional Rivet Pliers (makes things easy, the cap rivets in this may work for fingers and you don't need to buy the above cap rivets, I didn't try them) - https://a.co/d/07N0gDDT
Bracer M5x6mm Screw Rivets - https://a.co/d/09AMamXZ
Optional 4.8mm Leather Punch Set (makes things easy for bracer rivet punches) - https://www.hobbylobby.com/crafts-hobbies/leather-craft-supplies-tools/tools-finishes/leather-hole-mini-punch-set/p/22709
Construction:
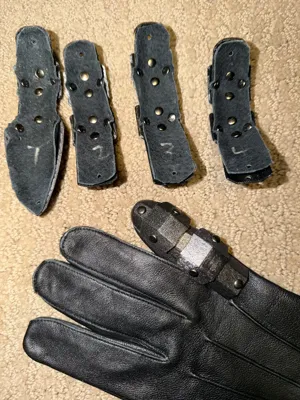
I have added markings to the harder to identify pieces, but you can use a metallic Sharpie marker to mark all your parts before you remove them off the build plate. Finger parts go:
Distal Phalange
Distal Joint
Middle Phalange
Proximal Joint
Proximal Phalange
Pinky finger has it's own joint files, the three middle fingers use the same joint files. The thumb stops after the middle phalange and goes to the thumb guard.
I sanded and painted all my parts before starting construction, I used the texture plate on the bracer parts and didn't really mind that texture, so didn't sand any parts with textured surfaces.
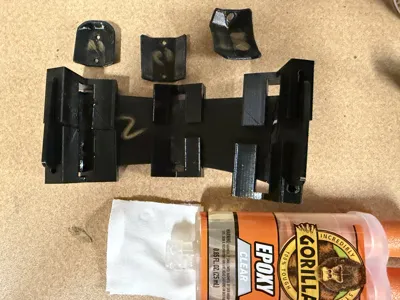
I started construction by bending the 4 bracer pieces, creases go inside the bracer parts. I have enough clips on the build plate to epoxy 2 bracers pieces at once. I used a small swipe of the gorilla glue epoxy above in the creases of the bracer parts to hold the bend.

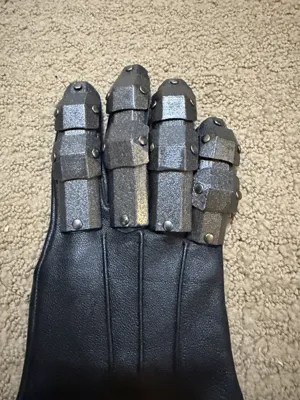
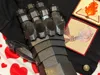
Next I moved on to making the fingers. I riveted all the finger parts together on to piece of leather from the black suede trim piece, you could use scrap leather from the left glove if you so choose. Using the provided punch with the 6mm x 8mm rivets on the leather makes things easy. I left out the end most rivet on each section, but did punch the hole.

I measured and marked on the glove using the constructed fingers to find out where to punch rivet holes in the glove. One finger at a time starting from the pinky side, I would then put in the rivet for the tips of the fingers as that was the most painful to place. I would then use a light application of leather glue on the suede trim piece of the finger armor before riveting the back of the hand rivet. I would then quickly stick my hand in the glove and apply pressure to make sure the leather glue would adhere properly to the glove. This can be very fast acting, so practice how to do this before gluing. This glue works well as I wore it all weekend at a con and didn't get any separation. This also means its most likely difficult to remove, so be careful when applying finger armor sections.
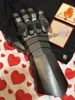
For the bracer section, I used the 4.8mm punch for the M5x6mm screw rivets. I started with the spiked portion and got the front holes marked and punched those out first. From there I could use the bracer sections to make my measurements and used the seams of the glove as a guide all the way back with the exception of the final holes. The final holes in the last bracer section are a bit higher above the seam, but you can use the last bent piece as a guide to see how much higher to punch those holes from the seam of the glove. Here are some pics of both sides of my glove seams and punches.


Comment & Rating (13)