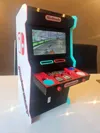
Nintendo Switch Arcade Machine


Print Profile(1)
Description
Boost Me (for free)
If you like the model, I would appreciate a boost :)
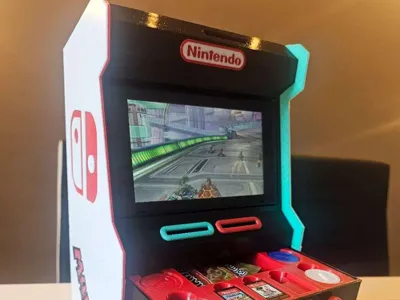
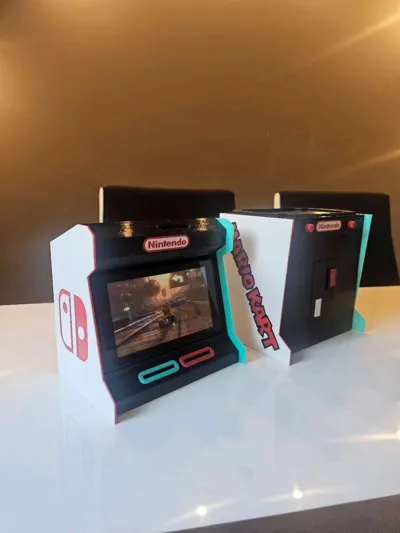
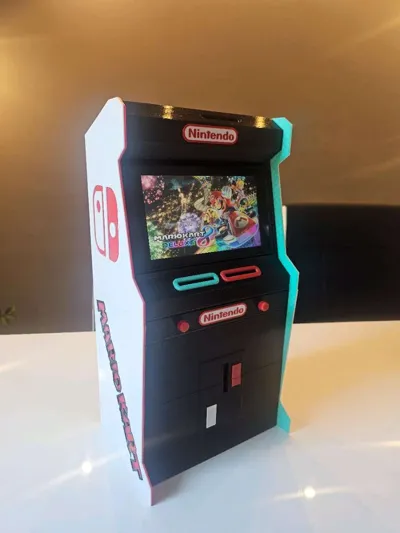
Nintendo Switch Arcade Machine
This will certainly ensure a good mood and gaming fun everywhere.
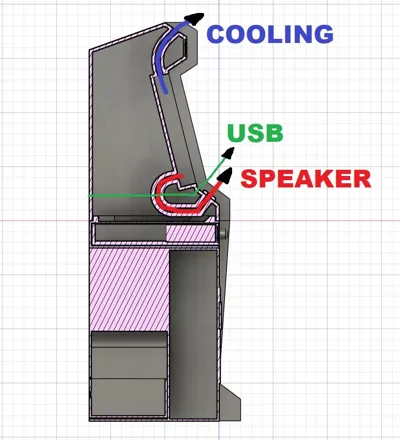
This is an arcade machine where the Switch is inserted from the front.
Advantages of this model that truly make it usable:
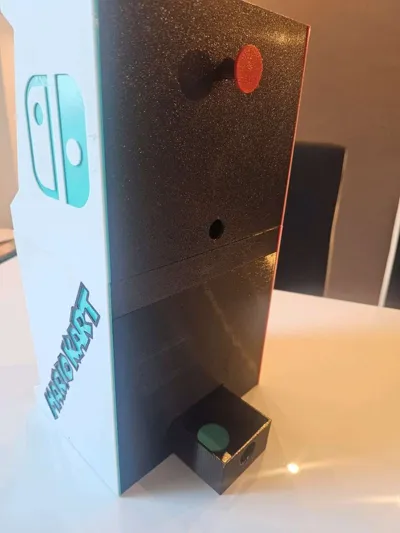
1.) Channel for cooling the Switch (cross-section photo added)
2.) Channel for sound, so it is directed forward again.
3.) Ejector pin, which facilitates the removal of the Switch without having to rotate the entire machine.
4.) Top part removable
5.) Drawer for games and 12 coins
6.) Coin slot where coins can be removed from the back.
7.) USB charging option, also space for a power bank in the upper part.
For the entire print, you will need 4 colors with my color choice. No screws etc are needed, only glued.
Assembly instructions:
1.) Print the top part (Switch holder). IMPORTANT: In my print profile, there are NO supports in the ventilation and sound channels. Remove the most important support, and the USB port should be clear if it is used.
2.) Print the top right/left plate and glue it to the side of the top part. It is important to ensure that the underside closes flush.
3.) Print the Nintendo logo top and bottom. Caution, the logos have 2 different sizes. Then glue the Nintendo logo in the upper part.
4.) Print ejector
Thus, the first part would be finished.
5.) Print drawer base
6.) Print the drawer and glue the second Nintendo logo.
7.) Print drawer insert. This can be inserted or glued.
8.) Print coins. I printed 3 coins of each color.
9.) Print the base cabinet and carefully glue it to the “Drawer Base”.
10.) Print bottom right/left plate
11.) Now place the top part on the bottom part and align the plates with the top ones and glue them. This way, no gap is created between the two parts.
12.) Print coin loader and insert it on the back.
Now the arcade machine is finished :)
The game principle is designed so that each player in Mario Kart receives 3 coins of one color. The first cup does not require any coins. Then the player who lost the cup inserts a coin and thus starts the next cup. If a player can no longer insert a coin, they have lost.
If you need help, I am always happy to assist.
The model is very easy to print, just use my print profile
License
You shall not share, sub-license, sell, rent, host, transfer, or distribute in any way the digital or 3D printed versions of this object, nor any other derivative work of this object in its digital or physical format (including - but not limited to - remixes of this object, and hosting on other digital platforms). The objects may not be used without permission in any way whatsoever in which you charge money, or collect fees.
Comment & Rating (11)