Search models, users, collections, and posts
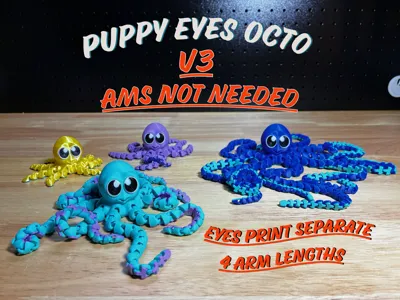
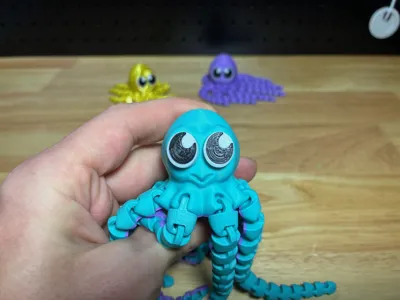
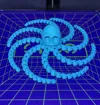
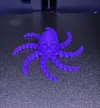
Puppy Eyes Octopus - V3
IP Report


GIF
Print Profile(4)
XL, 0.2mm layer, 2 walls, 12% gyroid
Designer
6.1 h
2 plates
Large, 0.2mm layer, 2 walls, 12% gyroid
Designer
3.4 h
2 plates
Medium, 0.2mm layer, 2 walls, 12% gyroid
Designer
2.1 h
2 plates
Small, 0.2mm layer, 2 walls, 12% gyroid
Designer
1.6 h
2 plates
Open in Bambu Studio
Boost
865
2412
170
33
1.9 k
1.3 k
Released


Description
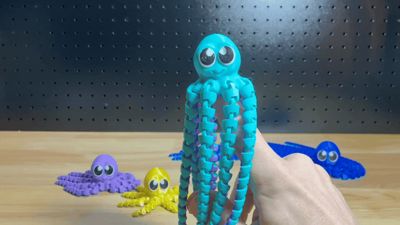
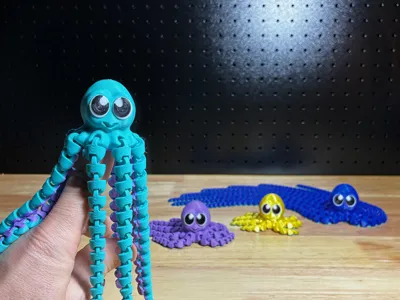
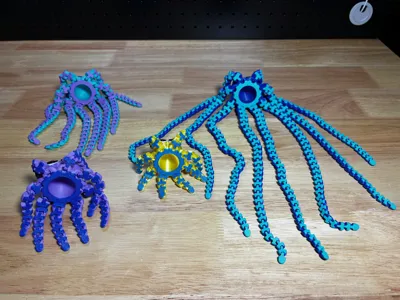
Ok back for another round with the Improved V3!
I sell a lot of these cuties so I wanted to make them more efficient to print and while I was at it gave it some cosmetic adjustments as well.
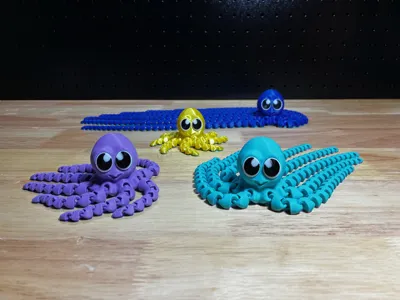
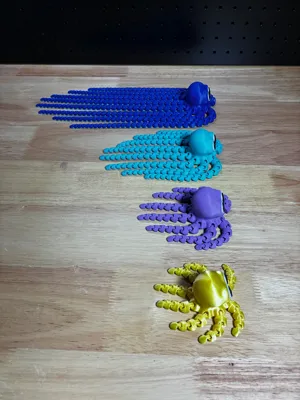
The large V2 octo would typically take 6+ hours to print with upwards of 40 grams of waste. The large V3 now takes around 3 hours and no waste.
List of Updates:
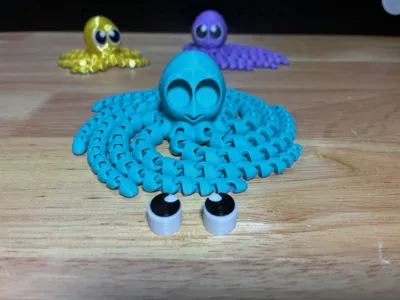
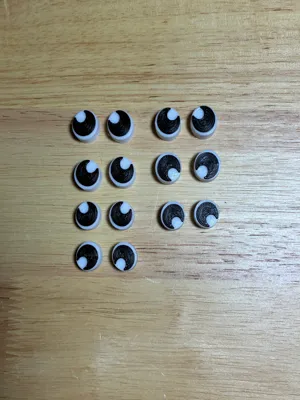
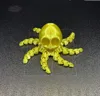
- The eyes are now separated so you can print full body significantly faster and with no waste at all.
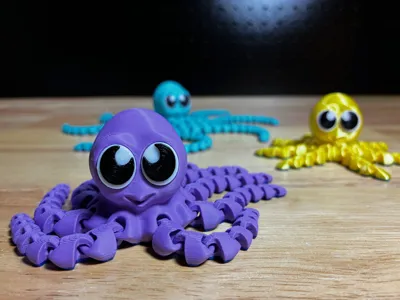
- Eyes are deep enough to only need to press in without the need for glue.
- Eyes are larger and print like a hueforge - white layers first, then a few layers of black.
- Eyes were made symmetrically so you can mix and match the direction they appear to look!
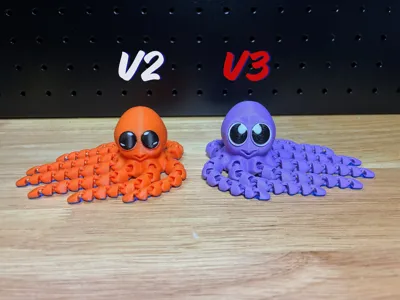
- The head was given a slightly more rounded look on top
- Improved face and smile to be more distinct.
Pro Tips:
- Printing Eyes: If you don't have an AMS just slice the plate for the Eyes in Studio, then right click the “green vertical layer bar” on the right side to add a pause when it needs to change to black filament. Start the print, then swap out your filament when it pauses and hit resume.
- EX: the large eyes would be paused at layer 37 (7.4mm) for you to swap over to black.
- Do the same for the "range modifier" on the Octo if you want the bottom 1.2mm to be different colors like the pictures.
- Each Eye has been labeled on the bottom with the corresponding size (S,M,L,X) so you can print large batches of them at the same time and throw them all in the same container to have them ready to go.
- I slowed down the first layers and the outer walls to assist in bed adhesion but these prints have lots of small part surface contact on the bed - make sure to have a clean/prepared bed before printing for better adhesion!
- I have a “Range Modifier” set to have the first 1.2mm print in the different color. You likely will not see the effect until after you slice it.
License
This user content is licensed under a Standard Digital File License.
You shall not share, sub-license, sell, rent, host, transfer, or distribute in any way the digital or 3D printed versions of this object, nor any other derivative work of this object in its digital or physical format (including - but not limited to - remixes of this object, and hosting on other digital platforms). The objects may not be used without permission in any way whatsoever in which you charge money, or collect fees.
Comment & Rating (170)